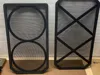
Screen Frame


Print Profile(1)
Description
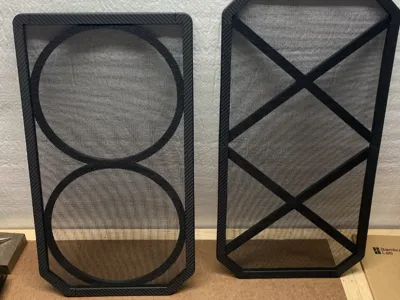
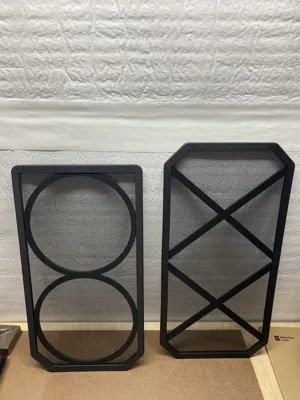
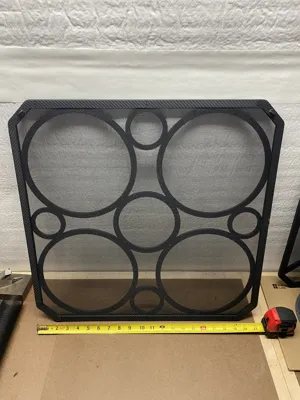
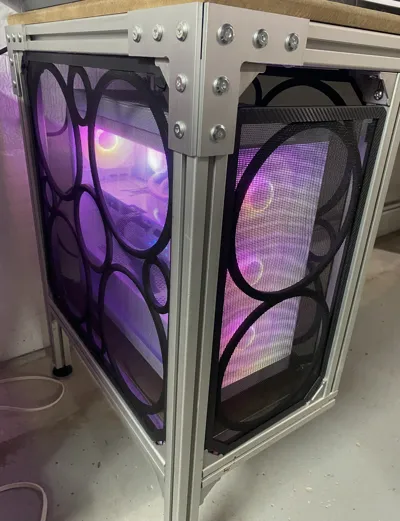
I designed a series of different length screen frame and corner pieces to give you the freedom to build a custom mesh screen for whatever application you need. Combine different lengths of frame to achieve your desired length and use the pins to align and temporarily secure the frame in place. When building large screens keep in mind internal supports will be needed to increase frame rigidity. Internal supports are needed to prevent the screen frame from bowing and twisting when installing the screen. The largest screen I've built so far has been 21"x21", I designed a series of rings I super glued together as internal supports. Printer build plate size can be a limiting factor so you might have to get creative when designing the internal supports.
Additional Details (important):
- The frame pieces are printed in the vertical orientation with a skirt, and I've had successes printing pieces as tall as 216mm if I adjust the print speed to silent. I find that in the vertical orientation I achieve the best dimensional accuracy and insures good pin fitment.
- If you're savvy with the bambu slicer you can scale the pieces without distorting the pin pocket dimensions. Here's a youtube link showing you that process: Bambu Studio - Expanding a section of a model without scaling distortion
- I'm sure this screen frame system has its limitations, but simple frames of moderate size are achievable.
- I used fiberglass mesh screen from Menards as well as their .125" spline to secure the mesh in the groove.
- I included trim pieces on the second build plate, see step 8 below in the instructions for their use.
- Below ill provide instructions on how I build a frame using these pieces and I hope you find it useful. I encourage anyone that pursues this build to make any modification you see fit to achieve your end result.
- This design requires superglue.
Materials to reference:
36" x 84" Charcoal Fiberglass Screen at Menards®
0.125 in. x 25 ft. Black Screen Spline
Loctite Super Glue 0.35 oz. Longneck Liquid Clear Bottle (each) 234796 - The Home Depot
*In the instructions below I won't talk about how to properly size a frame or how to use a tape measure. Instructions start once you have all your pieces printed out.
Instructions:
Step 1: Once I have all my frame pieces and pins printed out, I lay them out on a flat surface in the configuration I desire.

Step 2: I start by gluing the corners and long sections together while using a block of steel as a flat surface plate to keep all the pieces aligned. I encourage you to do this on a metal surface because if you're generous with the super glue you will have glue push out the joints while assembling the pieces and it will attach to whatever surface you're using.


Step 3: I then proceed to glue the main sections together.

Step 4: I decided to go with a ring design for the internal supports and once glue in place makes the frame very rigid, in the picture below blue arrows indicate the spots I applied superglue.

Note: Your support structure should be no thicker then 6mm and kept flush to the back surface of the frame, reference photo below.

Step 5: Once the glue has dried, I lay out the screen and cut the length of spline material needed. Make sure to leave about 1-1.5" of extra screen material around the perimeter.

Step 6: Began working the 0.125" spline into the groove, the roller tool makes this process very easy. I used a set of needle nose pliers in the corners to seat the spline where the roller can't reach. Try not to pull the screen really tight during this process, you can over tension larger screen frames causing a bow.


Step 7: I used a pair of flush cutters to trim the remaining screen.


(Optional) Step 8: I decided I wanted a cleaner look, so I made trim pieces to hide the spline groove. These are glued on so pretty much a permanent modification and would prevent you from rescreening the frame. I haven't had to dismantle one yet, but I can only imagine they won't come apart nicely.

End Result:

License
You shall not share, sub-license, sell, rent, host, transfer, or distribute in any way the digital or 3D printed versions of this object, nor any other derivative work of this object in its digital or physical format (including - but not limited to - remixes of this object, and hosting on other digital platforms). The objects may not be used without permission in any way whatsoever in which you charge money, or collect fees.
Comment & Rating (1)