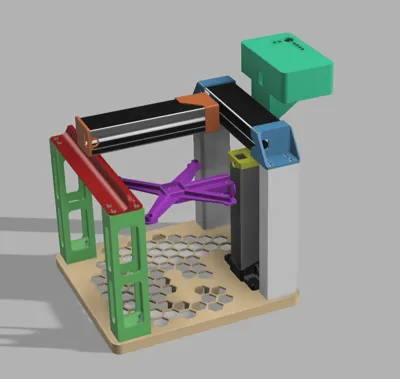
EasyThreeD K10 Re-Imagined


Print Profile(1)
Description
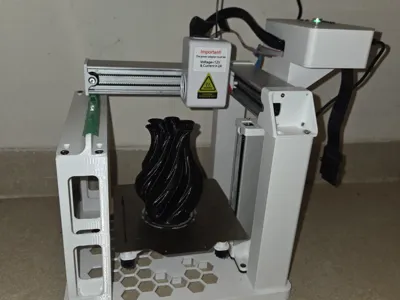
So... I did a thing...
I was kind of bored with the minor tweaks and upgrades for the K10 I was making and I decided to modify it to be "Core XY" (not really, but bear with me) vs. original bed slinger style.
What I did was to model pretty much everything from sratch.

Eveything is either printed, or the original parts, except for the 120x120mm PEI bed plate, which is simply so much better than the original, and the springs I replaced a while back.
So if you go down that path, you will need a set of 2mm, 3mm and 4mm screws...the full list of stuff I upgraded is below.
Needless to say, if you modify your printed in any way, it's at your own risk and I assume no responsibility.
I am sharing this for educational purpose only.
Everything is customizable and modular, so I can replace with new, better design (if I have one...)
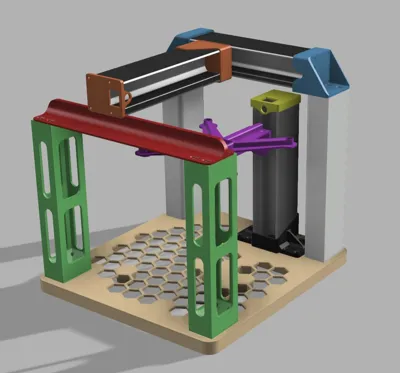
So, here are the list of parts I made:
- A customizable base, a bit big - 220x220, where the columns and Z axis mount are mounted.
- A removable Z Axis mount with cable guard.
- Columns to mount X axis (I am working on a design for linear rail for the end of the Y axis which will give it stablity)
- X axis brackets to secure to the X axis to the columns, with cable guard for the motor.
- Y axis mount to connect to the slider (different orientation than the original) with cable guard.
- Z axis bed arm and mount - since the bed now moved down instead of sideways. I recommend printing the bed mount itself from ABS if possible.
- Enclosure for the board with mount directly onto the X axis (I drilled 4 holes in the back of the X rail, but I am working on non-destructive version that will mount the board on top of the Z axis and secure to the X).
I used Palmarci config file to reverse the axis directions where needed (check out his blog, it's very nice):
https://palmarci.me/blog/2025-05-02-easythreed-k10-3d-printer-main-board-reversing/index.html?fbclid=IwY2xjawQELfhleHRuA2FlbQIxMABicmlkETJrZDdVNUdYd0dRZjY2VkxLc3J0YwZhcHBfaWQQMjIyMDM5MTc4ODIwMDg5MgABHi8AXnkLRC36idU-Mpq3RIcmVFR-_JP12PprDC-VNCxR-Zq36ci6z6gZz5An_aem_sUf_bJlAJUWtrUeaJLA48A
Beside the printed parts, I also lubricated the rails with HOREX PTFE silicon grease so they move smoother.
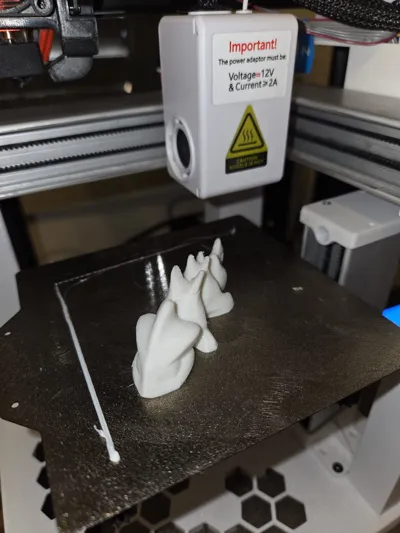
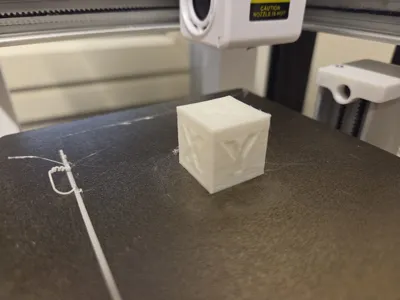
Still some wrinkles to iron out, as it's not 100% flawless as I would like - but getting there.
Print is ~4 times faster than the original settings (the ones that came with Orca profile from EasyThreed)
Hope you like it
Requires Screws:
M2 8mm like these:

https://www.aliexpress.com/item/32973784147.html
and M3 and M4 screws like this:

https://www.aliexpress.com/item/33041563818.html
I also added 16T W6 B3 GT2 T pulley wheels instead of the original idlers. and D3 M2.5 10mm long screws to fit them, with nylon nuts.
https://www.aliexpress.com/item/32817328238.html
https://www.aliexpress.com/item/1005008314676042.html
https://www.aliexpress.com/item/1005008074482336.html


You may need to loosen the belt to fit the teethed pulley.
I printed an adjustable slider from here : https://www.thingiverse.com/thing:7165387 credits to JCDI
And refitted them with a belt and M2 3mm Grub screw:
https://www.aliexpress.com/item/32780887864.html
https://www.aliexpress.com/item/1005008530636994.html
I also got a 120x120 PEI magnetic bed plate, which is WAY better than the original one
https://www.aliexpress.com/item/1005004488690160.html
Hope you enjoy this project as much as I did. I was a lot of fun to plan, design and built it with my son.
Comment & Rating (32)