Eisenhorn Cabinet Door Mount and Accessory Holder


Print Profile(1)
Description
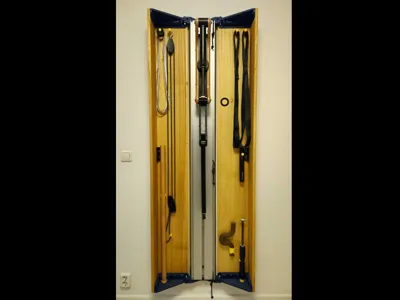
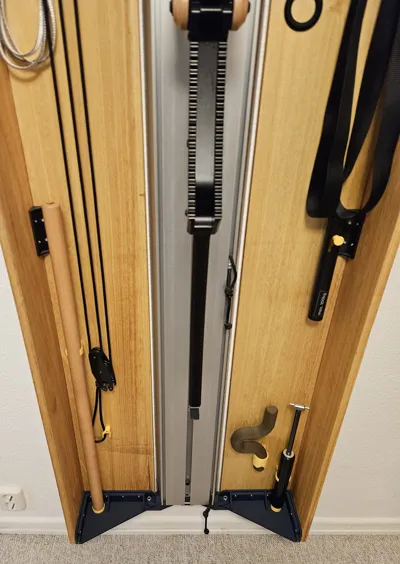
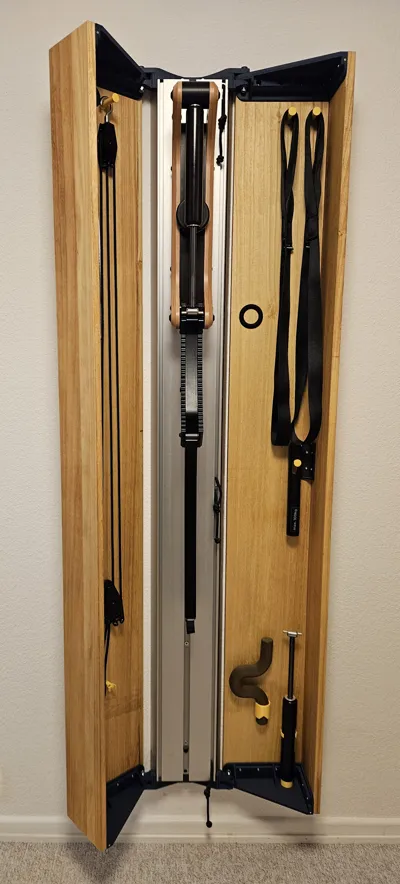
I designed my own door mounts for the Eisenhorn training device so I could build the design cabinet myself. The individual parts are optimized for almost support-free FDM 3D printing. In addition, there are custom-fit, self-designed accessory holders.
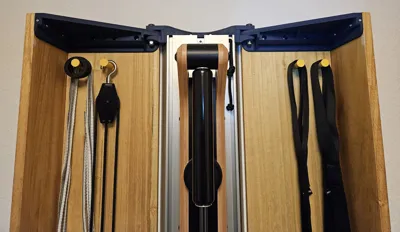
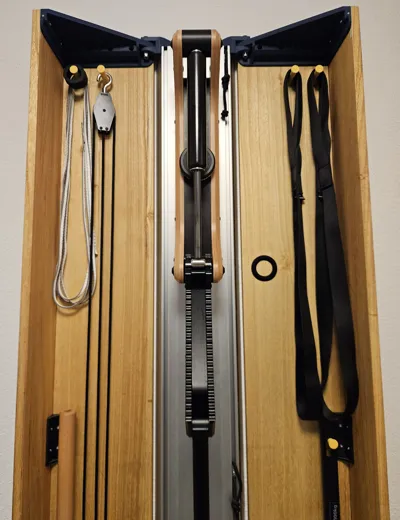
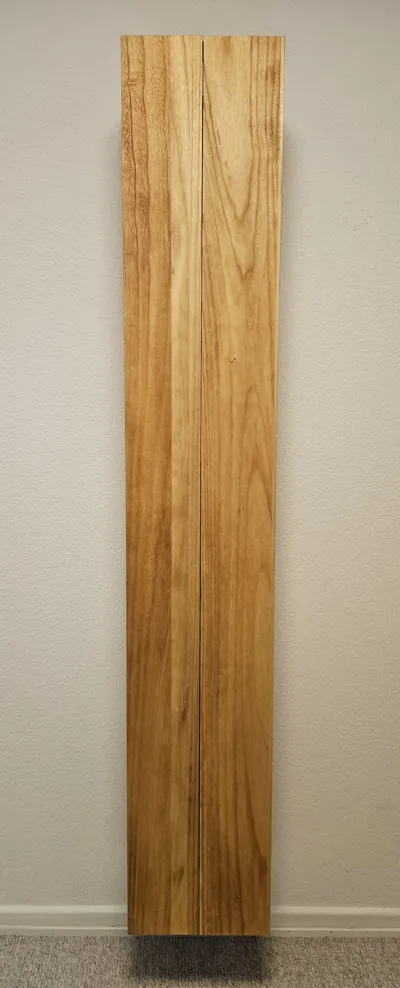
With the door wings, the Eisenhorn can be visually integrated into your home with the desired wood. The accessory holders ensure that all accessories are neatly stored and always within reach.
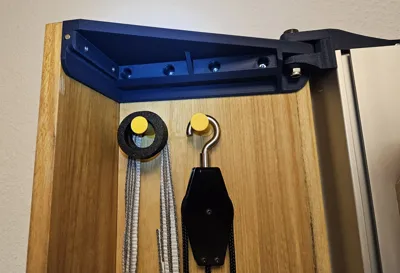
The top and bottom door mounts have pre-drilled holes (6.2 x 3.15 mm) for 6x3 mm magnets. This helps to keep the doors better in position when closed.
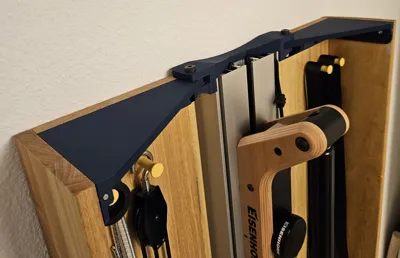
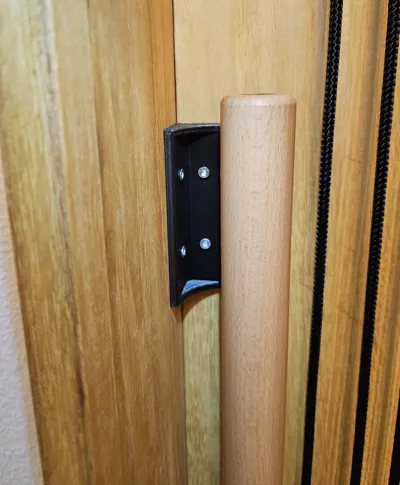
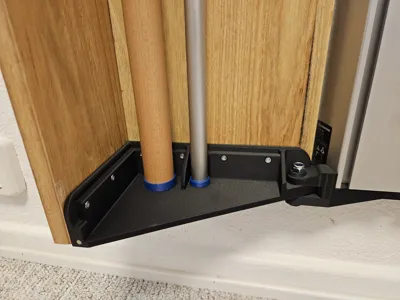
A total of 2 carriers and 4 mounts are to be printed. The carriers are inserted into the top and bottom of the Eisenhorn's aluminum column. A hole is provided in each mount for the top and bottom screws used to secure the aluminum column to the wall. For each door wing, there is one mount at the top and bottom, as well as a body connector for the middle of the door, which further stabilizes the front and side parts of the doors.
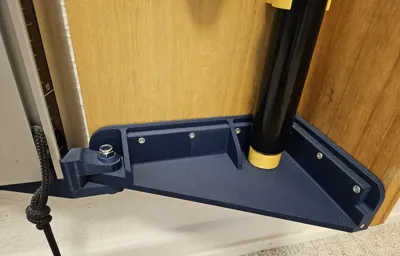
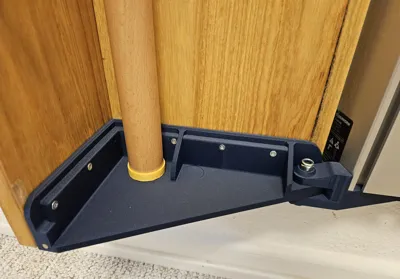
Both lower door mounts have designated spots for the accessory holders, which are secured with a suitable superglue (e.g. ARKA Kraftprotz).
The mounts should be printed in their respective orientations. Supports are only needed for the first two print plates (aluminum column carriers top + bottom).
Boost Me (for free)
If you like my work, I would appreciate your boost very much! 🫶
Required Material
- two wooden planks each (glued laminate or similar) with the following dimensions:
Attention: my aluminum column is 1850 mm long in total. Please check the length of your aluminum column and add or subtract the deviation from the following length measurement!
Door fronts: Width 158 mm, Length 1874.1 mm
Door sides: Width 228 mm, Length 1874.1 mm
Max thickness 18 mm each
- 26 x countersunk screws for the mounts, e.g. SPAX 3.5 x 30mm (or similar screws with max width 3.5 mm; screwing depth 25mm)
- 16 x screws for the body connectors and accessory holders, e.g. SPAX 3.5 x 16mm (or similar screws with max width 3.5mm, screwing depth 15mm)
- 4 x shoulder screws with collar, e.g. Ganter Normelemente shoulder screws with collar - ISO 7379-10-M8-30 (see picture)
Receiving diameter: 10mm Thread: M8 Length: 30mm Thread length: 13mm
The middle part of the screws allows the doors to be easily opened and held in position.

- 4 x self-locking hex nuts M8
Installation
1. The wooden planks for the sides should be deburred at the rear inner edge (the edge facing the wall and the aluminum column). This prevents the wood from possibly scraping along the wall when opening and closing.
2. Remove the topmost mounting screw of the aluminum column.
3. Insert the upper mount onto the aluminum column from above. Gently moving it back and forth facilitates insertion. Ensure that the mount is fully inserted.
4. Reinsert the upper mounting screw.
5. Now repeat steps 2-4 for the lower mount on the aluminum column.
6. Now screw the left door mounts (top + bottom) to the wooden planks. Align the wooden planks correctly and place the door mounts at the very top and bottom ends of the planks. The long side is for the side panel and the short side is the front. The front overlaps the cross-section of the side panel. Use the countersunk screws (3.5 x 30mm) for this.
7. Once the upper and lower door mounts are attached, you can now secure the body connector in the middle. This ensures that the wooden planks are held together well in the middle. Use the smaller screws (3.5 x 16mm) for this.
8. Now repeat steps 6-7 for the right side as well.
9. Now the left and right hinged doors can be inserted into the upper and lower aluminum column mounts. Insert the door mounts evenly at the top and bottom. It is best to insert the door mount as if the cabinet were "open," meaning from the side and not from the front. Uneven insertion could potentially break the mounts if too much force is applied. Check that the door mounts have been correctly inserted into each other and that the insertion holes for the shoulder screw are clear.
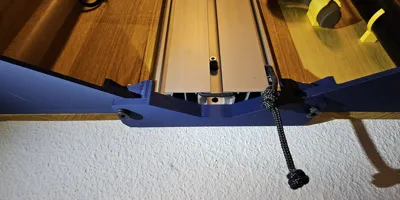
10. Now, push a shoulder screw through the assembled mounts on the top left and right. The head of the shoulder screw must rest fully on top. Wiggling the screw back and forth helps with insertion if the mounts are not directly aligned. Then secure the shoulder screws in position with the M8 nuts.
11. Repeat the previous step for the lower mounts. The shoulder screws must be inserted from below and secured with nuts from above.
12. If the doors are to be held lightly in position when closed, then install a 6x3mm round magnet in the designated holes at the top and bottom. Pay attention to the correct polarization of the opposing magnets.
13. Once everything is correctly installed, you can now screw on the accessory holders or glue them onto the lower door mounts.
License
You shall not share, sub-license, sell, rent, host, transfer, or distribute in any way the digital or 3D printed versions of this object, nor any other derivative work of this object in its digital or physical format (including - but not limited to - remixes of this object, and hosting on other digital platforms). The objects may not be used without permission in any way whatsoever in which you charge money, or collect fees.
Comment & Rating (8)