Search models, users, collections, and posts

Life size Rukia

IP Report

Print Profile(3)

All
P1S
P1P
X1
X1 Carbon
X1E
H2D
A1
H2D Pro
P2S
H2C
H2S
X2D
A2L

0.2mm layer, 1 walls, 4% infill
Designer
138.3 h
18 plates

Rukia Skirt
Rukia Skirt
Designer
176.4 h
32 plates

Rukia Mini Fig
Rukia Mini Fig
Designer
6.2 h
1 plate

Open in Bambu Studio
Boost
288
608
28
6
132
18
Released 

Description

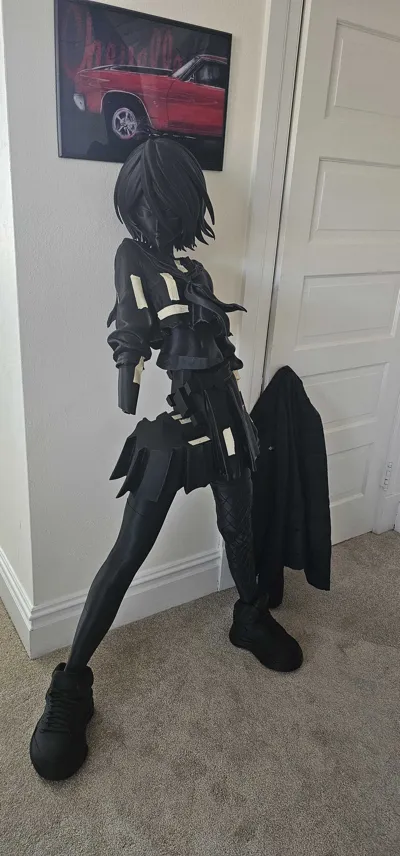
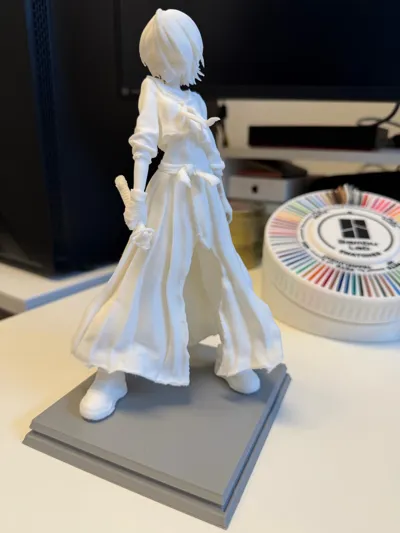
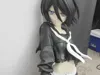
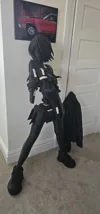
Life-Size Rukia – A Monumental 3D Printing Project!  Embark on the creation of a life-size Rukia Kuchiki model, standing at an impressive 1524mm (approximately 5 feet). Project Overview: Model Dimensions: Height: 1524mm (5’0”) Total Parts: 44 Assembly Recommendations: Adhesive: Use strong adhesives such as epoxy, super glue, or hot glue to firmly secure the printed parts. Alignment: The model includes alignment pegs to help with positioning during assembly. Take care to align precisely—small misplacements can affect stability and Rukia’s overall look. Gap Filling: For any seams between parts, consider using filler putty or similar materials. Finishing Touches: Once assembled, sand the seams and apply a primer before painting to achieve a smooth, professional finish.

Comment & Rating (28)

(0/1000)

here's the full photo of the assembled and painted rukia. I have one gripe with the blade, there's no support and it 100% needs a dowel. I was too lazy to make one; so, I used a collapsable one that's much more stable. Everything is held together with super glue, sprayed with rattle cans and the eyes are done with acrylic paint markers.
13
Reply
Production photos. All this to make a gift for the homie above.
1
Reply
Replying to @ObeastMode :
I also reccomend when printing, use cubic or gyroid at 4% with 4 walls for maximum strength and minimal usage. Took me about 12-13kg. The robe skirt was over 50% of the weight, Just drop to 3% infil for the robe skirt. I also reccomend leaning it up against the wall if possible or building a base with a support rod in the upper skirt. 9/10 luban upscale. However, there's a lot of weird defects that cut holes into the actual print, causing me to do extra work to fill them in.
1
Reply
looking great 👍 I'm pretty sure I've also printed a collapsible sword at some point. might modify it to suit if the default doesn't work out.
0
Reply
u know what im thinking?
0
Reply
EYO
0
Reply
Replying to @DA_CRAZY_CAT :
😭🙏
0
Reply
is there any way you can make this for bambu a1 mini?
1
Reply
😭🤣
0
Reply
Replying to @King_Prophet :
huh?
0
Reply
can i add some holes?
1
Reply
bro why
0
Reply
hear me out…
0
Reply
ok...... 👂. WAIT........ WHAT
0
Reply
Replying to @DA_CRAZY_CAT :
is it a child? bc if it is then please no one hear me out (ive never seen bleach)
0
Reply
I'm not going to print it because I don't have a place to put it, but I wanted to congratulate you—great job!
2
Reply
what did you use to glue it together?
0
Reply
super glue and an accelerator. A lot of it. Don't use anything but hobby glue, BSI is a good brand to keep things held. Gorilla glue is too weak and it broke a few legs because of it.
0
Reply
thx, just ordered some. got the body printed, now working through the dress. I figured ill start assembling what I can for now
0
Reply
why yall making this ngl thats kinda sus
1
Reply
hello I have sent you a message.. I am looking for someone to create a Dazai from Bungo stray dogs life size.. is this something you would be interested in working with me on? I would be happy to pay for your efforts
1
Reply
nice one!
1
Reply