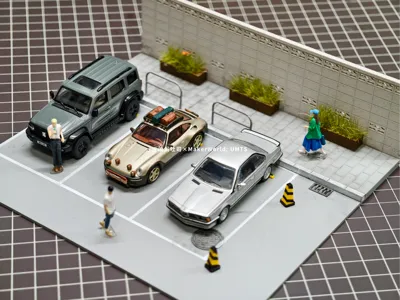
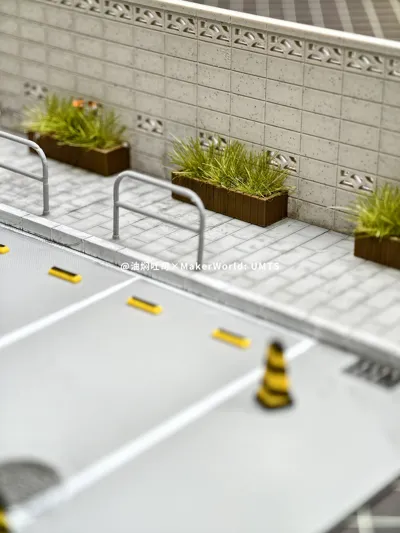
1/64 miniature diorama: Open-air parking space


Print Profile(2)
Description
(Model for personal collection only, not for commercial use)
In previous models, some friends left comments requesting a courtyard wall with an openwork window, which led to this small parking lot scene
To reduce printing time, different parts of the model were completed using 0.2mm and 0.4mm nozzles respectively
Main Body One: Ground
1 Base: 0.4mm nozzle (approx 1h20m, second print setting)
Still printed upside down, there are three flat supports at the bottom for manhole covers that need to be removed
2 Sidewalk: 0.2mm nozzle (approx 2.5h)
Both are printed separately and then glued into place, please follow the instructions in the image below
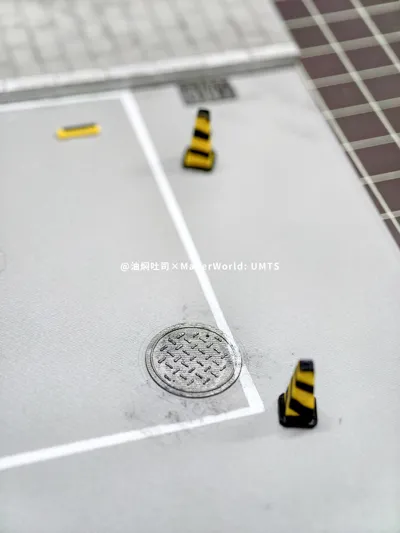
Step ①: Align the sidewalk with the sewer (as shown), leave a 2mm gap from the base edge on the other side for placing the wall (please be sure to do this, otherwise the wall cannot be installed correctly)
Step ②: After the sidewalk is firmly glued, then glue the wall into place

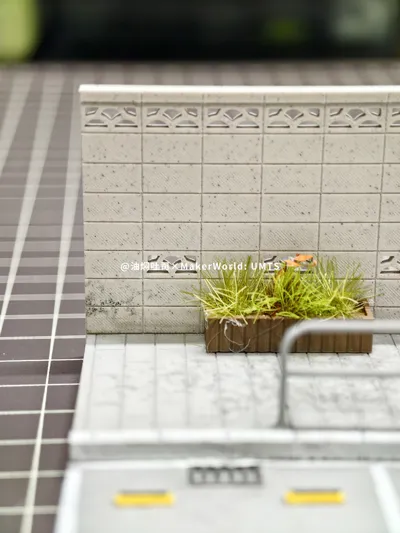
Main Body Two: Wall
Courtyard wall: 0.2mm nozzle, approx 3h
The wall in the picture uses PLA Marble filament (Polymaker Marble Limestone), the effect is good, giving the wall a natural stone texture
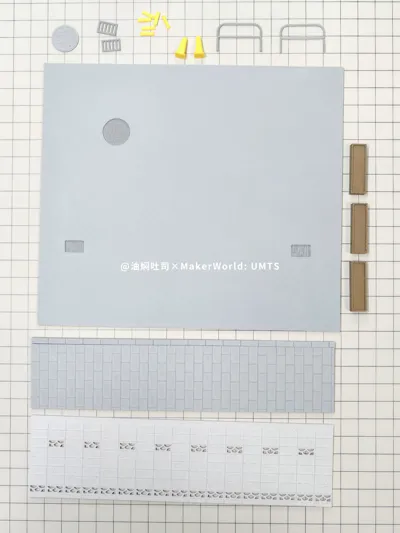
Other Parts
Wooden frame flower beds x3, traffic cones x2, guardrails x2, square manhole covers x2, round manhole cover x1, wheel stops 3 pairs (6 pieces)
Can be printed uniformly and then painted, or printed with different filament colors (requires manually arranging parts on separate plates in the slicer software)
Regarding Painting
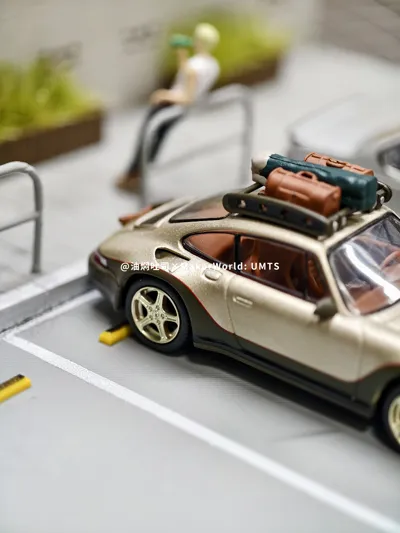
1 Parking lines in the picture: fine tape was applied, leaving gaps to be painted white, each parking space is approximately 4x8cm
2 Parking spaces can be arranged as desired, adjust the number of wheel stops as needed (grouped in the model, can be ungrouped manually)
3 The aging effect uses an old method: use a cotton pad with a little black pigment, gently dab it where needed (typically at the base of walls, curbs and ground intersections, manhole covers and their surroundings)
【3.8】Revision
1 Modified railing structure to improve print success rate
2 The wheel stops were changed from two short bars to one long bar, making installation easier

If you have any questions, feel free to leave a comment to discuss
License
You shall not share, sub-license, sell, rent, host, transfer, or distribute in any way the digital or 3D printed versions of this object, nor any other derivative work of this object in its digital or physical format (including - but not limited to - remixes of this object, and hosting on other digital platforms). The objects may not be used without permission in any way whatsoever in which you charge money, or collect fees.
Comment & Rating (19)