Ultimate Fully 3D Printed Knifemaker Vise


Print Profile(2)

Description
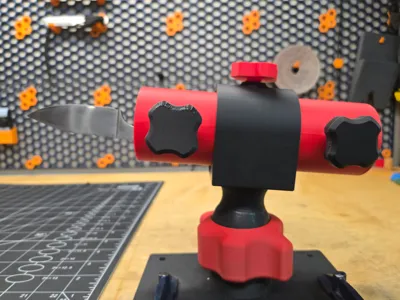
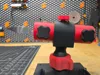
Introducing the Ultimate Fully 3D-Printed Knifemaker Vise
Every knifemaker knows the frustration of constantly readjusting their vise just to reach every nook and cranny of a blade. Those interruptions break your workflow and slow your progress. With the Ultimate Fully 3D-Printed Knifemaker Vise, that problem is a thing of the past.
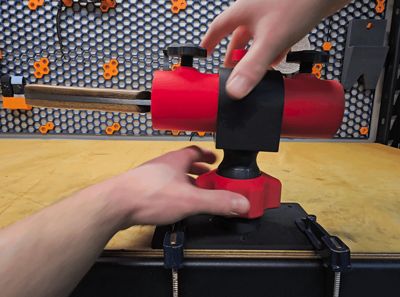
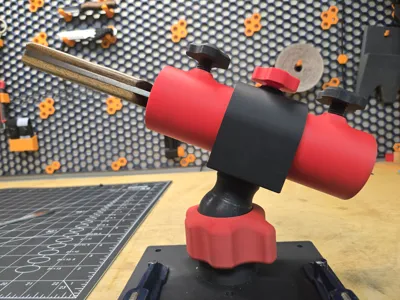
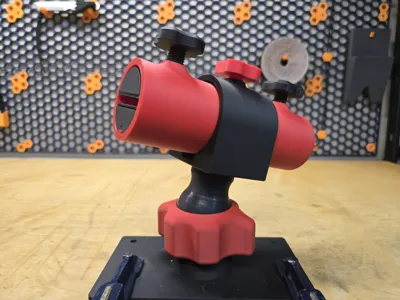
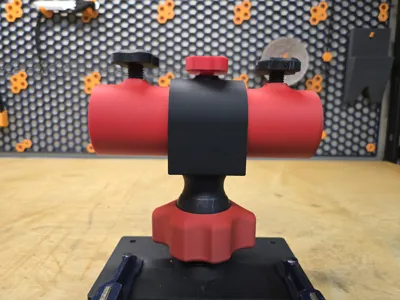
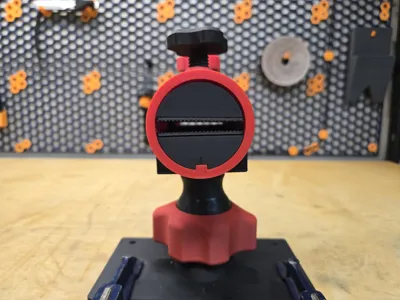
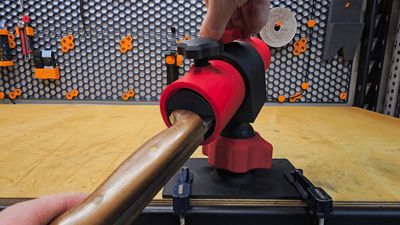
Specifically designed for knifemaking, this vise offers four axes of motion, allowing you to position your work exactly where you need it. The locking ball joint provides fast, smooth, and precise positioning, enabling full rotation along the X, Y, and Z axes. In addition, the two-shell design allows the knife to rotate 360° along its own axis, so you can work on any side of your blade without ever unclamping it.
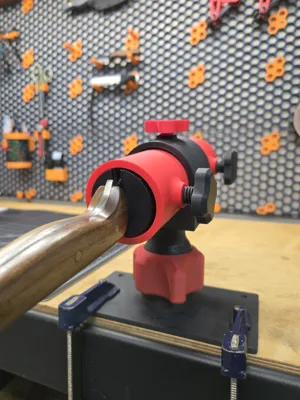
The vise securely holds knife blanks up to 50 mm wide and 8 mm (5/16") thick, while the TPU jaws provide excellent grip and protection, preventing damage to your workpiece.
Fixe the Ultimate Fully 3D-Printed Knifemaker Vise to your workbench with screws and washers or use clamps to hold it in place allowing for maximum flexibility.
Spend less time adjusting your vise, and more time perfecting your craft.
Boost Me (for free)
This model took me a lot of time to design, consider boosting it (it's free) if you like it ! It helps a lot.
Components nomenclature :

Assembly:
Snap both TPU pad to their jaws, firmly press the 6 pegs


Slide the bottom jaw in the internal shell.
Aligned both arrows and push the jaw to the end of the internal shell. There are two notches at the end of the internal shell that will lock the jaw in place (a bit of force might be needed).


Insert the ball in the nut.
Turn the nut upside down and insert the ball into the nut. The ball is press fit into the nut (quite a lot of force is needed), but once completely inserted, it should move freely. If your ball doesn't fit, require an extreme amount of force or doesn't move once inserted, please print the Smaller variation of the ball (it is 0.2 mm smaller than the original one).


Insert internal shell in the external shell
Align the notch of the external shell with the bumps of the internal shell and slide it to the middle. Rotate the internal shell 180 ° and lock it in place with the locking screw. Make sure the screw is seated in the slot carved around the internal shell.


Screw the external shell to the ball.


Insert the top jaw, hold it at the end with one hand and lock it in place with the 2 ball screws.
Tighten both screws until the two jaws are sitting flush on top of each other.


Screw the nut to the base and voilà !


License
You shall not share, sub-license, sell, rent, host, transfer, or distribute in any way the digital or 3D printed versions of this object, nor any other derivative work of this object in its digital or physical format (including - but not limited to - remixes of this object, and hosting on other digital platforms). The objects may not be used without permission in any way whatsoever in which you charge money, or collect fees.
Comment & Rating (6)