Lab Rax Vertical Wall Mount System


Print Profile(1)
Description
Lab Rax Vertical Wall Mount System
Boost Me (for free)
💙 Like It? Boost It!
Adapter Feet & Wall Receiver Brackets
Space inside my utility cabinet was very limited, so I designed this system to mount my Lab Rax vertically on the wall instead of using it in its standard horizontal configuration. This solution allows you to securely hang your rack while keeping everything compact, accessible, and cleanly organized.
This printable mounting system consists of two main parts:
- Vertical Wall Mount Adapter Feet – These replace the original feet of the Lab Rax.
- Wall Mount Receiver Brackets – These are mounted to the wall and allow the adapter feet to slide in and securely lock the rack into position.
Together, they create a stable and modular vertical mounting solution.
Compatibility
This system works with:
- The original 10” Lab Rax Mklements version
- My custom 19” Remix variant, designed to mount standard 19” accessories
For the 19” brace model for Lab Rax, see:
Lab Rax 19" Server rack brace set for bolted vers - Free 3D Print Model - MakerWorld
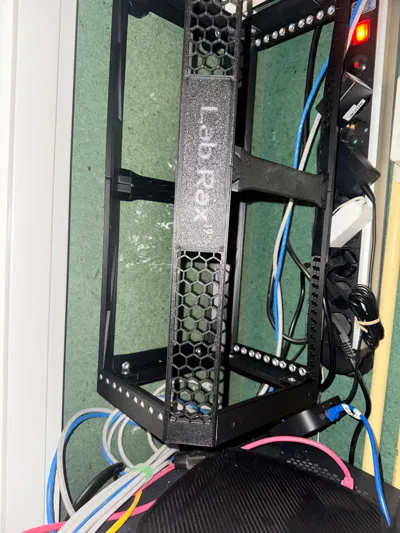
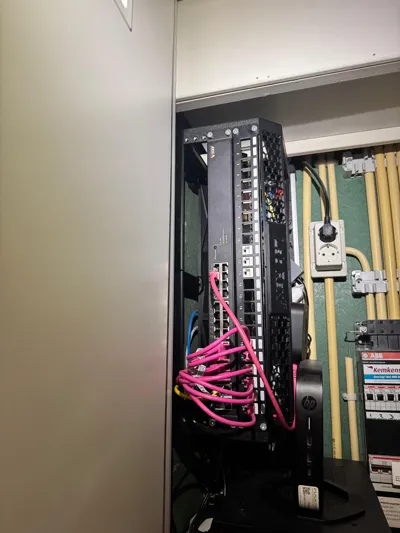
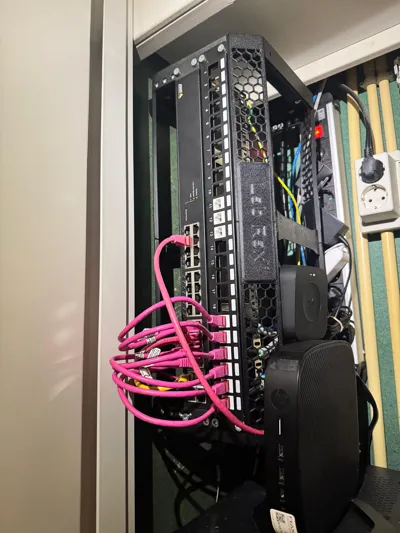
Real-World Tested Setup
I am personally using this system with a 3U 19” Lab Rax variant.
My current configuration includes:
- A 24-port keystone patch panel
- An AXIS T8524 24-port PoE+ switch
Even with this setup installed, the rack remains very stable and secure when mounted vertically.
That said, I recommend:
- Maximum 3U for the 19” variant
- Up to 5U for the 10” variant, depending on total equipment weight
Wall material, mounting hardware, and load distribution are critical for safety. Always use appropriate screws and anchors for your wall type.
Installation Instructions
Step 1 – Mark the Wall Position
- Remove the original feet from the bottom of your Lab Rax rack.
- Hold these feet against the wall in the position where you want the rack to hang.
- From inside the rack, mark the center of the four mounting holes.
These marks indicate where the lower mounting hole of each wall receiver bracket should be installed.
I used 3.5 mm screws, but choose hardware appropriate for your wall type.
⚠️ Important:
Leave approximately 5 cm (2 inches) of clearance above the rack position.
This ensures you have enough space to slide the rack into the mounted brackets later.
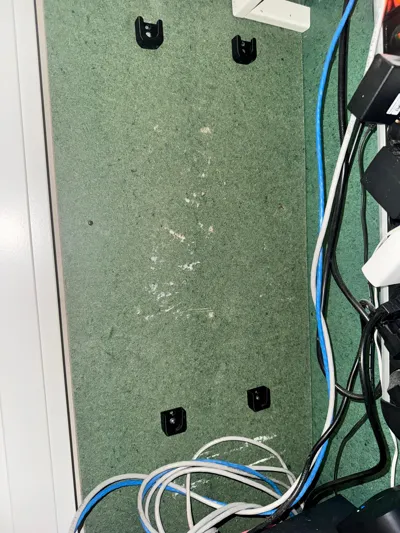
Step 2 – Mount the Receiver Brackets
- Install each bracket using the lower mounting hole first.
- Use a level to align all brackets perfectly horizontal.
- Once aligned, secure each bracket with a screw in the upper mounting hole.
Make sure all brackets are aligned properly before fully tightening.
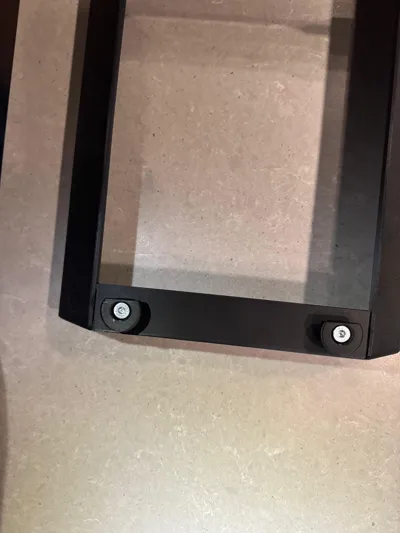
Step 3 – Install the New Adapter Feet
- Mount the printed adapter feet to the bottom of your Lab Rax rack.
- Ensure that the flat side (the side that was on the print bed) all faces the same direction.
- This flat surface should become the final upper orientation when the rack is mounted vertically.
Correct orientation is important for optimal strength and load distribution.
Step 4 – Mount the Rack
Carefully slide the rack downward into the receiver brackets.
The interlocking design will guide the rack into position and secure it.
Additional Use Case
These adapter feet can also be used to create a solid and fixed base for a horizontal Lab Rax setup.
If you prefer a more permanent or stable placement on a desk or shelf, the feet provide a strong and stable mounting interface.
Recommended Print Settings
The parts were designed for easy printing and strong structural performance.
Material: PETG
Layer Height: 0.2 mm
Infill: 15% Gyroid
Supports: Not required
Brim: Recommended for the wall brackets
Design Considerations
- The Adapter Feet are optimized for support-free printing.
- The Wall Receiver Brackets are printed at an angle to improve strength across the layer lines.
- Printing at an angle significantly increases load resistance in the primary stress direction.
- PETG is recommended for better strength and temperature resistance compared to PLA, especially in enclosed spaces like utility cabinets.
For heavier setups, consider increasing:
- Perimeters (3–4 walls recommended)
- Infill percentage
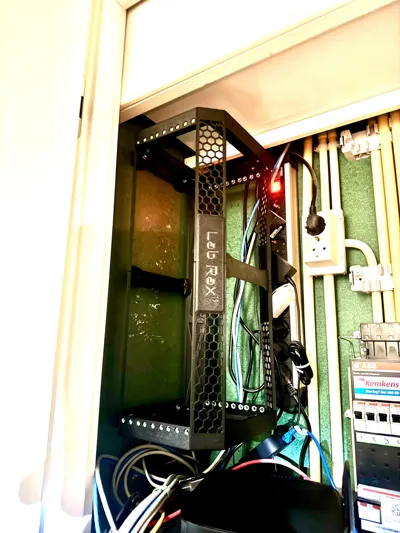
Why I Made This
My meter cabinet had very limited horizontal space. Mounting the Lab Rax vertically allowed me to:
- Maximize usable space
- Keep cables organized
- Maintain airflow
- Create a clean and professional homelab setup
If you're working with a tight network cabinet or compact technical space, this vertical mounting system can be a practical and clean solution.
Comment & Rating (0)