


Print Profile(1)
Description
Boost Me (for free)
If you like this print i would appreciate a boost :)
I also made an under-desk-mount for this case, so i could mount the eGPU hanging under my desk. You can find it here.
Parts required
- Adapter board TH3P4G3 with ATX bracket
- GPU with max 3 slots height. Length is not relevant, you can print as many extenders as you need
- ATX power supply
- 4 screws to mount the power supply
- m3 countersunk screws
- m3 heat threaded insert OD 4.5mm
Printing
Print Settings
- Print with a heat resistant material like PETG
- Print all plates except for the bottom plates (top plate as you prefer) without top and bottom layers and choose honeycomb infill (in Cura you might have to install an extension. Google it). Configure the infill structure to have sufficient width (i think i chose 3 lines)
Parts to print
There are multiple Versions of the case. The only combination i used is the case with a length of 299mm + one 66mm extension. All others should work, but i never printed them and just changed some parameters in fusion to upload them here.
If a filename contains “- x times” print the part x times :)
needed - Main Part
- From the “main case” folder print all files directly in the folder.
- Choose the “main case - 199mm”, “main case - 299mm”, “main case - 179mm” version depending on what your printer can print. 299mm is preferable.
For the 199mm version your power supply shouldn't be longer than ~190mm, otherwise it might not fit. For the 179mm Version it shouldn't be longer than ~170mm.
optional - Extensions
Print these if you need a longer case. I only used one extension part, but “stacking” multiple ones should work fine. Printing longer ones is preferred above printing multiple ones.
Per extension print
- All files directly in the “extension” folder.
- Depending on the length you need, print all files in the “extension - ” folder.
Assembly
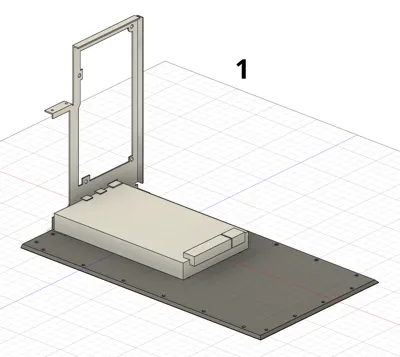
- Mount ATX bracket to adapter board (picture 1)
- Mount adapter board to base plate (picture 1)
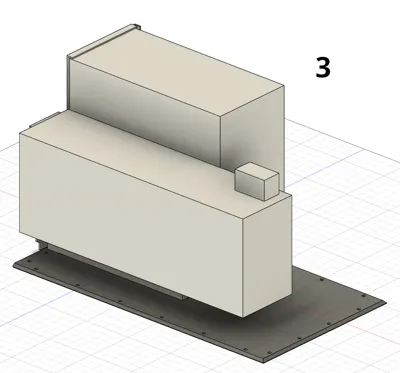
- Install PSU (picture 3)
- Connect adapter board power (picture 3)
- Install GPU (picture 3)
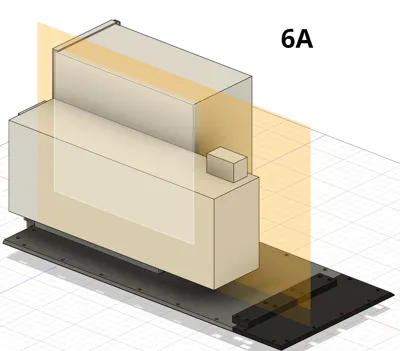
- If required: assemble extenders
- bottom: This part needs screws and heated inserts (picture 6A)
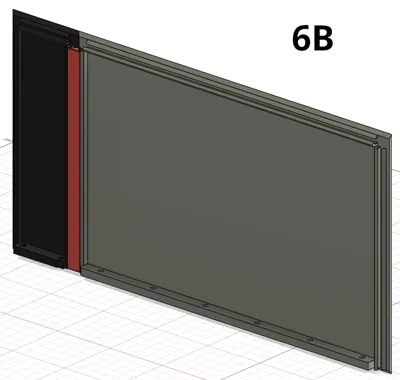
- other Parts: They assembled together by sliding in the plastic pieces (picture 6B)
- Install the heat inserts using a soldering iron. Each wall part has holes for these inserts on their bottom side.
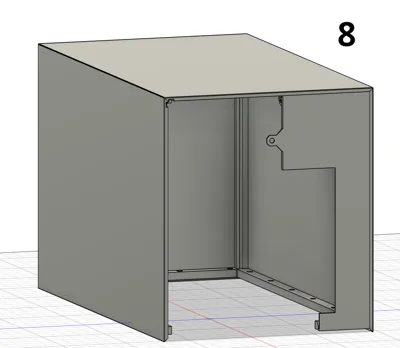
- Assemble case except bottom plate (picture 8)
- hold the parts together and then slide in the connection pieces
- do the back part last
- Place the assembled parts (step 8) on top of the assembled base plate (with GPU, etc) and screw the housing to the base plate
Comment & Rating (4)