Doctor Who Tardis - Light and hinged doors


Print Profile(1)
Bill of Materials


Description
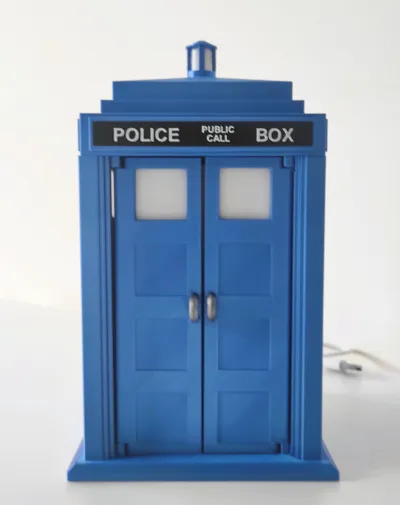
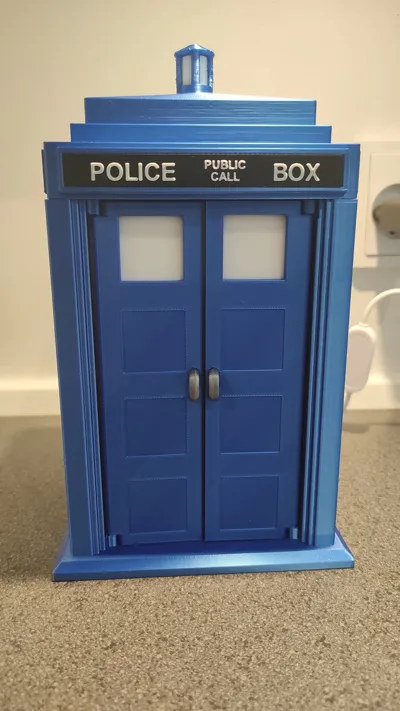
Bring a touch of time‑travel charm to your home with this 1:14 scale detailed TARDIS model designed for lighting integration and with functional doors.
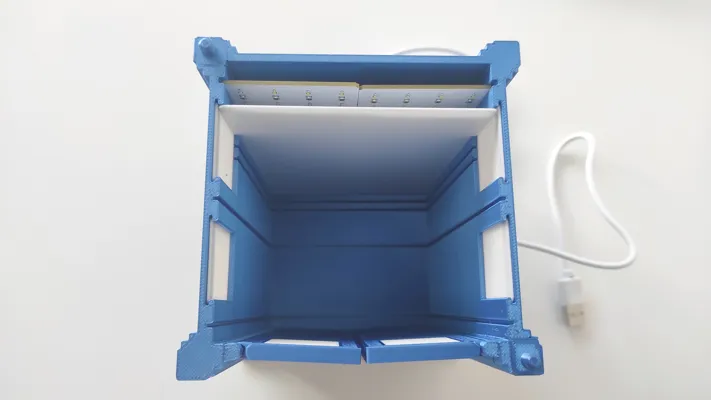
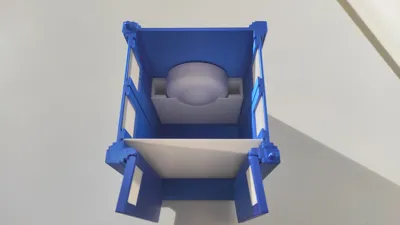
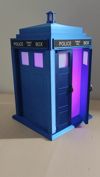
The interior includes a mounting slit sized specifically for the two Bambu Lab Maker Supply lithophane backlight boards side by side. If you prefer using the Bambu Lab Puck Light, a dedicated fixture is included as a separate printable part.
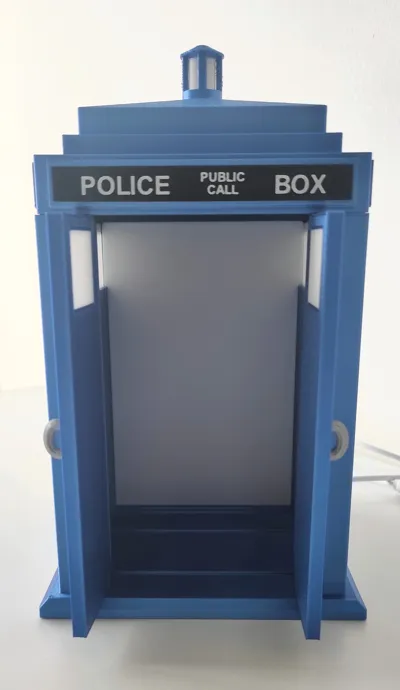
The windows are printed separately and act as natural diffusers, softening the internal light for an even glow. An additional internal light‑diffuser panel is also included; it slides into any of the interior slits so you can fine‑tune the lighting effect to match your setup.
Both front doors are fully functional and can be opened or closed.
Disclaimer: This Tardis is not bigger on the inside.
Be careful when removing supports around the top and bottom door hinges. Cut off the support as close to the semispherical hinge features as possible to avoid them snapping off.
Assembly:
Thread the power‑supply cable for the lithophane backlight boards through the rear opening of the model and into the TARDIS.

- Connect one lithophane backlight board to the power‑supply cable.
- Use the black/red connection cable to link the two lithophane backlight boards together.
- Slide both backlight boards into the rear interior slit of the TARDIS and press them down gently until they lock into place.
- Insert the window diffusers into their dedicated slits.
Slide the main light diffuser into any of the interior slits - several positions are available so you can choose the distance that gives the best light diffusion for your setup.

- Push the door handles into the depressions on the front of the doors.
- Snap the doors into the hinge mounts on the TARDIS body.
- Insert the torch‑light diffuser into the top section of the TARDIS from the inside.
- Glue the “POLICE BOX” signs onto the frames around the top of the TARDIS.
- Align the pins and holes on the TARDIS body and roof, then place the roof section on top.
In case of using the puck light - simply mount the light in the fixture and place it in the Tardis.

License
You shall not share, sub-license, sell, rent, host, transfer, or distribute in any way the digital or 3D printed versions of this object, nor any other derivative work of this object in its digital or physical format (including - but not limited to - remixes of this object, and hosting on other digital platforms). The objects may not be used without permission in any way whatsoever in which you charge money, or collect fees.
Comment & Rating (0)