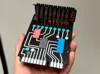
Ghostbusters 2 “Belt Gizmo” cosplay accessory


Print Profile(4)

Description
🚫👻 Ghostbusters 2 Belt Gizmo cosplay prop 👻🚫
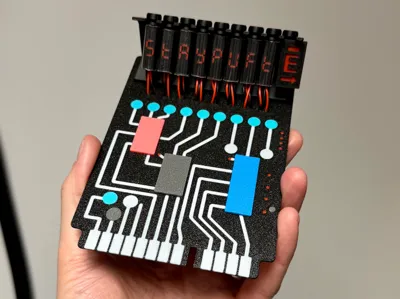
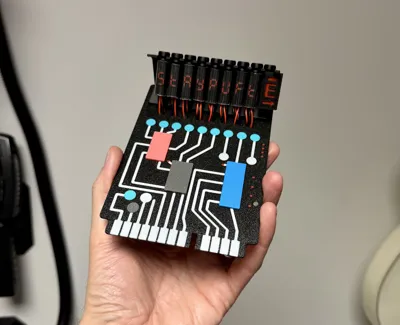
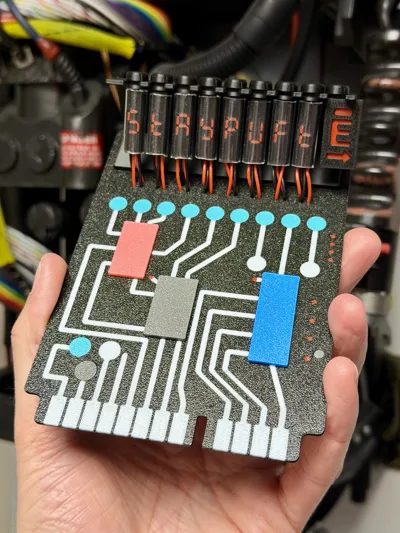
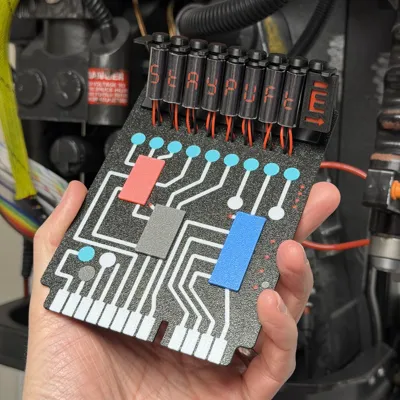
Ghostbusters 2 “Belt Gizmo” cosplay accessory. No one is quite sure what it does (in the original Ghostbusters at least, the original was actually the circuit board from a Sanyo calculator and in Ghostbusters 2, it was some painted cardboard!), but you need it as part of your cosplay setup.
I've made this so you can adjust the readout in the “nixie tubes” by changing the colour of the individual segments of the text, but more on that below. This is a prop only, it doesn't do anything (just like the on-set ones) other than helps you complete the look.
This build is spread across several build plates and print profiles, details of which will be described below.
For anyone new to changing settings within Bambu Studio, don't panic! - I've walked through each step with screenshots - If at any point you've made changes that you aren't happy with, just hit undo (Ctrl-Z/Command-Z) and start those changes again.
Boost Me (for free)
👻 If you like this print, please consider a boost as a way of supporting me on here 👻
🥽 Optional - Nixie glass replacement
If you don't want to print the transparent ‘glass’ (which isn't as clear as we'd all like) you can instead purchase some clear pipe and use that. I bought some clear pipe from Amazon with an ID size of 7mm (which was very tight and took some patience / squeezing!) and OD size of 8mm. They require cutting to size (25mm) before pushing over the Nixie displays.
·····
✏️ Customising your nixie tube readout
I've included two plates of pre-created letters and numbers in the Nixie tube print profile. On Plate 2, it's 0, 1, 2, 3, 4, 5, 6, 7, 8, 9 and -. On Plate 3, I've spelt out StAYPUFt, which is what I've printed out for my one.
If you want to create your own, each character is a separate piece to modify, and each character can be made using the 7 segments that make up an 8.
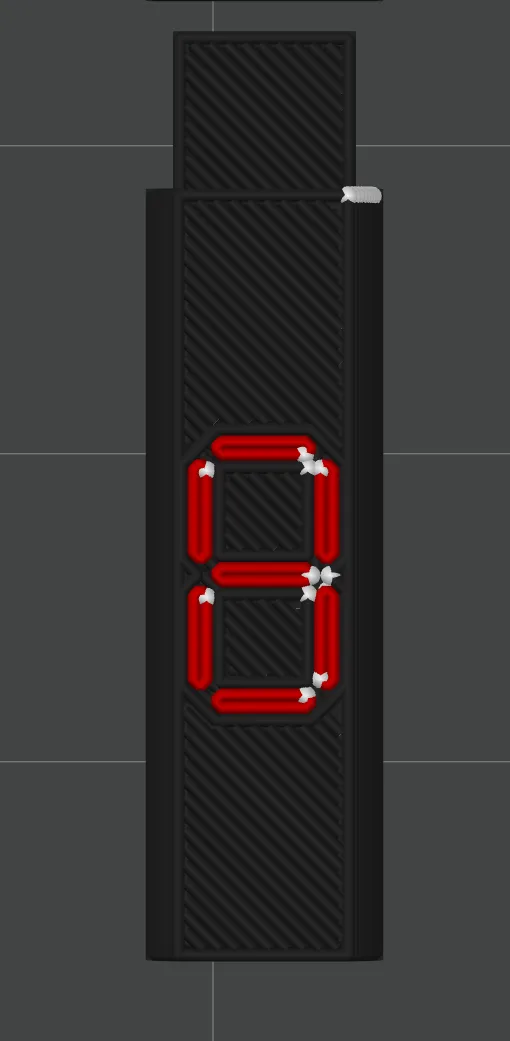
- Select the segment: Click on the specific segment you want to edit.
- Change colour: Under the Objects tab, change the colour of the values you want to show (or hide).
Visual guide: Changing the filament colour to red makes it show; changing to black means it blends in with the tube.

💡 Tip: As an example, if we wanted to make an S or 5, you would turn the Top Right and Bottom Left segments black.
·····
🔥 Tips before you start
Having a clean print bed and hot end(s) free from filament is essential in getting that crisp, clean look. Here's some tips on what to do to get the best print possible;
🧼 Cleaning
Clean your plate first, following your usual routine. Dish soap works best, clean and then rinse thoroughly, ensure the plate is dry and free of debris before putting back in the printer.
Leftover filament residue on your hot end can cause unwanted colour streaks. Please inspect your hot end before starting the print, if you spot any clumps or leftover filament, follow Bambu's recommended cleaning guide to remove.
👀 Watch the first layers
Even with the best pre-printing cleaning routine, filament can sometimes surprise you and some small strands can sometimes get dragged into areas they shouldn’t be. Watch the first couple of layers go down, if you spot any potential colour bleed, you can pause and remove any stray filament from where it shouldn't be.
·····
🖨️ Printing setup
I've broken this up into 7 plates, plus a separate print profile for the “glass” tubes that you will need to download, depending on your printer model. I've printed this exclusively on a Textured PEI Plate, but it should look fine whatever you choose.
Main file plates
- Plate 1: Main board, this prints face down, so I highly recommend you use a textured PEI plate for the best finish. I've limited this to 4 colours for the average AMS setup. The additional colour parts are printed on the other plates and glued in place. (Filament: black, light blue / turquise, white and red)
- Plate 2: Grey pieces (Filament: Grey or silver)
- Plate 3: Pink Chip (Filament: Pale pink)
- Plate 4: Blue chip (Filament: light blue)
- Plate 5: Daughter board (optional) (Filament: Black, grey/silver), red, turquoise)
Nixie parts plate
- Plate 1: Nixie tube holder (Filament: Black)
- Plate 2: Nixie tube internals with numbers (Filament: Black, Red)
- Plate 3: Nixie tube internals with "StAYPUFt" letters and spare green fitting. (Filament: Black, Red)
- Plate 4: Green nixie internal part. (Filament: Green)
- Plate 5: Alternative end part with the E and Arrow (Filament: Black, Red)
Nixie glass profiles
These are separate as they require global Vase Mode settings:
- Nixie Glass H2D profile: Set for vase mode over two plates for 9 covers.
- Nixie Glass X/P/A profile: Set for vase mode over two plates for 9 covers.
- Filament: Transparent PLA or PETG.
If you are using an A1 mini, please adjust the number of tubes per plate and print enough times to get 9 in total.
·····
🏗️ Assembly
For all steps involving glue, please allow adequate time to set based on the glue you are using.
Parts needed to assemble the basic board

- Grey parts: Start by gluing the grey chip to the board. It has two guide pins to help with alignment. Then glue in place the two grey circles, one is small and fiddly, take your time and glue them in with the textured side facing up.
- Pink chip: Glue in place as you did with the Grey chip. Use the pins and holes as a guide for straightness.
- Light blue chip: Glue in place as you did with the Grey chip. Use the pins and holes as a guide for straightness.
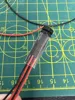
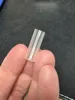
- Nixie tubes: Prepare the inner pieces by pushing the disk with the hole over the shaft until it hits the stopper, then apply the end cap.
- Clear covers: If using the Nixie glass print profile (for transparent filament) Fit the clear tubes over the internals. You can use a dab of glue here or leave them off for clearer text.
- Wiring: If using wires (1.22mm diameter recommended), push them through the 4 holes above the capacitors and glue to the back of the board.
- Final mount: Fit the nixie tube holder to the board using the 4 pegs/holes, then slot the tubes and wires into place.
You now have yourself a Ghostbusters 2 Belt Gizmo! If you make one of these, I'd love to see a picture!
·····
🧰 Troubleshooting
Model Doesn’t Match Preview / Wrong Colours / Odd Layout / Dots instead of lines or shapes
If your model looks misaligned, missing colours, or prints incorrectly, please make sure you are using the supplied 3MF print profiles, not the raw STL or STEP files.
The 3MF files contain all the model specific tuning, including:
- Correct object positioning
- Colour allocations
- Line width settings
- Print specific adjustments
To use them properly:
- Either click “Open in Bambu Studio” directly from MakerWorld,
- Or download the .3MF file and open it manually in Bambu Studio.
Avoid using the raw STL or STEP files unless you specifically want to rebuild your own profiles, they do not include the tuned print settings.
License
You shall not share, sub-license, sell, rent, host, transfer, or distribute in any way the digital or 3D printed versions of this object, nor any other derivative work of this object in its digital or physical format (including - but not limited to - remixes of this object, and hosting on other digital platforms). The objects may not be used without permission in any way whatsoever in which you charge money, or collect fees.
Comment & Rating (0)