TurtleBeach VelocityOne Yoke Sim Mounting Adapter


Print Profile(1)
Bill of Materials


Description
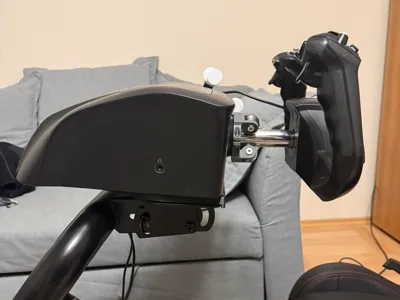
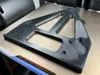
VelocityOne Yoke to Sim-Rig Adapter (Thrustmaster 135 mm Pattern)
Boost Me (for free)
If you have a racing rig but want to swap over to flight simulation without drilling new holes into your wheel deck, this adapter is the solution. I designed this to bridge the gap between the Turtle Beach VelocityOne Flight Yoke and the industry-standard 135mm M6 mounting pattern—commonly found on rigs set up for the Thrustmaster T300, TX, T-GT, and TS-PC.

Hardware Requirements
To get this mounted, you will need a few standard metric hardware pieces:
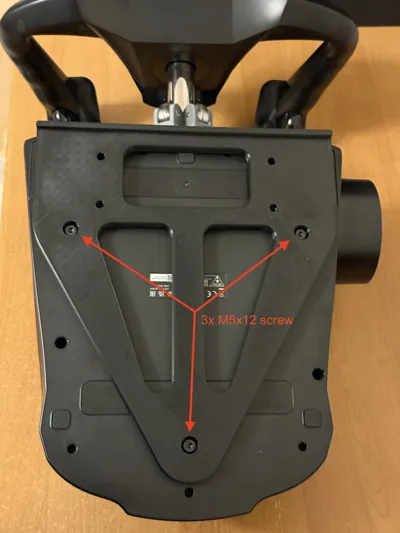
- 3x M5 x 12mm Flat Head Screws: These attach the adapter directly to the bottom of the VelocityOne Yoke. Flat heads are required so the adapter sits flush against your rig.
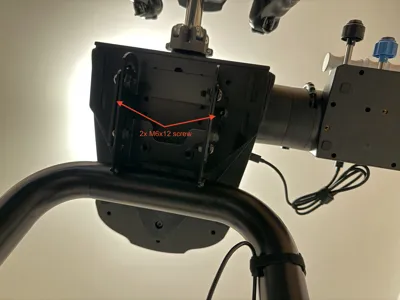
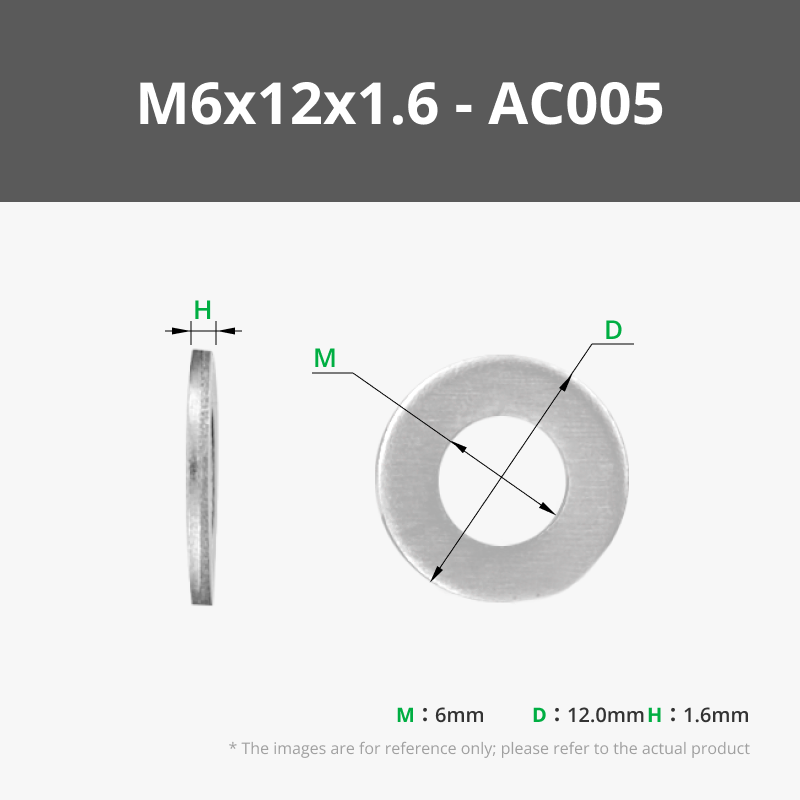
- 2x M6 x 12mm Screws: These secure the adapter to your sim-rig plate.
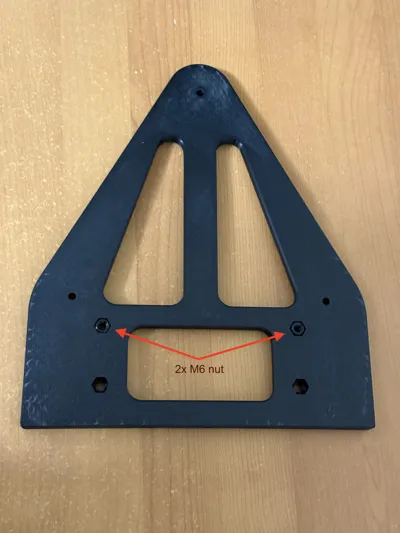
- 2x M6 Nuts: These drop into the adapter to receive the mounting screws.
- Optional: You can use an additional 2x M6 screws and nuts if your rig supports a 4-bolt pattern and you want maximum stability.
Suggested Print Settings
- Material: I highly recommend PETG, ASA, or ABS.
Assembly and Installation
The assembly follows a specific order to make things easy:
Insert the Nuts: Start by placing your M6 nuts into the hexagonal recesses on the adapter.

Mount to the Yoke: Align the adapter with the three mounting points on the base of your VelocityOne. Secure it using the three M5x12 flat head screws.

- Mount to your Rig: Place the yoke (now with the adapter attached) onto your sim-rig's wheel deck.
Final Secure: From underneath your sim-rig plate, thread the M6 screws up into the nuts you placed in the adapter earlier.

Boost Me (for free)
License
You may create derivative works based on this object, provided that all such derivative works are published exclusively on the MakerWorld platform and include proper attribution to the original creator. You may not share, upload, host, distribute, or publish this object—or any derivative work of this object—on any other digital platform, marketplace, or distribution channel. Commercial use of this object and any derivative works is strictly prohibited. This includes, but is not limited to, selling, renting, sublicensing, or using the object in any context in which you receive monetary compensation or other financial benefits.
Comment & Rating (0)