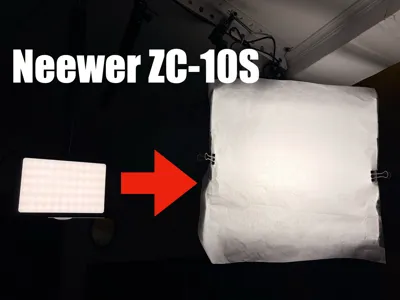
Transform your Neewer LED panel into a diffuser


Print Profile(1)
Description
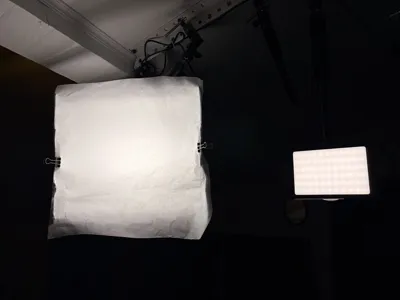
Transforming a Neewer ZC-10S into a compact mini softbox using a 3D printed cage and four reflector panels provides softer, more even, and more flattering light. It's an ideal solution for a home studio setup, without investing in a commercial softbox.
🧰 Required Material
Hardware:
- M3 x 40 mm x4
- M3 x 20 mm x2 (optional depending on model version)
- M3 Nuts x6
3D Printing:
- Bambu Lab Matte filament (PLA Matte recommended)
- White or black color (white improves internal reflection if not covered)
Light Reflection:
- Household aluminum foil
- Double-sided tape (good adhesion)
Diffusion:
- White baking paper (parchment paper), economical and effective solution, moderately heat-resistant
🧩 Design Concept
The main cage fits around the LED panel and attaches via existing points. It allows free access to the power cable and the bottom screw thread (for tripod or camera mount). The structure remains lightweight yet sufficiently rigid.
The four side panels screw gently into the cage. They create a reflection chamber and are covered with aluminum foil to reflect light forward. Their angle is designed to concentrate and soften the light output.
The front diffuser screen is held in a dedicated groove. Made from white baking paper, it transforms direct, harsh LED light into soft, homogeneous light.
🔧 Assembly Steps
- Screw the two parts of the cage around the LED panel using M3 x 20 mm screws.
- Cover the vertical and side panels with aluminum foil using double-sided tape.
- Screw the panels onto the cage with M3 x 40 mm screws, tightening carefully so as not to weaken the 3D printed structure.
- Position a baking sheet on the front, either glued or simply held with paper clips.
Be careful not to overtighten the screws to avoid excessive stress on the 3D printed parts.
License
You shall not share, sub-license, sell, rent, host, transfer, or distribute in any way the digital or 3D printed versions of this object, nor any other derivative work of this object in its digital or physical format (including - but not limited to - remixes of this object, and hosting on other digital platforms). The objects may not be used without permission in any way whatsoever in which you charge money, or collect fees.
Comment & Rating (0)