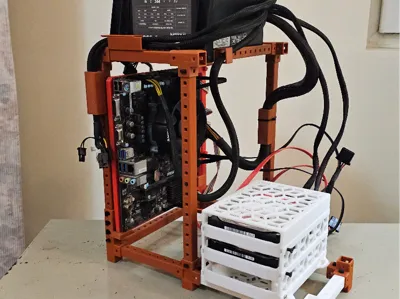
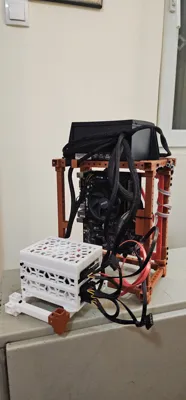
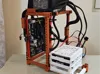
Home Racker micro ATX server rack


Print Profile(1)
Description
In order for this to work you need the following models:
1) Model for the micro ATX motherboard support link (unfortunately i can't find the model i used which is cut and compatible with the P1S)
2) Model for the HDD caddy which can be found on makerworld
Instructions:
If you are familiar with homeracker then it will be intuitive for you, if you are not i encourage you to take a look at @kellerlab profile he will do a better job explaining.
There are only three modifications of homeracker i used for this build:
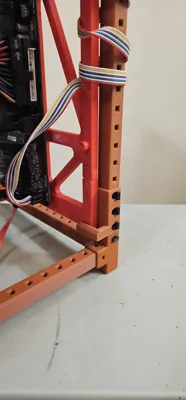
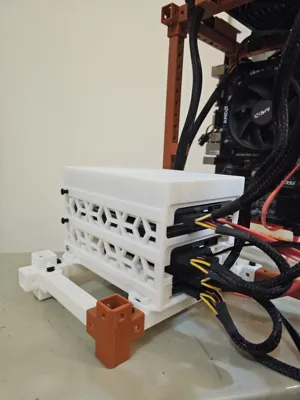
- Extended lock pins to grip the caddy, of whom there are three variants in the project +1,+2 and +3 mm extended lock from which you can choose which ones to use. You will need 4 of them so just clone the one you prefer
- +1 fits tightly (maybe a risk for the pin to jiggle it's way out)
- +2 fits a bit looser but the lockpin engages better
+3 leaves a gap between the caddy and the lockpin

Caddy - by some miracle the caddy perfectly fits into homeracker 15x15 specification, i will not ask any questions just thank the author. It is a bit tricky to install the lockpins through the small ears of the caddy, so i suggest inserting the 4 lockpins from the bottom and then twisting them into position and then trying to center them on 4 holes

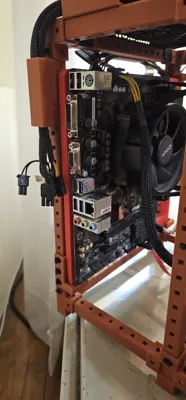
- Motherboard holders - this is a modification of one of homeracker parts (i don't remember which one). You have 3 pieces to print but be careful as there are 2 different pieces (mirrored across a single axis)
- One piece for the front where the IO is
- Two pieces for the back


There is room in this model for improvement which i may do in the future, but i will welcome any help from the community !
Comment & Rating (2)