Freelancer Game: Liberty Heavy Fighter Defender


Print Profile(4)
Bill of Materials


Description
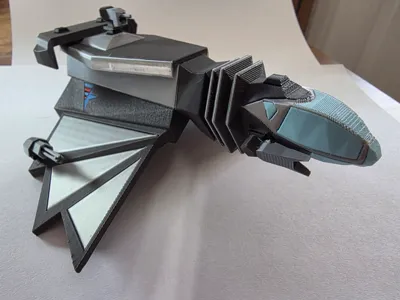
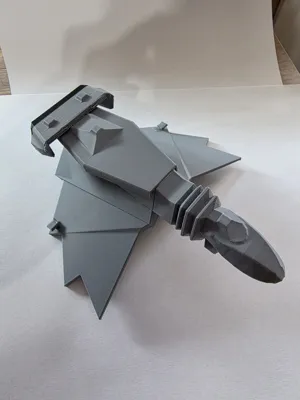
"The best of the best", this heavily outfitted rig represents the pinnacle of Liberty's technological advances and design savoir-faire. With its elevated armor and power rating as standard and the additional mount for firepower, it's no wonder that this ship is the number one choice of the Liberty Armed Forces.
Boost Me (for free)
If you're a fan of Freelancer and enjoyed this model, consider giving me a boost (It's free!). Let's help keep Freelancer alive!
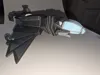
Time to acquire your own copy of Liberty's finest heavy fighter! For all of us that played Freelancer, the Liberty Defender was the biggest upgrade to our firepower and survivability in the early game. Its unique styling and heavy armament left a lasting memory on me, so I decided to put together a printable model to commemorate and remember this iconic ship.
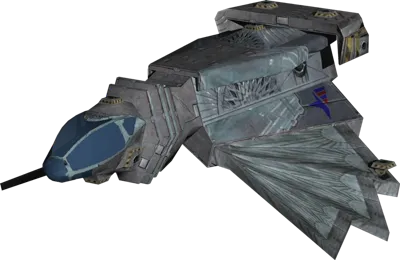
Thanks to HotSliceOfJesus on Thingiverse for this model, and their original is uploaded to this post as a reference. I used this as the base, but while working on this project, learned how to extract models from the game myself. I have also repaired many holes and problems with the in-game models that make them unprintable, and incorporated several other improvements to make them easier to print and assemble. I have also spent extensive time colorizing and reproducing the basics of the ship's textures. I tried to reproduce some of the art deco-style textures in the original model, but could not get them to print in a manner I was satisfied with.
Print Options - V1 2/11/26
Several print profiles are included:
- If you have an H2C or other low-waste printer capable of >4-color printing, you can consider the “6 Color with Support Material” profile. This prints all-in-one with a 0.4mm nozzle and heavy use of support material to print at an angle with excellent surface finish and detail reproduction.
- Parted versions are included for both 4-color and 6-color capable printers. For 4-color printers, the wings are sliced to a separate build plate so that the Liberty logo can be reproduced in blue and red.
- Parted profiles are sized for the P1/X1/A1-sized bed, but are compatible with the A1 Mini without scaling down.
- To print with a single color, just combine all the filaments into one in the slicer. It still looks great, and significantly reduces the print time!
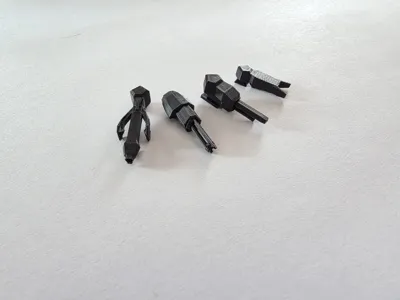
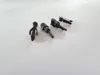
- I have included profiles for weapon hardpoints in dual-color. These should be printed with a 0.2mm nozzle. Mix and match to select your loadout!
Supports: No additional supports should be needed. I did tweak supports extensively for good release and as good of a surface finish as I could achieve.
Graphics: Most of the graphics are cut into the model using vector graphic modifiers. This makes it easy to maintain symmetry and flexibility, since Bambu Slicer is hard to color with properly.
Tolerances: Parted versions use dowel-style connectors with a tolerance of 0.2mm. Feel free to adjust these to your printer's tolerances.
Brim: The wings and small parts are printed with a small brim to aid in bed adhesion to the typical textured PEI plate. If using a bed-slinger style printer such as an A1, consider adding a brim to the fuselage and cockpit as well as they could get unstable with height.
Assembly
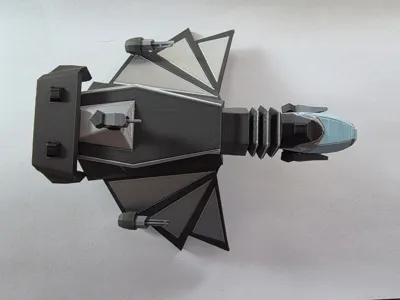
If you print a parted-out version, each piece needs to be glued separately to the fuselage. Each component has a differently-shaped connector:
- Wings: Connect to each side of the fuselage with two circular pegs each.
- Engine: Connects to the underside of the fuselage with two hexagonal pegs.
- Cockpit: Connects to the front of the fuselage with one square peg.
- Hardpoints: There are no connectors. These can be glued in any orientation to the square hardpoint mounts on the wings, fuselage, and cockpit.
Super glue (CA) is recommended to glue these together. They do not snap-fit.
Happy printing!
More Freelancer Prints:
CTE-3000 “Falcon” Heavy Fighter


Hardpoints Collection:


Comment & Rating (0)