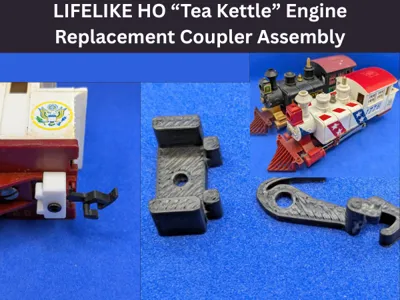
LifeLike Teakettle Engine Replacement Coupler Assy


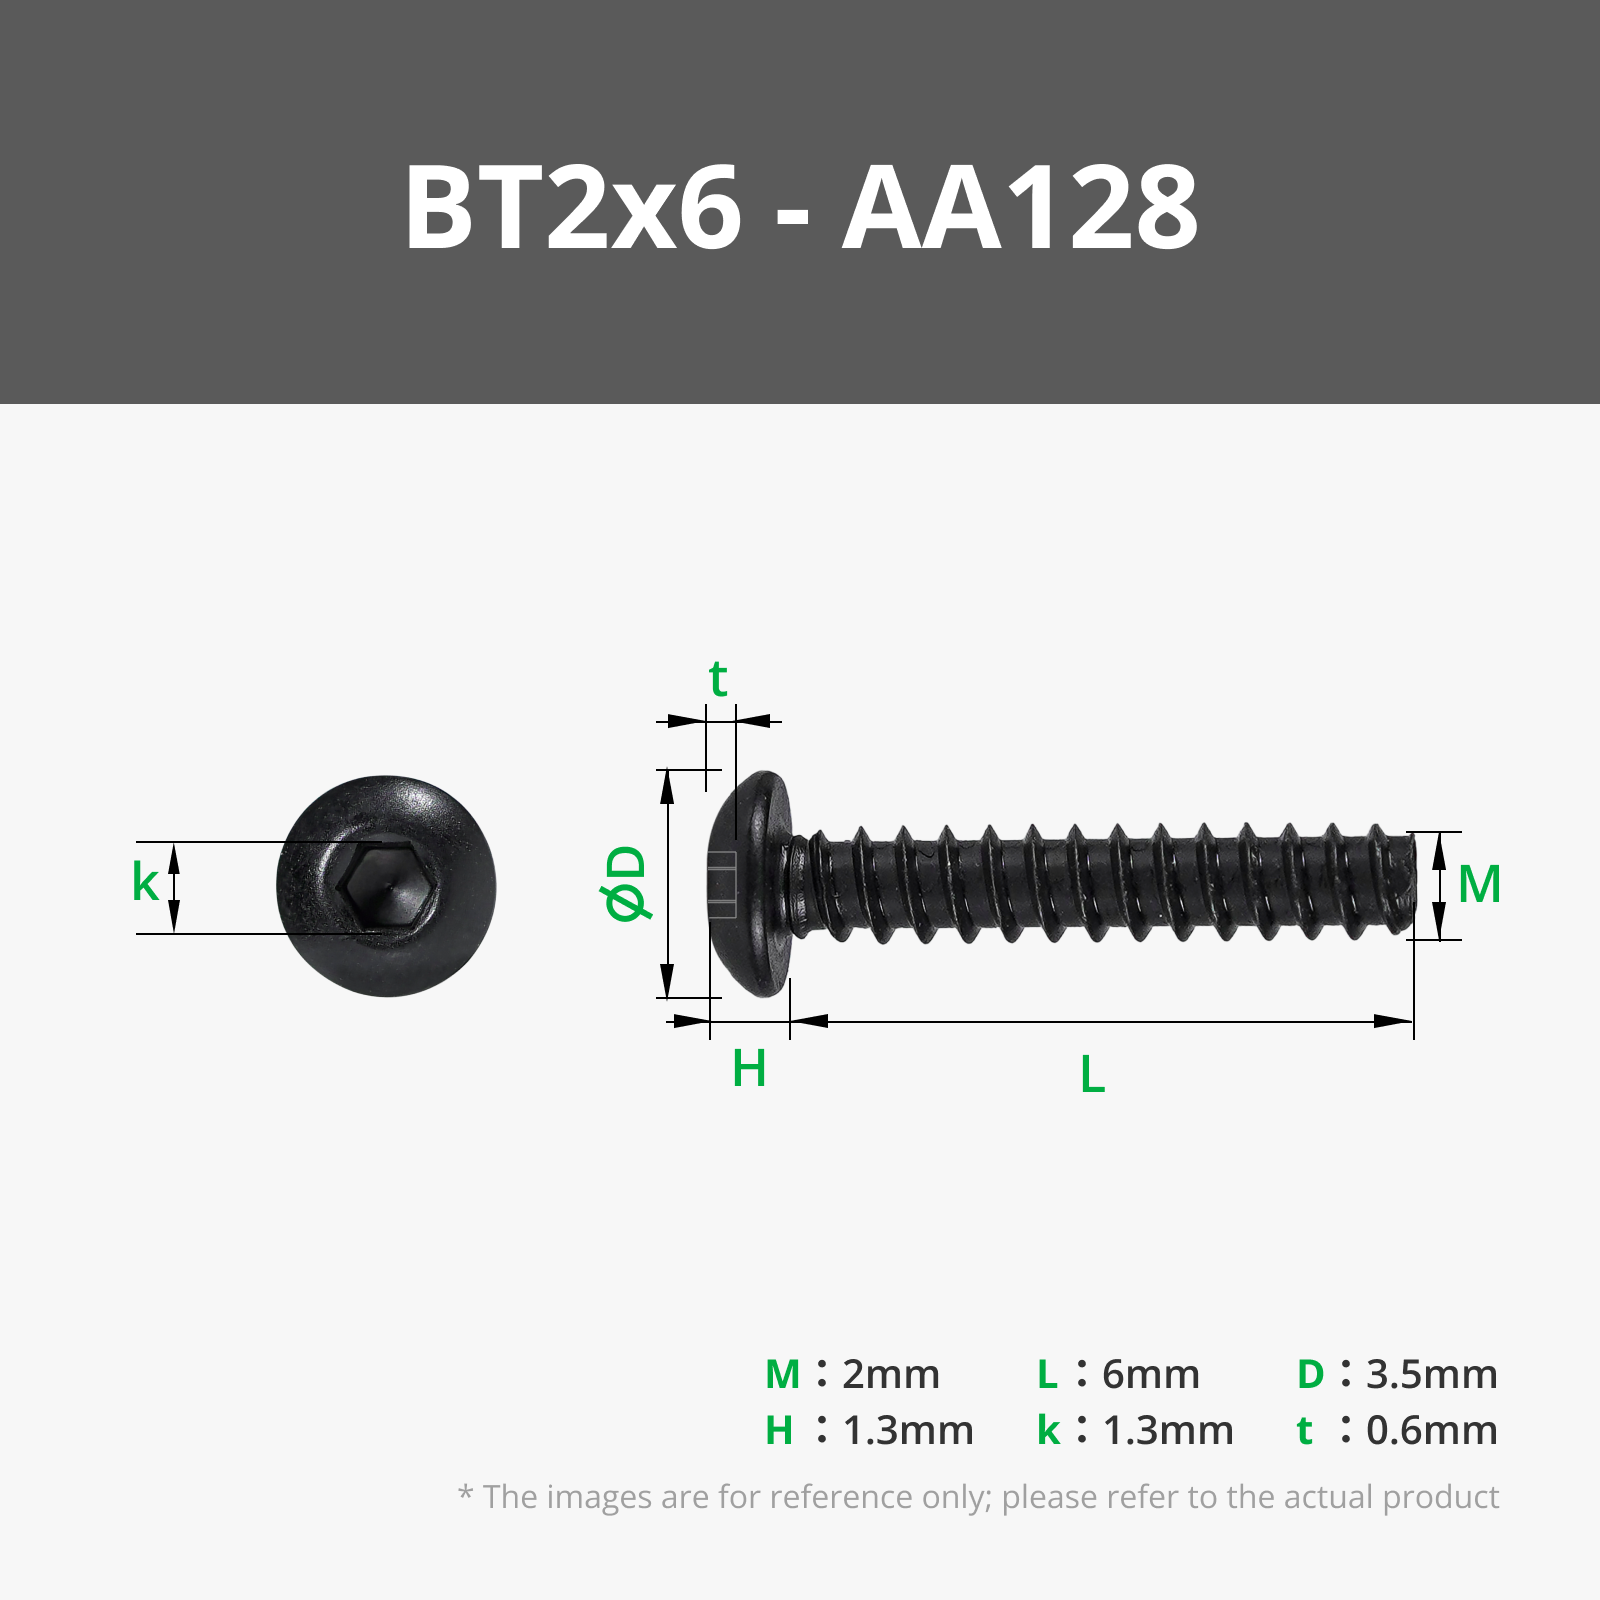
Print Profile(1)

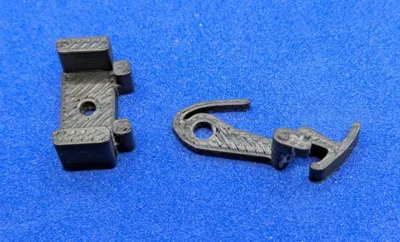
Bill of Materials

Description
This is a simple to print and install coupler assembly for the LifeLike Teakettle engine series.
The couplers on these older engines tend to break, which is what happened on the two I have.

Here is one of them with a partially broken coupler:

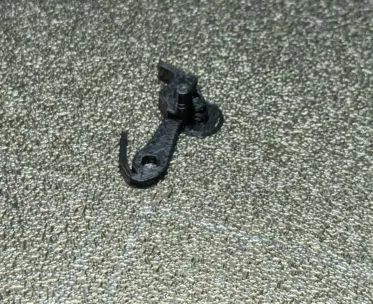
This assembly will allow you to replace that coupler and place your engine back into service.
The old coupler is held in place by a keyed pin.
To remove the broken coupler, you push down on this which will release it, allowing you to pull out the old remains of the coupler.

However, once you do this, what usually happens is the plastic arm of the pin either breaks off completely or partially. So, any new coupler you try to install will have nothing to hold it.

The new assembly deals with that easily. If you still have part of the old pin in place just bend it out of the way and remove it completely.

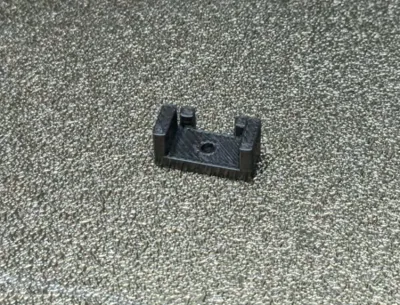
Print both pieces of the assembly. The only part that requires any support is the coupler. I recommend printing each individually.

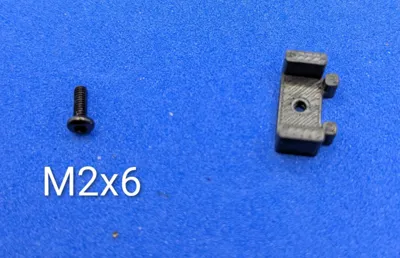
The only thing you need besides these two parts is an M2 x 6 screw.

How to install:
First slide the new coupler into position approximately where it will go.

Once this is done, thread the M2 x 6 screw into the coupler holder until it just protrudes from the other side. Then slide it over top of the old mount as shown.

Once you have it in place, start threading the screw in, moving the coupler left and right with slight pressure until you find the center of the hole with the screw. Then you can thread it in the rest of the way. No glue is needed unless the coupler holder is loose. On both of my engines, the friction fit is more than enough to keep it in place. Here are some more views of both engines with the parts installed.


I hope this helps you out and gets your engines back into service.
License
You shall not share, sub-license, sell, rent, host, transfer, or distribute in any way the digital or 3D printed versions of this object, nor any other derivative work of this object in its digital or physical format (including - but not limited to - remixes of this object, and hosting on other digital platforms). The objects may not be used without permission in any way whatsoever in which you charge money, or collect fees.
Comment & Rating (0)