
Print Profile(2)
Description
🐟 Fish Tank Mini Auto Top-Off
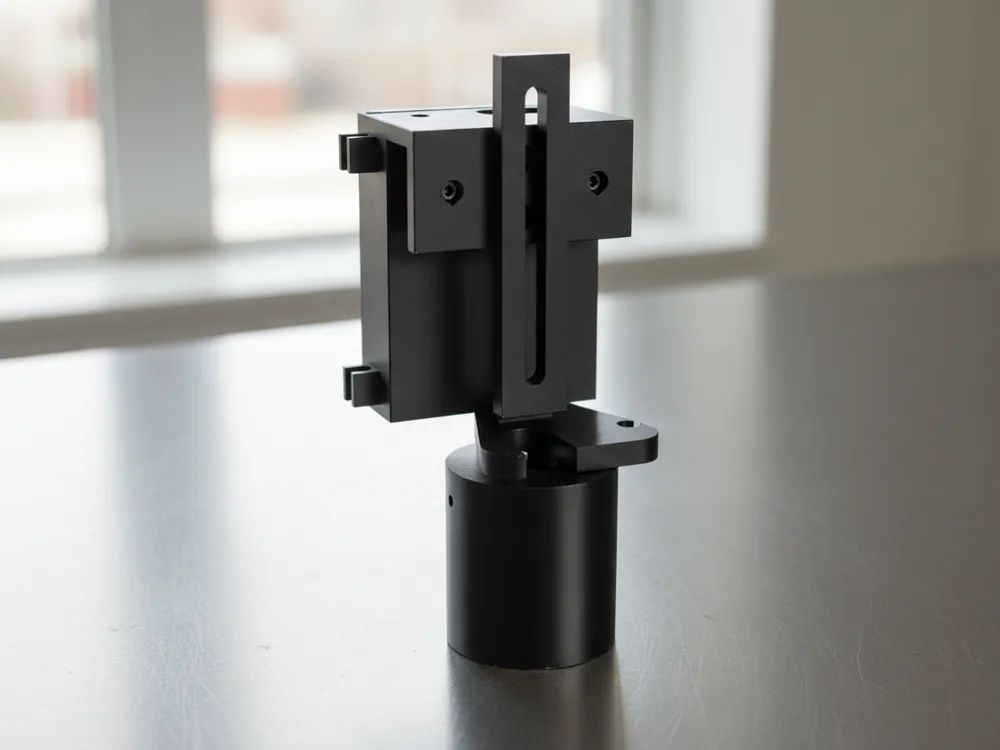
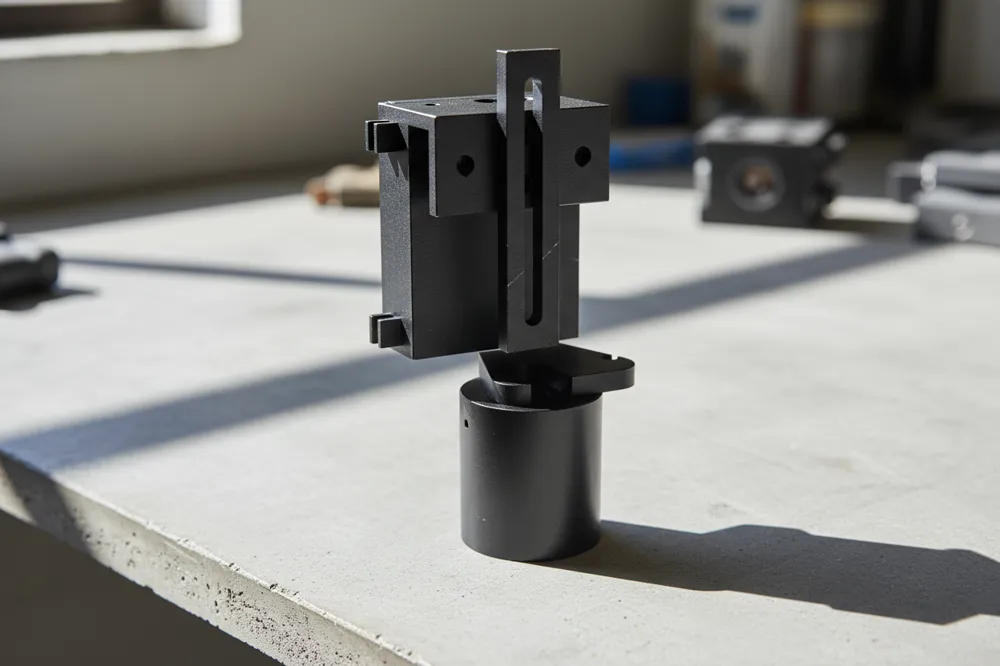
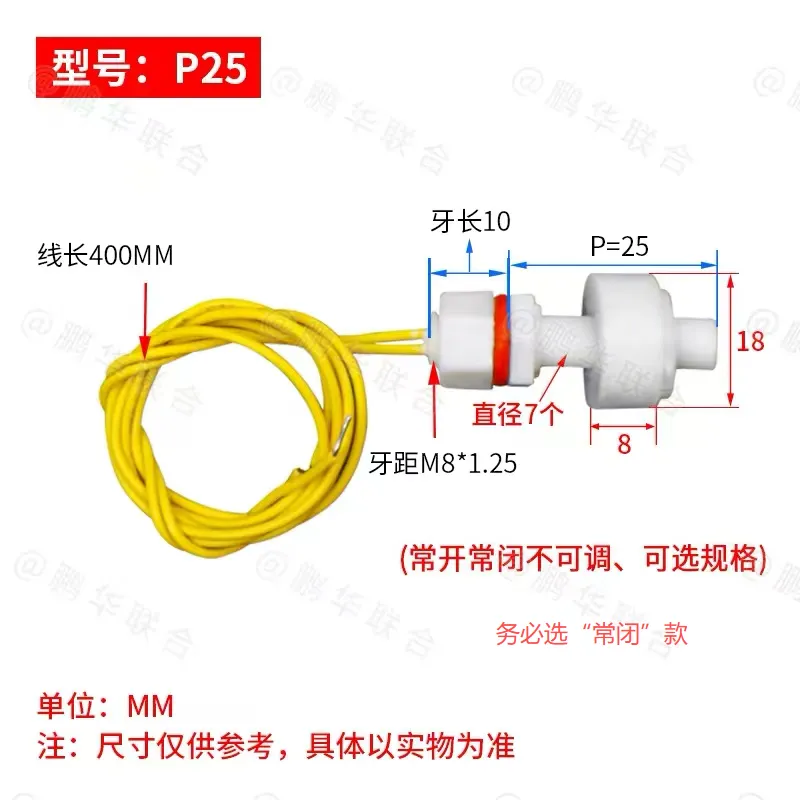
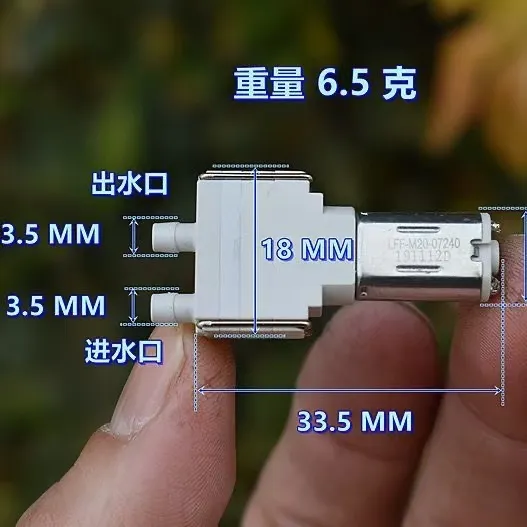
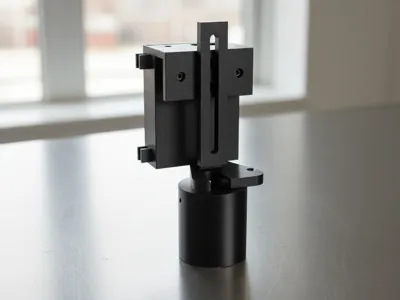
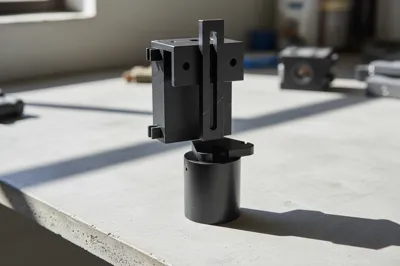
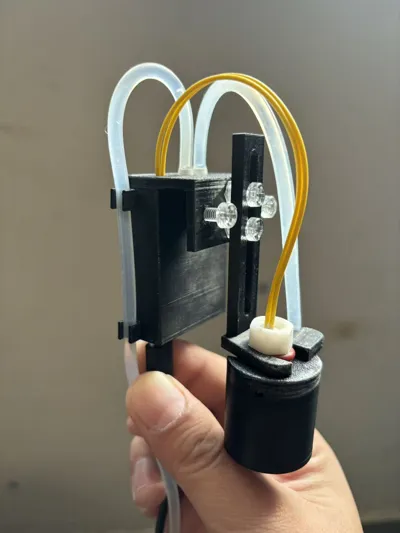
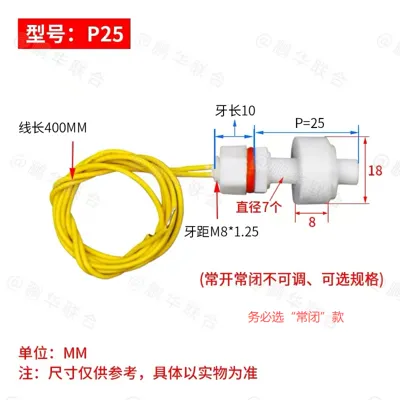
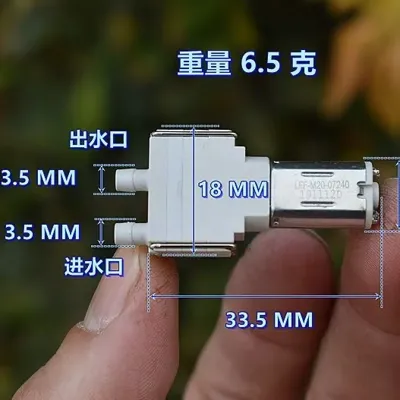
An automatic top-off enclosure kit designed specifically for desktop mini fish tanks. It automatically refills when the water level is low and stops when the desired level is reached. Compatible with 6-10mm tank walls, it uses L-shaped hooks for installation, is powered by Type-C 5V, features a built-in N20 miniature diaphragm pump, and works with an external float level switch (M8/P25) for automatic water level control. The overall unit dimensions are only 40 × 16 × 52 mm
⚠️ Electronic components need to be purchased and soldered by yourself, does not include accessories like water tubing or a water bucket
Boost Me (for free)
If you like this model or need more support, please boost me
✨ Design Features
- no supports — all round holes are designed as teardrop holes
- Fully solid wall thickness — 2.1mm / 5 walls, 0% infill means solid
- Sliding cover enclosure — back panel sliding cover, easy for maintenance and disassembly
- Wave baffle — prevents frequent sensor triggers from water surface fluctuations
- Modular — main body, sliding cover, bracket, tube clip, wave baffle are printed independently
🛒 Accessories List (with reference cost)
💡 The following are electronic/hardware components that need to be purchased separately; 3D printed parts are not included here
| No | Accessory Name | Specification | Quantity | Reference Price |
|---|---|---|---|---|
| 1 | N20 Diaphragm Pump | 3V/5V Miniature Diaphragm Pump | 1 | ¥4 |
| 2 | Type-C Female Connector | 2-Pin SMT type (10×3.8mm) | 1 | ¥0.5 |
| 3 | Float Level Switch | P25 (NC type) | 1 | ¥5 |
| 4 | Silicone Tube | Inner diameter 2mm Outer diameter 4mm | 5 meters | ¥2 |
| 5 | M4 Nylon Screw | M4 × 8 mm | 2 pieces | ¥1 |
| 6 | M4 Nylon Screw | M4 × 10 mm | 2 pieces | ¥1 |
| 7 | Heat Shrink Tubing | Ø3mm | Appropriate amount | ¥1 |
🔔 Total cost (including filament) is estimated to be around 15 CNY
🖨️ Printing Recommendations
Filament Selection
Highly recommend PETG, this device will be in prolonged contact with moisture; PLA will absorb moisture and become brittle
Slicer Settings
| Setting | Recommended Value | Description |
|---|---|---|
| Material | PETG | Mandatory. Water-resistant, temperature-resistant, good toughness |
| Layer Height | 0.20 mm | Standard precision is sufficient |
| Walls Count | 5 | ⭐ Crucial setting! 5 layers × 0.42mm = 2.1mm, the entire wall thickness will be solid walls, naturally waterproof |
| Infill | 0% | 5 walls make it solid, no infill needed |
| Supports | None | Teardrop hole design, no supports absolutely needed |
| Skirt | Auto or 5mm | Recommended to enable, increases bed adhesion |
Print Orientation
| Part | Placement Method | Description |
|---|---|---|
| Main Body | ⬇️ Upside down (top surface on bed) | Most stable, no internal supports needed |
| Sliding Cover | ▶️ Flat (outer surface facing up) | Good surface quality |
| L-shaped Bracket | ▶️ Flat | Head facing down on bed |
| Tube Clip | Any | Part is very small, any orientation works |
| Wave Baffle | ⬇️ Flange facing up | C-shaped opening facing sideways |
🔧 Installation Guide
Step One: Print all parts
- ☐ Main body × 1
- ☐ Sliding cover × 1
- ☐ L-shaped bracket × 1
- ☐ Tube clip × 2
- ☐ Wave baffle × 1
Step Two: Assemble the main body
- Install the pump — From the rear opening of the main body, place the N20 diaphragm pump into the internal frame
- Thread the wires — Thread the pump wires and float switch wires out through the wire holes in the main body
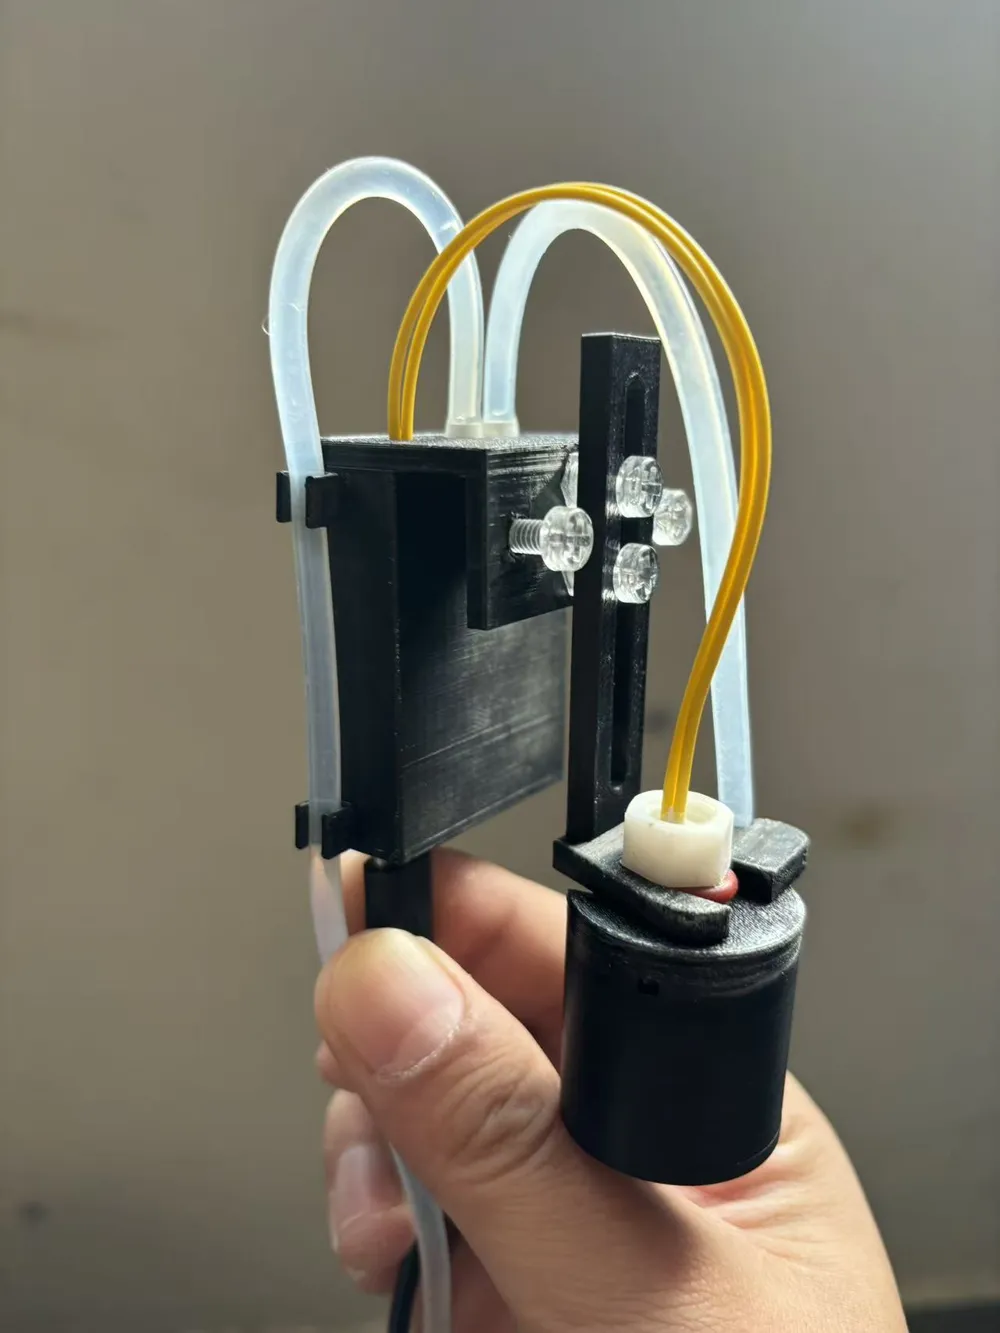
- Solder the circuit — Three components are wired in series, connections are as follows: Positive line: Type-C VBUS(+) → N20 Pump(+) Negative line: Type-C GND(-) → Float Switch → N20 Pump(-)
- Install the Type-C — Embed the soldered Type-C female connector into the bottom boss slot, secure with glue
- Close the enclosure — Organize the wiring, slide the cover from the **top** into the slot
Step Three: Install on the fish tank
There are 4 M4 screw holes on the hook baffle; before use, expand all holes with self-tapping screws:
- 1 hole on each side (26mm spacing) — for clamping the main body to the tank wall
- 2 vertical holes in the middle (10mm spacing) — for fixing the L-shaped bracket
Installation steps:
- Use an M4 self-tapping screw to screw into each of the 4 holes to expand them, then remove
- Hang the L-shaped bracket on the inside of the tank wall, align the adjustment slots with the 2 middle holes, loosely secure with nylon screws
- Install the float level switch and wave baffle on the L-shaped bracket (nut fixed)
- Slide the L-shaped bracket up and down to adjust its height so the float is at the target water level, then tighten the middle screws
- Hang the main body on the outside of the tank wall, use M4 nylon screws through the side holes to clamp and secure it to the tank wall (do not overtighten)
Step Four: Connect the tubing
- Connect one end of the silicone tube to the pump outlet, pass it through the top water outlet hole, and bend it into the tank
- Place the other end into the top-off water bucket
- Secure the tube firmly with tube clips (stick to the side of the enclosure)
Assembly Tips
- M4 screw holes are pre-drilled to 3.8mm; first, use self-tapping screws to expand the holes, then remove them and use nylon screws to fix
- Do not overtighten when screwing; stop when you feel resistance to avoid cracking the printed part
📖 Usage Instructions
Daily Use
- Plug and Play — Connect Type-C to a 5V power source (charger / power bank will work)
- Automatic Operation — Water level drops below float position → pump starts refilling → water level restores → pump stops
- Refill Bucket — Regularly check the water level in the top-off bucket, remember to add water when it's empty
Precautions
- ⚠️ The water level in the bucket should be **below** the fish tank water level to prevent siphoning backflow
- ⚠️ For first use, it's recommended to **monitor it for a while** to confirm the float switch sensitivity and refill volume are normal
- ⚠️ Regularly check the silicone tube for aging, kinking, or blockage
- ⚠️ It's recommended to cover the top-off bucket to prevent dust and insects
Troubleshooting
| Problem | Possible Cause | Solution |
|---|---|---|
| Not refilling | Float stuck / Circuit disconnected | Check if float moves smoothly, check solder joints |
| Constantly refilling without stopping | Float switch installed incorrectly (NO/NC wired wrong) | Reverse float direction or replace with NC type |
| Pump makes noise but no water comes out | Air in tubing / Pump head damaged | Re-prime and bleed air, or replace pump |
| Leaking | Tubing connection loose | Reconnect silicone tube firmly, can reinforce with zip ties |
❓ FAQ
Q: Can it be printed with PLA
A: Not recommended. PLA becomes brittle after absorbing moisture, and prolonged use near a fish tank may cause cracking. It's acceptable for temporary use, but PETG is more reliable for long-term use
Q: Is a waterproof coating necessary
A: No. A 5-wall PETG print is inherently waterproof, no extra treatment is needed
Q: Can it be adapted for larger fish tanks
A: This design is compatible with 6-10mm tank wall thickness. If the tank wall is outside this range, you'll need to adjust the hook spacing yourself
Q: How to wire the float switch
A: Very simple — the float switch is connected in series with the pump's power circuit. Low water level → float sinks → switch closes → pump powers on → starts refilling
Q: Is it noisy
A: The N20 diaphragm pump operates very quietly, similar to a phone's vibration, barely noticeable in daily use
🎣 Keeping fish should be an easy thing. Let the machine handle small tasks like refilling
License

You shall not share, sub-license, sell, rent, host, transfer, or distribute in any way the digital or 3D printed versions of this object, nor any other derivative work of this object in its digital or physical format (including - but not limited to - remixes of this object, and hosting on other digital platforms). The objects may not be used without permission in any way whatsoever in which you charge money, or collect fees.


Comment & Rating (0)