AMS Cable Management for P2S /Organizer


Print Profile(1)

Bill of Materials


Description
Boost Me (for free)
Love it? Boost it! Your support keeps new designs coming.
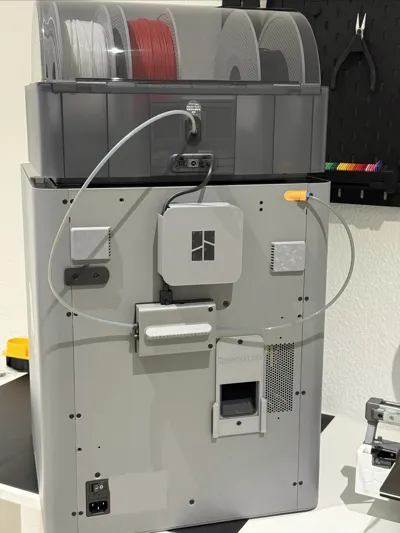
AMS cable management with magnetic attachment – modern, functional design for clean cable routing.
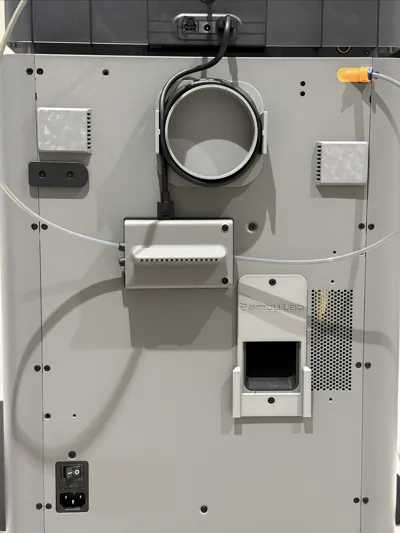
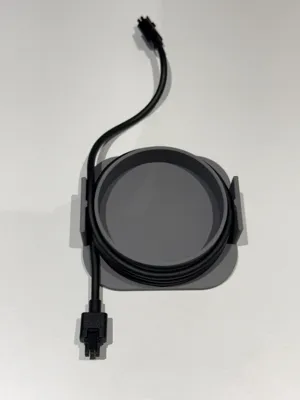
This model was developed to neatly wind and protect the AMS cable. The integrated strain relief ensures that the cable is routed without tension and is not kinked or damaged.
The round winding was deliberately chosen, as it represents the best and gentlest solution for cables.
Magnets are integrated inside. The rear panel of the printer is magnetic, allowing the cable management to be attached easily and securely with magnets – without any screws. This keeps everything tidy and always accessible.
The modern, minimalist design discreetly blends into the overall appearance of the printer and ensures a clean setup without cable clutter.
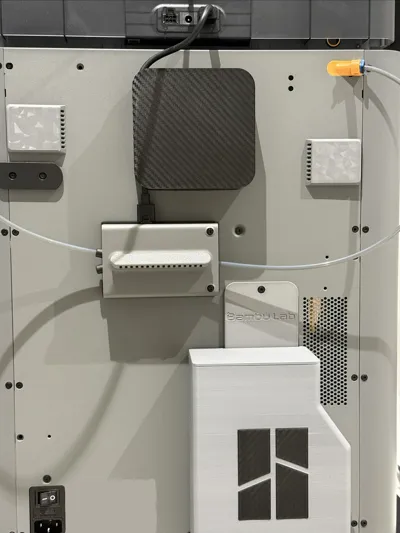
An optional cover is available:
- with logo
- without logo (will be provided later)
A simple installation guide with pictures will follow separately.
✔ Practical
✔ Cable-friendly
✔ Magnetic attachment
✔ Modern design
✔ Clean organization
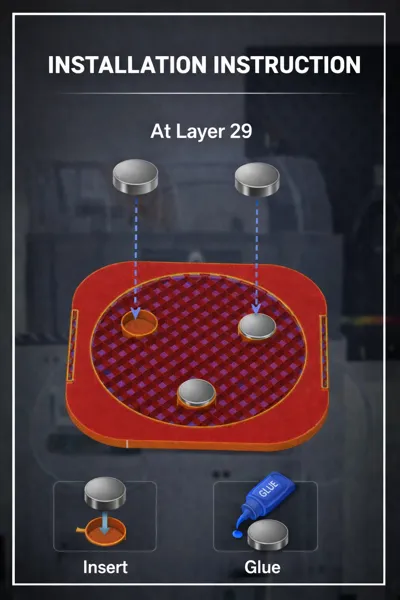
Installation Instructions:
1. Insert magnets
From Layer 29, the print will automatically pause.
During this pause, the magnets can be inserted into the designated openings or optionally
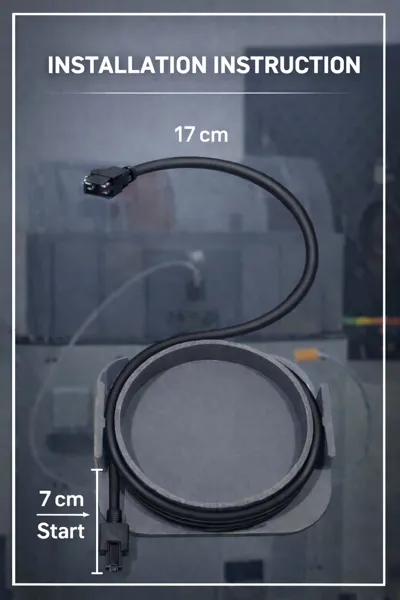
2. Prepare the cable
Place the AMS cable into the rounded guide and wind it evenly.
The integrated strain relief ensures that the cable remains free of tension.
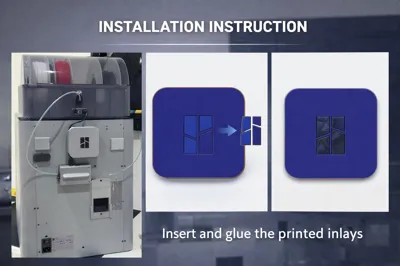
3. Mount to the printer
Attach the cable management magnetically to the rear panel of the printer.
The rear panel is magnetic, screws are not necessary.
Attach cover (optional)
Optionally, the cover can be mounted with or without a logo.
Compatible with:
- P2S / Additionally, the model is auch mit P1S kompatibel.
The mounting there is done with double-sided adhesive tape, as the rear panel is not magnetic.
A special P1S model will be released shortly. - AMS
- AMS 2 Pro
-------English-------------
AMS cable management with magnetic mounting – clean, functional, and cable-friendly design.
This model is designed to neatly organize and safely coil the AMS cable while protecting it from stress and damage. An integrated strain relief ensures the cable can be wound without tension, preventing sharp bends or wear.
The rounded cable path was chosen intentionally, as round guides are the best solution for long-term cable protection.
Built-in magnets allow easy and secure installation. Since the printer’s rear panel is magnetic, the cable management can be mounted magnetically without any screws. This keeps everything tidy, accessible, and easy to reposition.
The modern and minimal design blends seamlessly into the printer setup and eliminates cable clutter.
An optional cover is available:
- with logo
- without logo (will be provided later)
A simple installation guide with images will be added separately.
✔ Practical
✔ Cable-friendly
✔ Magnetic mounting
✔ Clean and modern design
✔ Organized cable routing
Installation Instructions:
1.Insert magnets
At layer 29, the print automatically pauses.
During this pause, the magnets can be inserted into the designated slots or optionally glued in place.
2. Prepare the cable
Place the AMS cable into the rounded guide and coil it evenly.
The integrated strain relief keeps the cable free of tension.
3.Mount to the printer
Attach the cable management magnetically to the rear panel of the printer.
The rear panel is magnetic, no screws required.
Attach cover (optional)
Optionally install the cover with or without logo.
Compatible with:
- P2S
- AMS
- AMS 2 Pro
The model is also compatible with the P1S.
For the P1S, mounting is done using double-sided adhesive tape, as the rear panel is not magnetic.
A dedicated P1S version will be released soon.


License
You may create derivative works based on this object, provided that all such derivative works are published exclusively on the MakerWorld platform and include proper attribution to the original creator. You may not share, upload, host, distribute, or publish this object—or any derivative work of this object—on any other digital platform, marketplace, or distribution channel. Commercial use of this object and any derivative works is strictly prohibited. This includes, but is not limited to, selling, renting, sublicensing, or using the object in any context in which you receive monetary compensation or other financial benefits.
Comment & Rating (74)