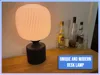
Designer Desk Lamp "FJORD"


Print Profile(3)


Description
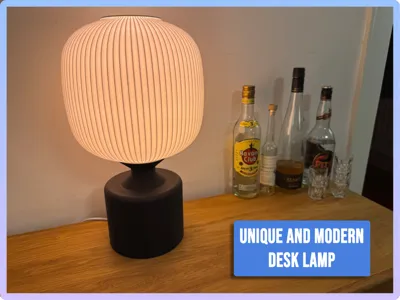
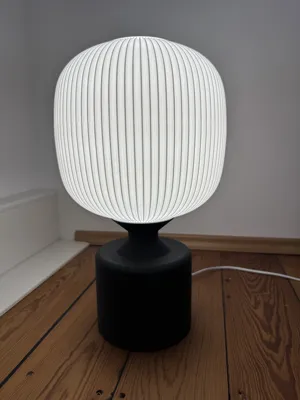
Desk Lamp “FJORD”
This project is a modern designer Desk lamp heavily inspired by scandinavian Designs. My Goal was to create a high-end, elegant lighting object.
Boost Me (for free)
You like this design? Then please give it a free Boost! This supports my work and make other designs possible - thank you :)!
Design & Style
The table lamp features:
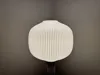
- a fan-shaped lampshade with a light, sculptural appearance,
- a solid, modern-designed lamp base, printed as one piece,
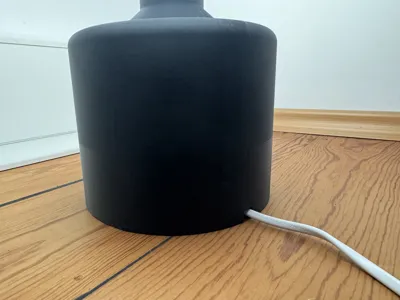
- and hidden cable routing, keeping the overall look clean and minimal.
The result is a lamp that looks like a high-end designer piece, fitting effortlessly into:
- living rooms,
- bedrooms,
- offices,
- or modern workspaces.
Despite its modern aesthetic, the lamp remains classy, warm, and timeless, making it suitable for almost any interior style.
Lampshade Versions
The lampshade is available in two different size configurations:
- Large version, compatible with H2-series print beds
- Smaller version, compatible with P1 / X1 / A1 print beds
Print Profiles & Print Quality - Please read before printing!
I provide print profiles for all parts, it is strongly recommended to use them!
They contain all critical settings required for a successful print, especially for the lampshade which is printed using vase mode.
The lampshade is a technically demanding part and requires:
- a well-calibrated printer
- a clean build plate
- a cleaned or a new nozzle!
- slow and controlled print speeds
Please carefully review and use the provided profiles to achieve the intended result.
Materials & Assembly
Only a small number of additional parts are required, such as a lamp socket, heated inserts and screws.
Assembly is designed to be simple and beginner-friendly, even for users with limited workshop experience.
- Round About 800g of Filament ( I recommend Bambu PLA Matte Ivory White or eSun Matte PLA Milky White for the lamp shades and some Black or colored matte Filament for the Base)
- Lamp Socket E27 - the Design is tested with and designed for this Model: https://www.amazon.de/dp/B01MQ140YO?ref=ppx_yo2ov_dt_b_fed_asin_title&th=1
- 3 Heated Inserts M2 (💡 This allows the socket to be screwed in and replaced later, if you dont want to screw it together you also can use glue for a permanent installation)
- 3 M2 Screws (around 10mm length)
⚠️ Important safety note:
If printed in PLA (recommended for best appearance), only LED bulbs with low heat output must be used. Do not use halogen or incandescent bulbs.
Note: I accept no responsibility for correct assembly! You are responsible for assembling the model yourself and using a high-quality socket!
Build Guide
Step 1: Printing the Parts (very important)
- Select the correct print profiles
- There are different print profiles included:
- Profiles for the lampshade (vase mode, special settings) - two profiles for the two lampshade sizes
- Profiles for the mounting parts (standard printing)
- Profiles for the Feet of the Lamp
- Please use the provided profiles, as all critical parameters such as line width, wall thickness, speed, and base settings are already optimized.
- There are different print profiles included:
- Printing the lampshade (vase mode)
- The lampshade is not printed fully in vase mode:
- The base is printed solid in normal mode
As shown in the following screenshot: Vase mode only starts with the jagged profile; the base itself is printed solidly. This means that enough lower shell layers must be added so that the base is printed solidly.

- Important settings to respect:
- Correct line width (as defined in the profile): outer Wall 0,6mm
- Slow print speed for a clean surface
- Perfectly clean build plate
- Recommendations:
- Use a new nozzle or at least a very well-cleaned nozzle
- The lampshade requires a well-calibrated printer
- The lampshade is not printed fully in vase mode:
Printing the mounting parts
- Use the included print profile.
- Ensure sufficient wall lines for strength. (4 Wall Lines recommended)
- Only little Supports are needed for the cable routing section at the bottom
- Safety note
- If you print parts in PLA (recommended for appearance), use LED bulbs only.
- No halogen or incandescent bulbs, as they generate too much heat and may deform PLA.
- Please ensure that your lamp does not become too hot.
Step 2: Preparing the socket holder (install heat-set inserts)
- Prepare the inserts
- You need 3 × M2 heated inserts.
- Heat the soldering iron
- A standard electronics soldering iron works well.
Step 3: Mounting the Lamp Socket
- Insert the lamp socket from the top into the socket holder.


Step 4: Cable Routing (important for clean appearance)
- Feed the cable through the socket holder and into the lamp base.
- Lay the cable neatly into the integrated, hidden cable channel.
- Make sure the cable is not pinched or twisted.

Step 5: Installing the Lampshade
Install the Top Ring on the Lamp Shade and secure it with a few drops of glue

- Place the lampshade onto the guide pins of the holder.

3. Add the nut that comes with the socket to secure the lamp shade

You are done! Have fun with your unique Desk Lamp!
License
You shall not share, sub-license, sell, rent, host, transfer, or distribute in any way the digital or 3D printed versions of this object, nor any other derivative work of this object in its digital or physical format (including - but not limited to - remixes of this object, and hosting on other digital platforms). The objects may not be used without permission in any way whatsoever in which you charge money, or collect fees.
Comment & Rating (1)