Segway Ninebot E2 plus ii Holder


Print Profile(1)
Description
Note:
If you want to print a different material, please adjust the print profile accordingly.
Every 3D printer behaves differently. Therefore, it may be necessary to adjust the print profile individually, for example, for support structures, temperature, print speed, or cooling.
If you have found better or optimized print settings, please make them available to everyone in the print profiles section. This way, everyone benefits.
Description
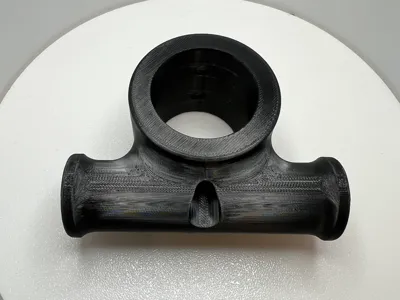
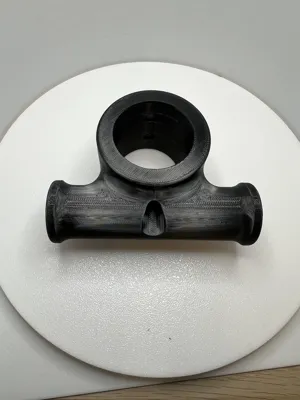
This is a 3D printed holder for the Segway Ninebot E2 Plus ii
I only provide the 3D model. You can decide for yourself which material to use for printing.
The print profile uses PETG-CF with PETG Support
The problem: If the bag is attached to the handlebars as usual, it obstructs the front light. This means you always have to remove it in the evening or at night to ride safely.
The solution:
I deliberately designed and 3D printed this model in one piece. It attaches to the original screw hole of the steering column and holds the bag so that the light remains unobstructed.
The holder is adapted for a tube diameter of 34 mm and a screw hole spacing of 20 mm. This means it might also fit other Segway e-scooters, provided the dimensions are identical.
Required Material
- 4x M6x16 dome head Allen stainless steel screws
- 4x U-washers 6.5 mm
- 4x spring washers for M6
- Threadlocker (medium strength, e.g. Loctite blue)
- Hex key
- Torque wrench
Assembly Instructions
1. Preparation
- Remove the 4 original screws from the handlebars and steering column.
- Carefully pull the handlebars out of the steering column and disconnect the connector inside the tube.
- Place the handlebars on a raised platform or soft surface, as the brake cable remains connected.
2. Insert Holder
- Slide the 3D printed holder over the steering column.
- Reattach the handlebars in reverse order of step 1.
3. Insert Screws
- Equip each screw with a U-washer and a lock washer.
- Apply threadlocker.
- Carefully insert the screws and alternately screw in only a few threads.
- Everything should be loose – do not tighten forcefully!
4. Tighten
- Tighten the screws evenly and crosswise.
- Torque: 5 Nm (for orientation: bicycles usually 6–8 Nm).
Boost Me (for free)
License
You shall not share, sub-license, sell, rent, host, transfer, or distribute in any way the digital or 3D printed versions of this object, nor any other derivative work of this object in its digital or physical format (including - but not limited to - remixes of this object, and hosting on other digital platforms). The objects may not be used without permission in any way whatsoever in which you charge money, or collect fees.
Comment & Rating (5)