Modular Exo-Skeleton Hand | With NES Power-Up


Print Profile(1)
Description
Boost Me (for free)
Boosts help me prototype and create useful and free models for the community. Please consider it. I appreciate all the love my models have been getting lately! Some folks have been asking about a commercial license—I need to hit 200 followers to unlock that feature on MakerWorld. Every follow helps and is greatly appreciated! 🤝
Easy print, Easy Assembly. AMS only required for NES controller powerup.
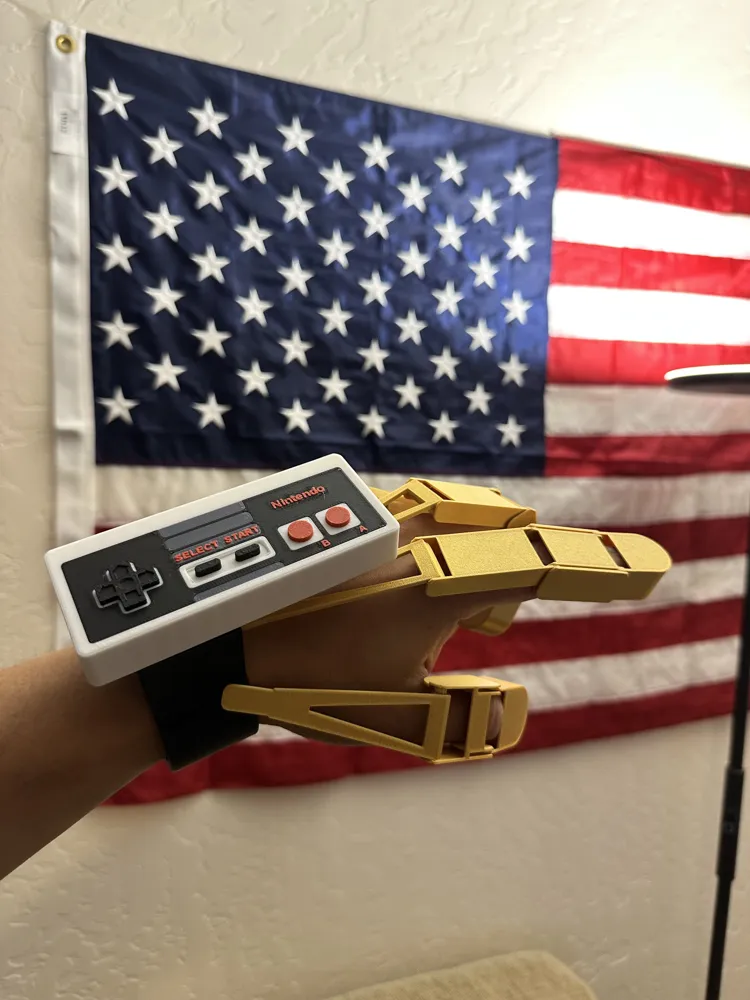
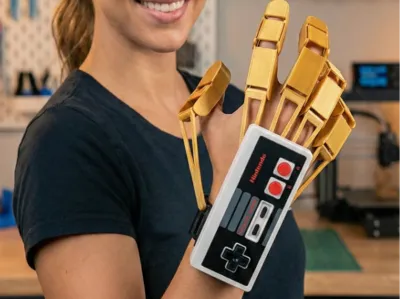
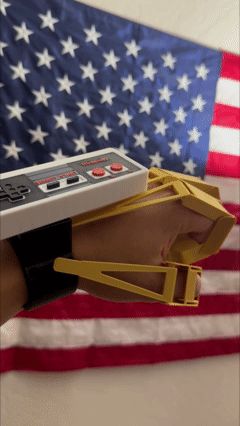
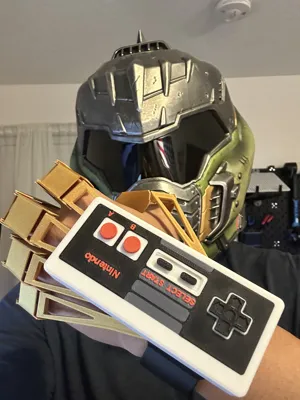
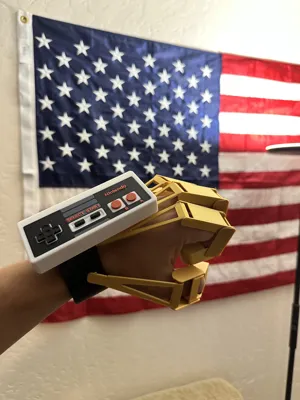
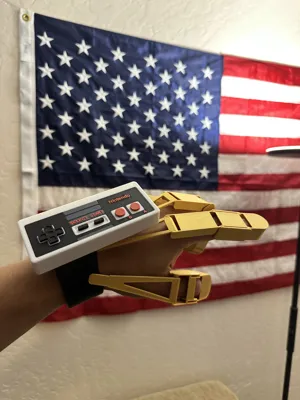
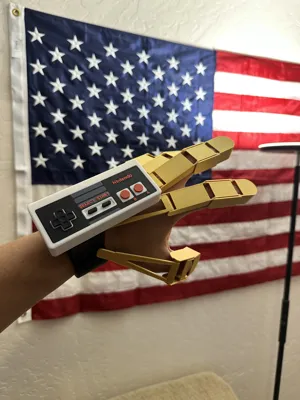
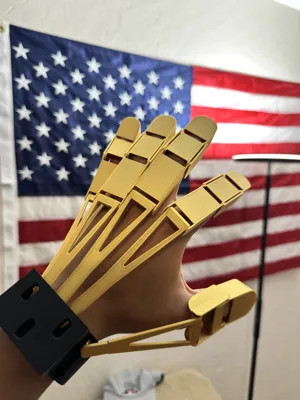
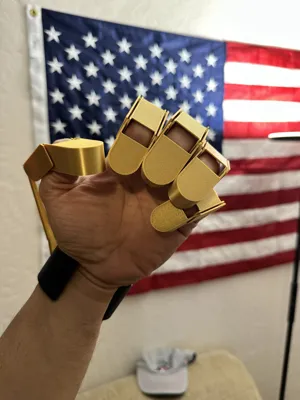
Bring your retro-futuristic dreams to life with this fully mechanical Exo-Skeleton Hand. Designed with ease of assembly in mind, this model requires zero glue and zero hardware. Everything slides, or studs into place.
Key Features:
- Print-in-Plate: All fingers are organized on a single plate for easy organization.
- Toolless Assembly: Uses a stud-and-slide mechanism for the fingers.
- Modular Design: Swap out "Power-Ups" in seconds.
The kit features a modular "Wrist Mount" system. I’ve included two versions:
- Standard Wrist Mount: A sleek, low-profile band.
- Power-Up Bracket: A specialized mount designed to host modular attachments.
The "Power-Up" Attachment: As a kid, I always imagined the legendary Power Glove looking a certain way—and even though the real thing was different, the NES controller aesthetic stuck with me. This model includes an NES Remote Power-Up that attaches directly onto the bracket, giving you that classic 8-bit mercenary look.
The Design Philosophy: I designed this hand specifically to fit a larger frame (6'3" / XL hand size). While it is built for a larger scale, the tolerances are forgiving enough to accommodate medium-sized hands. Caution: Scaling the model down significantly is not recommended, as the thin-wall design may lose structural integrity.
Material Quality Matters: Avoid using "budget" or brittle PLA for the mechanical finger components. The repeated load of the finger movement can cause lower-quality filaments to snap.
Assembly Instructions
- Choose Your Mount: Print either the Standard Wrist Mount or the Bracketed Wrist Mount.
- Attach Fingers: Slide the finger studs into the designated slots on the wrist mount in order (Thumb through Pinky). Pro-tip: Install the fingers while wearing the wrist mount.
- Mount the Power-Up:
- Insert the provided studs into the back of the NES Controller.
- Press the studs into the Wrist Mount Bracket.
- Optional: While designed for a friction fit, a small drop of superglue can be used on the power-up studs for a permanent bond.
⚠️ Caution: Version 1 Release
This model is currently in Version 1.0. While it is a fully functional, "no-glue" assembly, please consider this the first iteration of this hand exo-skeleton system.
I am actively looking for community feedback on the fit and durability. If there is enough interest, I plan to:
- Refine the Design: Improve tolerances and ergonomics based on your makes.
- Expand the Library: Release a series of new, swappable "Power-Ups" beyond the NES controller to fully utilize the bracket system.
License
You may create derivative works based on this object, provided that all such derivative works are published exclusively on the MakerWorld platform and include proper attribution to the original creator. You may not share, upload, host, distribute, or publish this object—or any derivative work of this object—on any other digital platform, marketplace, or distribution channel. Commercial use of this object and any derivative works is strictly prohibited. This includes, but is not limited to, selling, renting, sublicensing, or using the object in any context in which you receive monetary compensation or other financial benefits.
Comment & Rating (14)