BMCU Holder with Auto-rewinders - Upgrade kit


Print Profile(2)

Bill of Materials
- PC4-M10 pneumatic connectors x 4:
Description
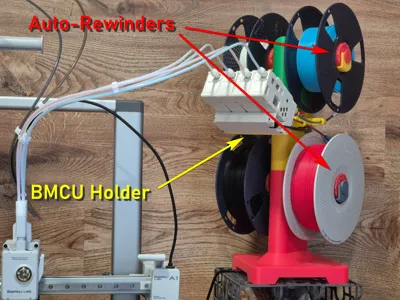
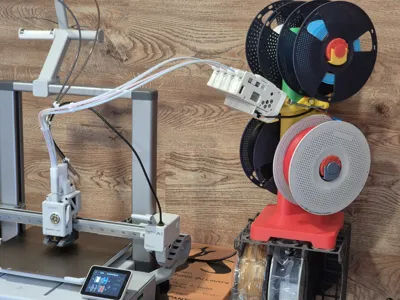
It's an upgrade kit for @Olek's Multi spooler with bearings and bmcu holder.
I liked his multispooler stand and wanted to make it more convenient for my own use. First of all, it needed auto-rewinding spool holders. Also, I didn't really like the idea of placing the BMCU upside down.
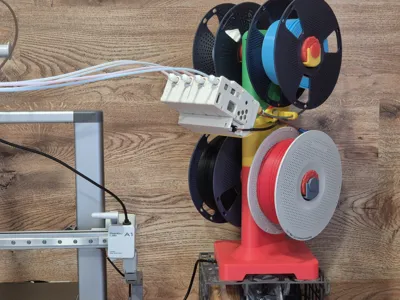
So, I designed the holders (saddles) for Phil Caruso's Auto-Rewinder Remix and an original BMCU Holder. In my version, the BMCU is mounted in its normal orientation, all four spools are positioned as shown on the printer screen for AMS-Lite, and, of course, the spools automatically rewind the filament during unloading or filament changes.
Once the entire setup had been thoroughly tested, I decided that it might be useful for anyone who has already used Olek’s Multi-Spooler Stand.
If you haven’t printed the Multi-Spooler Stand yet, you can print this Upgrade Kit along with the ‘Stand only, corrected version’ profile from Olek’s project and get a smooth-running setup.
You can apply either a partial upgrade for the Auto-Rewinders only, a full upgrade including the BMCU holder, or a full upgrade with additional TPU components. The main print profile includes three corresponding plates.
Plate 1 is required in all cases. For a partial upgrade, print only plate 1.
For a full upgrade, print plates 1 and 2.
For the full upgrade with additional TPU components, print all three plates.
Depending on your upgrade choice, print the required plates before proceeding with the upgrade process.
How to upgrade:
1. Go to Phil Caruso's Auto-Rewinder Remix, dowload and print the first designer profile ‘drum and cap and fixed spring’. You can print two sets (for the upper spools only) or four sets (recommended). I printed them in PETG, and they work as intended. |  |  |
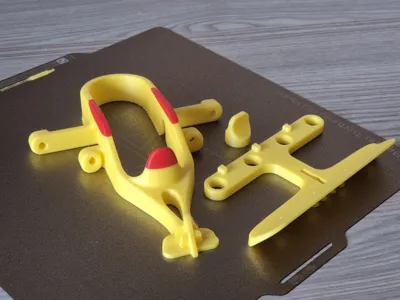
2. After printing the first plate from the current Upgrade Kit, you'll get two saddles and two sets of axles and flanges to assemble the Auto-Rewinders. If you want them for all four spools, print this plate twice. The Axle Assembly (axles and flanges) was taken from another project by Phil Caruso - many thanks to him. Assembling the springs into the drum assembly is quite intuitive, but I recommend following Phil's instructions from his project. You will need two 608ZZ bearings for each Auto-Rewinder. | 
|
|
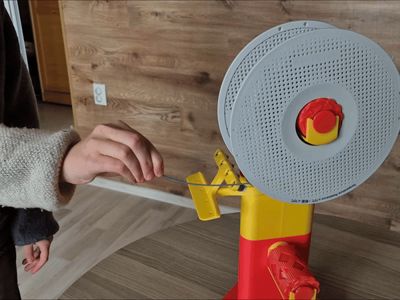
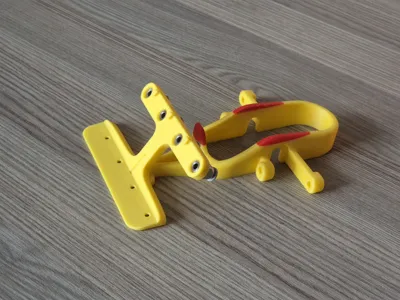
3. Replace the dowels in your Multi-Spooler with the new saddles. Use screws and nuts from your existing Multi-Spooler Stand, or, if building a new setup using the ‘Stand only, corrected version’ profile from Olek’s project, use DIN933 M8x20mm screws and DIN934 M8 nuts. Insert the Auto-Rewinders into saddles. Pay attention to the arrows on the flanges - they must correspond to the main direction of spool rotation. You can check the correct direction by hand. Congratulations! The partial upgrade is complete. |  |  |
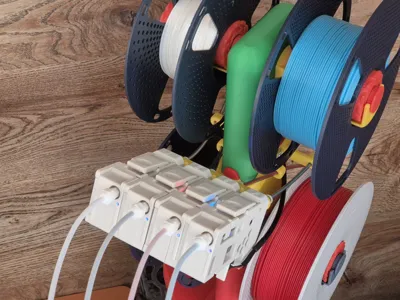
4. Going ahead with the full upgrade process. The BMCU Holder consists of two main parts (Belt and Shelf) and one additional component (Flap_Tool). There is also a socket wrench on plate 2. First, screw the pneumatic connectors into the shelf. You will need four PC4-M10 connectors. Then assemble the BMCU holder: place the shelf onto the belt guide (the guide looks like a cross when viewed from above) and press the shelf down firmly until it clicks — this may require more force than expected. It must sit securely, as shown in the video. After that, place the assembled holder onto the stand. |  |  |
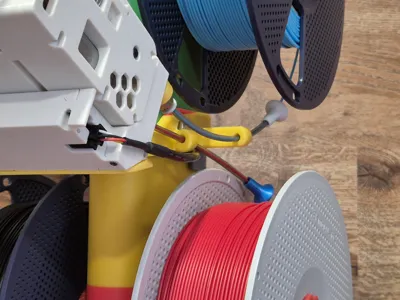
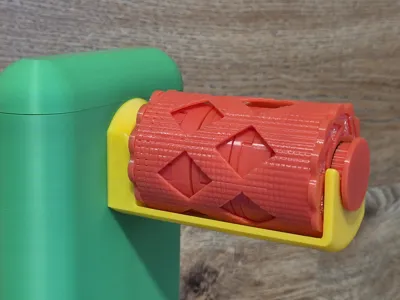
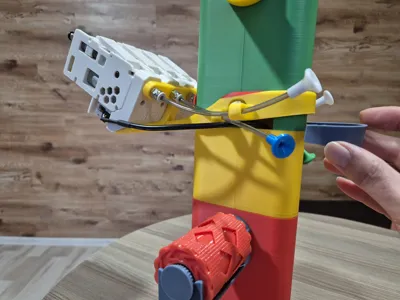
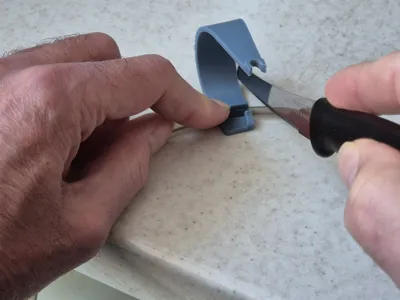
5. Cut four pieces of PTFE tube, each 12–14 cm long. To do this easily, you can use a knife and the Flap_Tool, as shown in the picture. This tool is designed specifically for clean, accurate tube cutting. The opposite end of the Flap_Tool can be used as a PTFE remoover.
Feed the tube pieces through the guide holes in the belt arms and orient them as shown in the picture. The outer tubes should point upwards, and the inner tubes downwards. Then secure them in the pneumatic connectors.
The PTFE funnels shown in the picture are optional, so I didn’t include them in this Upgrade kit. If you like them, you can get the funnels here — they really help with loading filament. |
 |

|
6. Install the BMCU onto the holder shelf, then gently lower the entire stand with the BMCU onto the table and fasten the BMCU to the shelf using the self-tapping screws provided with the BMCU kit. This holder version should fit any BMCU variant (370X, 370C, DM, Hall, etc.). If your version has only two screw holes for fixation, use those.
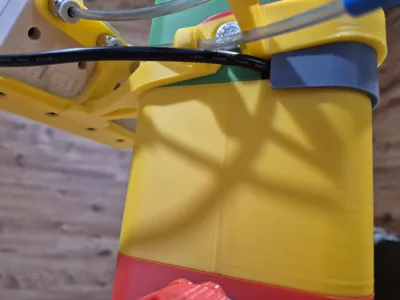
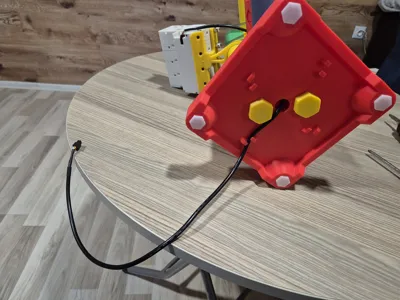
Plug in the BMCU cable, then route it through the cable channel in the stand down to the base, and secure it in the cable retainers.
Insert the Flap_Tool into place until it clicks - it should snap easily. When it is in place, it serves as a cover (flap) that protects the cable channel from dust.
Now you can connect the entire setup to the printer.
Congratulations! The full upgrade is complete.
|
  |
  |
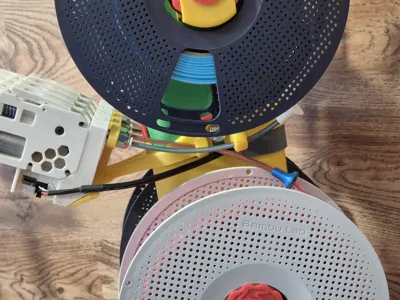
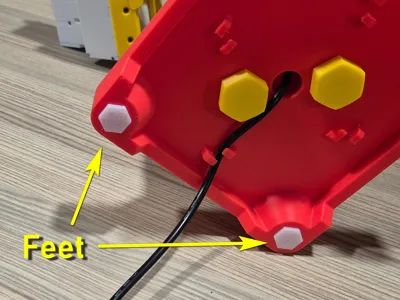
7. Additional options. If you’ve made it this far, you’ve probably chosen the ultimate upgrade with additional TPU components. As for the feet — everything is intuitive: just print them and plug them in. Regarding the TPU rings, I recommend using them for the upper rewinders only. They slightly move the spools apart and bring them closer to the outer BMCU units (1 and 4). That’s why plate 3 includes four feet but only two rings. In the pictures, you may notice printed PC4-M6 connectors in my setup. This is a deliberate replacement for the standard PC4-M6 connectors supplied with the BMCU. I’ve encountered an issue several times where the stock connectors do not allow filament to pass from the BMCU into the PTFE tube — the filament catches on the inner rim of the connector. The printed version works much better, so I replaced all four standard connectors. This applies only to connectors located at the output of the BMCU. Stock connectors work perfectly in the forward direction - from the PTFE to the thread, but do not work well in the reverse direction. |   |  
|


Additional information:
Pay attention to the project materials: please, use PLA for plate 1.
Don't print the holders (saddles) in PETG. I've received some feedback from users about the holders printed in PETG being insufficiently rigid. I recommend printing them in PLA.
On the other hand, to print the spring drum from Phil Caruso’s project, I recommend using PETG.
Good luck with multicolor and multimaterial printing!
If you like this upgrade kit, please don’t hesitate to rate it.
Boost Me (for free)
You can also boost me here — thanks in advance!
License
You may create derivative works based on this object, provided that all such derivative works are published exclusively on the MakerWorld platform and include proper attribution to the original creator. You may not share, upload, host, distribute, or publish this object—or any derivative work of this object—on any other digital platform, marketplace, or distribution channel. Commercial use of this object and any derivative works is strictly prohibited. This includes, but is not limited to, selling, renting, sublicensing, or using the object in any context in which you receive monetary compensation or other financial benefits.
Comment & Rating (57)