ADVANCED ACETONE SMOOTHING CHAMBER the safest way


Print Profile(1)

Description
Safe Acetone Smoothing Chamber – Explosion-Risk Reduced Design
This project presents a significantly safer approach to acetone vapor smoothing, designed to minimize the risk of explosion while still providing effective vapor circulation inside the chamber.
I have seen many tutorials online that use standard 12 V fans placed directly inside acetone vapor environments. These fans are not designed for explosive atmospheres, and using them this way is extremely dangerous.
As an electrician, I consider such solutions unsafe.
This design is not absolutely risk-free (nothing involving acetone vapors ever is), but it dramatically reduces the danger compared to common DIY setups.
Design Concept & Safety Principle
The system is built around two separate chambers:
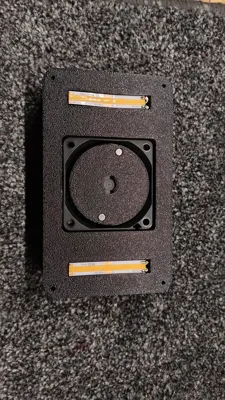
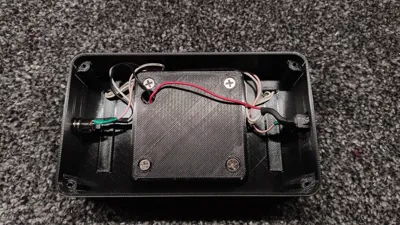
- Outer electronics box (on top)
Contains all electrical components: power, wiring, LEDs, switch, and motor. - Inner acetone chamber (below)
Contains only passive mechanical parts with no electricity inside.
Key Safety Feature: Magnetic Fan Coupling
To actively mix acetone vapors without placing electronics inside the chamber, this design uses magnetic coupling:
- The original fan blades are completely removed
- The fan rotor is smoothed and fitted with a 3D-printed rotor containing magnets
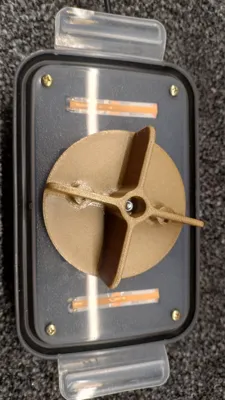
- Inside the chamber, the fan blades are mounted on a separate shaft with bearings
- Rotation is transferred only via magnetic force
➡️ No electrical sparks, no wires, no motors inside the acetone atmosphere
Materials & Printing Recommendations
⚠️ Material choice is critical when working with acetone
- Outer electronics box:
PETG is recommended (good acetone resistance for external use) - Internal fan blades:
Nylon or another acetone-resistant material is strongly recommended
PETG can work for limited use, but may soften depending on brand - Chamber box:
Must be made of a material that can withstand acetone vapors
Compatibility
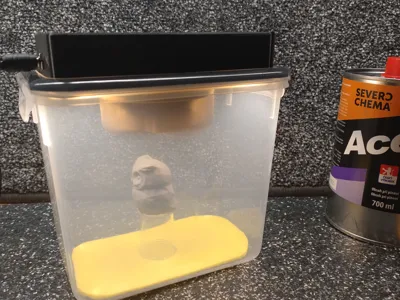
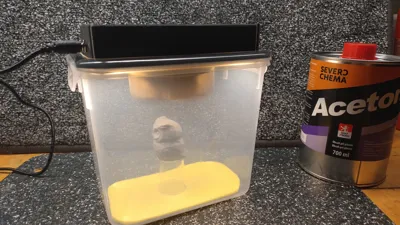
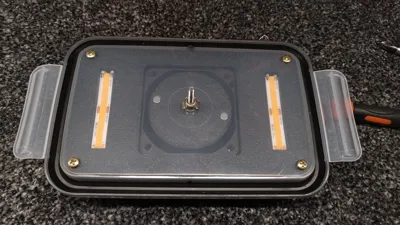
The model is designed for the storage box shown in the reference photos (from Action), but it will fit most lids of sufficiently large plastic boxes.
Installation Guide
- 3D print all parts
- Remove all supports
- Insert magnets into printed parts
- Best results are achieved when all magnets are oriented identically and the magnets are repel each other.
- Remove all blades from the fan and smooth the rotor
- Glue the printed magnetic rotor onto the fan rotor
- Install all electronic components into the printed electronics box
- Close the box using 4 small plastic screws
- Place the electronics box on the chamber lid and mark:
- 4 mounting holes
- Center hole for the M3 shaft bolt
- One small pressure-relief hole for the chamber
- First install the M3 bolt with washer and nut through the lid (fan shaft)
- Then mount the electronics box to the lid using 4 screws
- Assemble the internal fan:
- Press in two bearings from an old fan
- Secure with washers and nuts
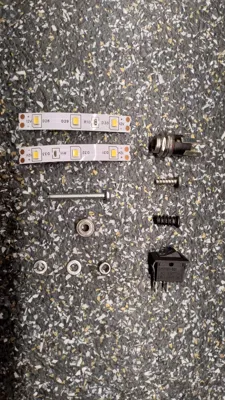
Parts List
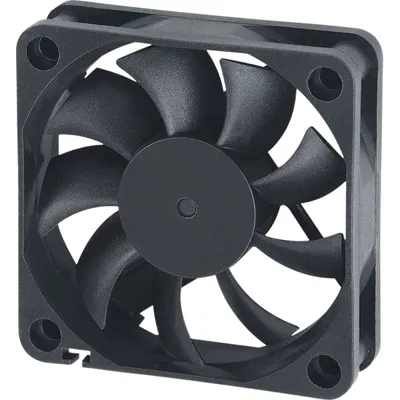
- 1x 60x60x15mm 12V brushless fan (center hub diameter 16mm)
- 4x 5x9-12mm neodymium rod magnet
- 1x M3x14mm screw for fan axle and some M3 nuts and washers
- 8x small plastic screw (3x6x12mm)
- 4x fan srew
- 1x switch 15x9mm
- 1x Panel Mount DC Jack 2.1mm
- 2x 50mm 12V led strip module (if you want light inside chamber)
- 2x small ball beranig 8x4x3mm (typicaly found i every old ball bearing 12/24v PC fan)
- 1x chamber box
- 1x 12v power supply
⚠️ Final Safety Note
This design significantly reduces risk, but acetone vapors are always hazardous.
Use only in well-ventilated areas, never near open flames or sparks, and at your own responsibility.
License
You may create derivative works based on this object, provided that all such derivative works are published exclusively on the MakerWorld platform and include proper attribution to the original creator. You may not share, upload, host, distribute, or publish this object—or any derivative work of this object—on any other digital platform, marketplace, or distribution channel. Commercial use of this object and any derivative works is strictly prohibited. This includes, but is not limited to, selling, renting, sublicensing, or using the object in any context in which you receive monetary compensation or other financial benefits.
Comment & Rating (1)