
MTG Command Station Custom Art Box: Morcant
Print Profile(1)
Description
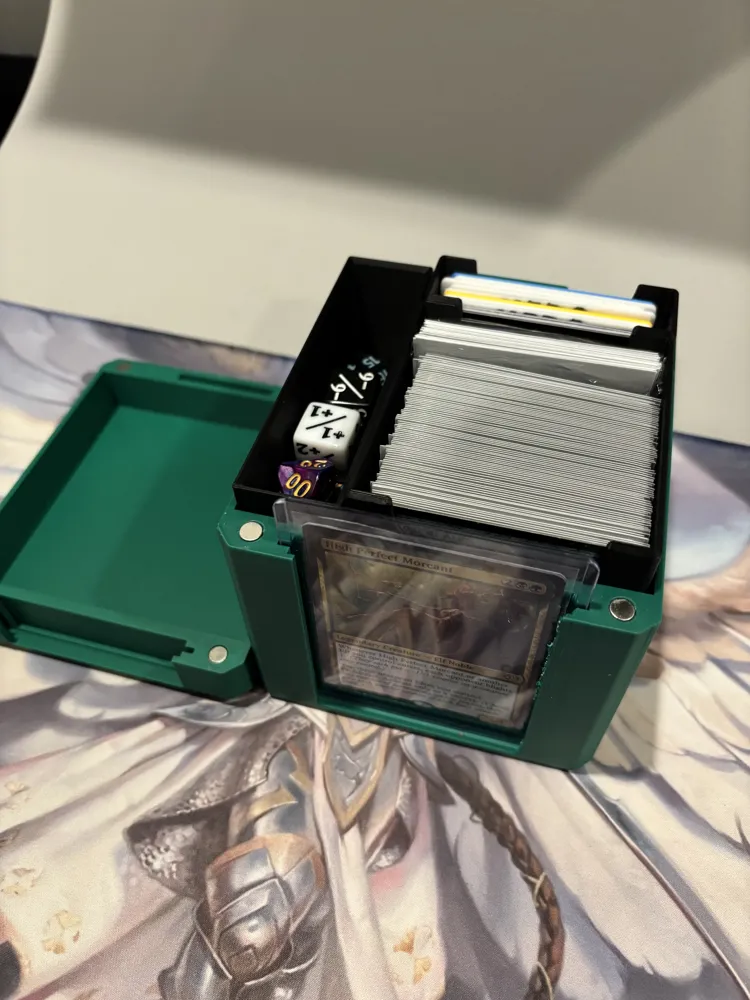
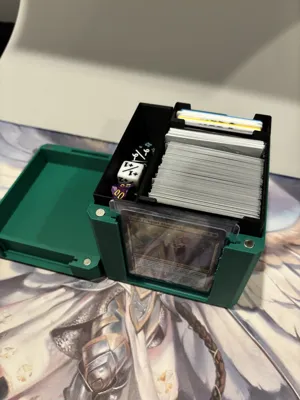
The Command Station: An all-in-one deck box designed to carry everything you need to play Commander.
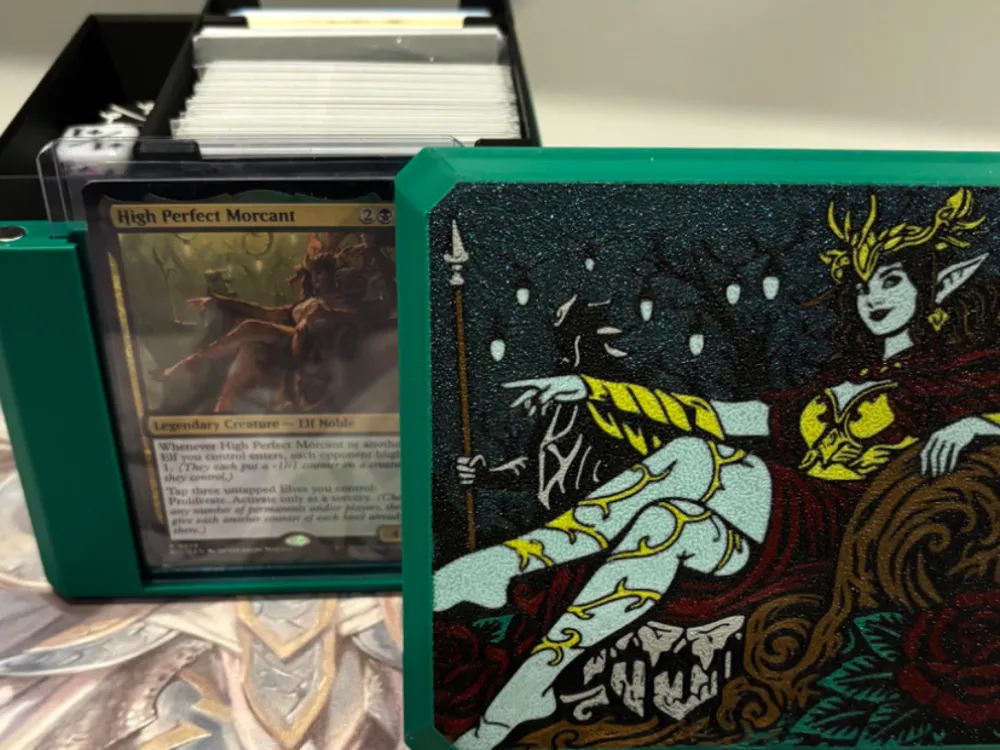
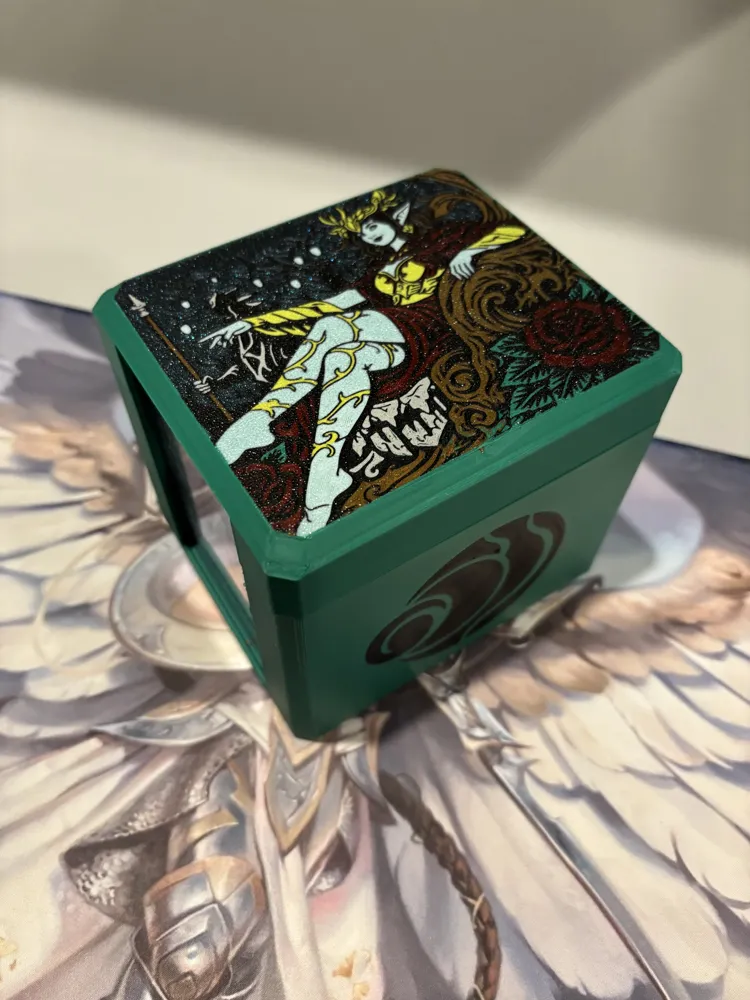
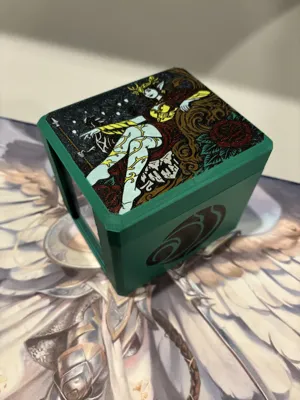
Finally getting around to building my High Perfect Morcant commander deck, and she needed a deck box. I decided to do something different and put some art on the deck box body itself. As such it needs to be printed on it's side and with supports. You could print this in a regular orientation without supports… just be prepared for a very long print time with a ton of filament wasted.
And if you need some elf tokens to go with your Morcant deck you can find those here.
Custom Art Lid - High Perfect Morcant
The image is embedded in the print file, so it's easy to customize the colors to your liking.
- Commander Display Slot
Show off your leader in style. A dedicated slot holds your commander in a toploader or mini-snap case. - Locking Dual Purpose Lid
The lid connects to the base via a rear precision fit tab and aligns cleanly with four pairs of 6mm x 2mm round magnets. The lid also functions as a convenient dice and token tray while you're playing AND as a slot to hold your commander while it's in the command zone. - Dedicated Deck Tray
Sized for 100 double-sleeved cards, your deck sits snug and protected. - Separate Token Tray
Keep your tokens, emblems, in their own compartment. The tray fits 12 of my custom tokens, or 20+ double sleeved standard tokens - Nesting Dice Trays (x2)
The nesting dice trays fit together for compact storage, perfect for dice, counters, or anything else your deck requires. Each tray will hold 12 d6 dice, or 4 spindown life counters and everything in between.
Boost Me (for free)
Like my designs? Consider sending me a boost. They keep me inspired to make more Magic: The Gathering accessories. Want to sell physical copies of my prints? Subscribe to my Patreon for a commercial license. Go to patreon.com/mtgMatt
Use Loctite or similar strong adhesive to secure the magnets.
Important Print Info:
**This is for printing the lid and making sure the detail comes through. Regular print settings are fine for the inserts and main body**
This lid will definitely print best with a .2mm nozzle, but you can print with the .4mm.
If you want to use the .4mm nozzle be sure to follow these instructions.The initial layer needs to be set to .21mm. Set the bed temperature to 65 degrees, this will make sure the fine initial layer adheres. Set the initial layer speed to 20mm/s and the initial layer infil speed to 50mm/s. Goes without saying, but make sure your plate is very clean for the lid.
No matter what nozzle you're using set the slice gap closing radius to .001.
The body and inserts will print just fine with a .4mm nozzle.
License

You shall not share, sub-license, sell, rent, host, transfer, or distribute in any way the digital or 3D printed versions of this object, nor any other derivative work of this object in its digital or physical format (including - but not limited to - remixes of this object, and hosting on other digital platforms). The objects may not be used without permission in any way whatsoever in which you charge money, or collect fees.


Comment & Rating (3)