Interchangeable Graded Card Frame


Print Profile(1)
Description
Finally, a perfect way to display your prized possessions! No longer will your 2.5”x3.5” works of fine art be stored away in a box, but rather displayed throughout your room or house!
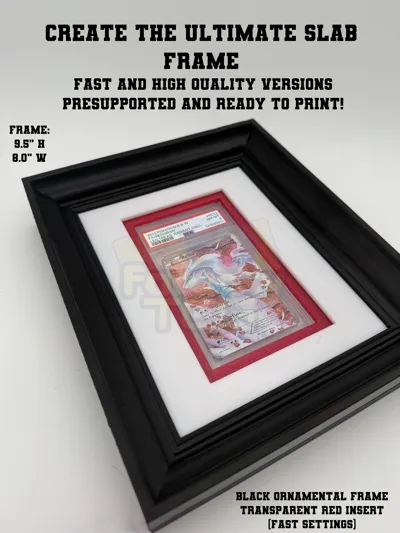
Introducing the Interchangeable Slab Frame. Designed from the ground up to be easy to print, look good, and with a cartridge system to allow you to change up colorways and slabs on the fly! The possibilities are endless for matching themes to your favorite slabs.
How to Assemble:
- Place Front Frame face down
- Place Backing Plate stepped edge facing down on top of the front frame. The Backing Plate has the stepped edge to make alignment with the front frame easy.
- Snap the Rear Frame to the Front Frame
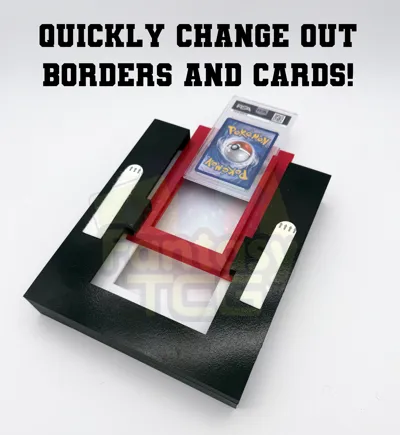
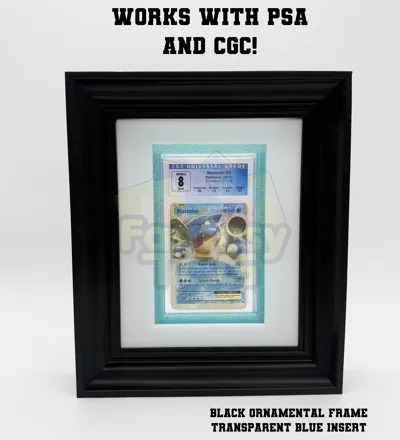
- Slide in the Slab Holder as you would a Gameboy cartridge - works with PSA (red plate) and cgc (blue plate).
- Slide slab of your choice into Slab Holder!
Each complete assembly needs the following:
1x Front Frame
1x Back Frame
1X Backing Plate
1x Slab Holder (PSA - red on plate; CGC - blue on plate)
There are two Front Frames to choose from: Basic or Ornamental if you are feeling fancy
There are a lot of optional build plates
Build plates of each for two settings: Fast or High Quality
Two frames: Basic or Ornamental
Two Slab Holders: CGC or PSA
Notes:
-Back Frame will always be printed flat.
-If printing PETG, make sure you have a clean build plate. I’ve been using a BIQU CyroGrip Pro with great results.
- Print takes around 9 hours with standard flow and 0.4 nozzle. This time is GREATLY reduced using a larger and/or high flow nozzle.
Mounting:
Walls: I use command strips or similar to mount the frame to the wall, which makes it easy to pull down if in a high, harder to reach area. This also makes the alignment of sequential frames easier. If it’s not in a high, harder to reach area, you can simply change out the Slab Holder by sliding it up and out, without removing it from the wall!
Having a hard time getting a smooth finish on the Back Plate? Be sure to check out:https://makerworld.com/en/models/398777-ironing-calibration-larger-speed-flow?from=search#profileId-300309 (not my file, but does a great job) to properly calibrate your ironing settings!
Desk: It stands upright without anything additional needed
NOTE: This is for personal use only, please do not sell (I am)
If you print this model, be sure to share your creations (and show off your graded cards)!
If you enjoyed this model please
Boost Me (for free)
If you LOVED this model and would like to buy me a coffee (decaf of course) you can donate securely through paypal at: https://www.paypal.com/donate/?hosted_button_id=AR686332S9M8U
We have quite a few more original models coming soon so make sure to follow us!
Socials:
IG: @fantasytcg
FB: Fantasy TCG
Web: fantasytcg.com
License
You shall not share, sub-license, sell, rent, host, transfer, or distribute in any way the digital or 3D printed versions of this object, nor any other derivative work of this object in its digital or physical format (including - but not limited to - remixes of this object, and hosting on other digital platforms). The objects may not be used without permission in any way whatsoever in which you charge money, or collect fees.
Comment & Rating (2)