Search models, users, collections, and posts

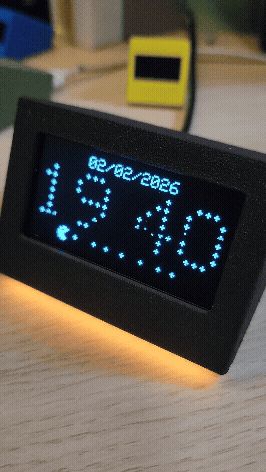
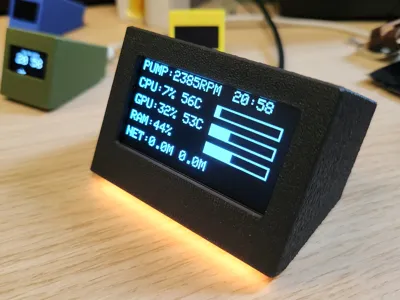
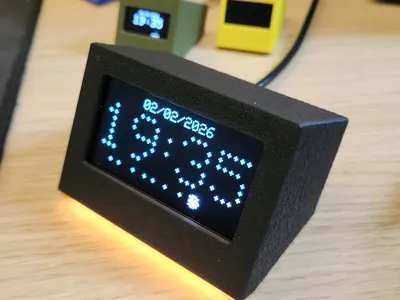
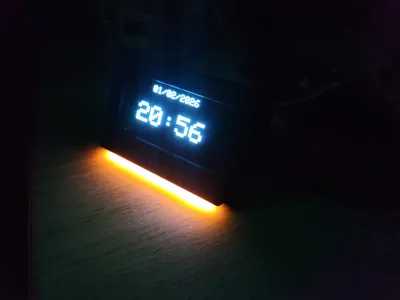
Simple 2.42" clock and PC monitor

GIF

Print Profile(1)

All
P1S
H2D
X1
H2C
X1 Carbon
A1
H2D Pro
H2S
X1E
P2S
P1P
X2D
A2L

0.2mm layer, 2 walls, 6% infill
Designer
3.2 h
2 plates
4.8(5)

Open in Bambu Studio
Boost
142
346
20
10
122
65
Released 

Description

I have designed another case for OLED.

This time it's slightly larger 2.42 oled. You can easly find it by searching “2.42" OLED SSD1309 128x64” in google.


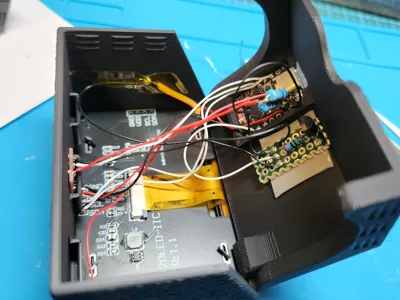
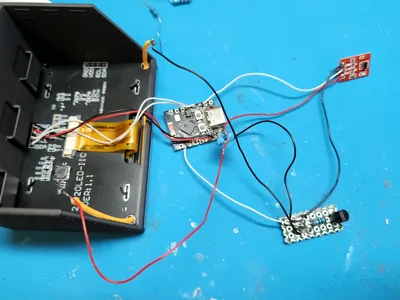
All you need to make it work is: ESP32-C3 supermini board and OLED screen.

Touch sensor TTP223 and 3v flexible led (around 60mm) is optional.


More details on how it works and how to assemble on my github:

https://github.com/Keralots/SmallOLED-PCMonitor


Print profile contains 2 versions of the case: with small 3v flexible led or no led bar.

Check my other cases for 0.96" and 1.3" oleds! 

1.3" https://makerworld.com/models/2185211

0.96" https://makerworld.com/models/2051935


Quick start:

  1. Download: https://github.com/Keralots/SmallOLED-PCMonitor/releases/download/v.1.4.2/firmware-v1.4.2-OLED_0.96inch.bin (0.96" firmware works for 2.42")
  2. Connect ESP32-C3 SuperMini to PC and go to: https://espressif.github.io/esptool-js/
  3. Click Connect, change flash address to: 0x0, choose the file downloaded in step 1, click Program
  4. Disconnect ESP32-C3 and solder 4 wires between OLED and ESP

    5. Case is easy to assemble :)

    Optional: check my Github for LED and touch sensor adding!


Comment & Rating (20)

(0/1000)

I ordered a few things from AlieExpress, including a 2.42" screen. I ordered the l2C in green, but they seem to have send me SPI with 7 connections and im guessing that is not compatible? At least from what i have been able to read up on :)
The designer has replied
1
Reply
I have added support to SPI screen already. it's in test branch and you can see the settings in user_config.h file. Send me a PM i will help you with setup.
0
Reply
Replying to @keralots :
Oh great, i missed the latest release. Thanks for the quick reply, but will see if i cant figure things out :)
0
Reply
That screen supports both SPI and I2C, depending on where are the 0ohm resistors soldered... If R8 is populated, it is SPI, if R9-10-11-12 is soldered on it is I2C. You could change them yourself if you are familiar with a soldering iron.
0
Reply
Boosted
I started with model 1.3, but I just finished version 2.42 touch. Thank you for this creation. However, for the Mario animation, it's a shame that it only appears on the "minute" change. It should have an animation like Space Invaders or Pac-Man, for example. Is it possible to display the information of Bambu printers and/or Klipper printers? Would that be an interesting additional option?
The designer has replied
Show original
0
Reply
Thank you for the feedback! Regarding the Mario animation: I need to think about how to implement a continuous animation effectively. Simply having Mario walk back and forth isn't quite as dynamic or 'interesting' as the paddle hitting the ball in Arkanoid or Pac-Man eating pellets. I'll put some thought into how to make it more engaging :) As for Bambu/Klipper printer monitoring, Bambu support is in my future plans (or might be a separate project). Thanks for the suggestions!
3
Reply
Fonctionne parfaitement
0
Reply
Print Profile
0.2mm layer, 2 walls, 6% infill
(Edited)
0
Reply
The ESP32 will create a WiFi access pointConnect to: PCMonitor-SetupPassword: monitor123Open browser to: 192.168.4.1Configure your WiFi networkThe device will connect and display its IP address. What is PCMonitor, how can I find it. I have complete loading the firmware to ESP32 C3 v.1.5.3. prompt display wifi setup ask to connect wifi pcmonitor-setup, and open 192.168.4.1. Can you help me to fix it. it is a very nice project and I would like to finish it. Is there a version with only the clock and animation fonction without PC monitor. Thanks.
0
Reply
Thank you for your quick reply. However, is PCMonitor located under Windows, or do you have a link to find it? I am new to programming and your guidance would be very helpful. Thank you
Show original
0
Reply
Print Profile
0.2mm layer, 2 walls, 6% infill
The print is very good as expected. The display has been ordered. I'm already excited. Today the display arrived and everything works perfectly. I also replaced the ESP32 module on this occasion and now I no longer have a problem with the antenna. Would it be possible to also offer DD.MM.YYYY as an option for the date format?
(Edited)
Show original
1
Reply
The Firmware and everything works great! I had some issues with the Wifi during building, but thanks to the great documentation, it didn´t take long to resolve. My only critique is that, I can´t fit the ESP32 into the case. I tried melting and cutting some plastic and it just doesn´t fit. Maybe because of that, everytime I try and close the case, it just doesn´t work. I am now using it without the case on the back, I don´t really see it so still looks good! Great first soldering project!
0
Reply
I admire your creativity The case is designed with great precision and the animated clock is really nice Congratulations
Show original
0
Reply
Would it be possible to share some links to the components? I would like to do your project as a beginner project for myself, so I am not yet familiar with it
Show original
0
Reply
Print Profile
0.2mm layer, 2 walls, 6% infill
I love it, as soon as I finish it I will upload a photo, thank you
Show original
0
Reply

License

This user content is licensed under a Standard Digital File License.

You shall not share, sub-license, sell, rent, host, transfer, or distribute in any way the digital or 3D printed versions of this object, nor any other derivative work of this object in its digital or physical format (including - but not limited to - remixes of this object, and hosting on other digital platforms). The objects may not be used without permission in any way whatsoever in which you charge money, or collect fees.