Center Point Finder

Print Profile(1)

Description

Congratulations on finally discovering FunOrNothing :)
This model is a completely new, innovative Center point finder.
(But then I found out that there was a similar commercial product after I posted this.)
Conventionally, to find the center point of a circular cross-section, a centerline finder was used to mark at least two centerlines, and then the intersection of those lines was used to determine the center point.
However, this method can incur errors depending on the type of tool or marker (writing instrument) used.

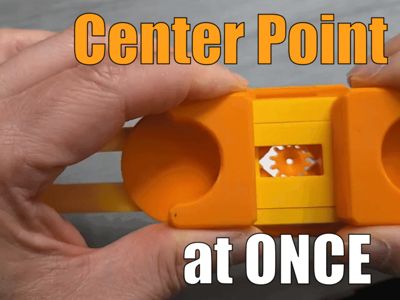
This device accurately locates the center point of a circular cross-section with a single use (measuring range: 15 mm to 130 mm in diameter).

Another thing is that this device can instantly find the center point of any cross-section that is symmetrical about both the x-axis and y-axis, such as a circle, a square, or a hexagon.

It can also be used to find the center of a side of a piece of lumber with both edges parallel.

After I made this and showed it to people, someone told me there was a similar product, so I looked it up.
https://bridgecitytools.com/products/cs-3-centerscribe?keyword=CENTER
It was both bad news and good news for me that a device similar to my design was available as a commercial product.
It was bad news that my design wasn't the first, but it was good news that there was at least a demand for such a device.

If you have the money, this product looks good.
But we can afford to buy a printer, but we can't afford to buy these tools. :)
Boost Me (for free)
Your boost helps me spend more time creating better designs. And don’t forget to check my other models — you might discover something useful! 😊
Assembly method
- Position the gear between the two rails and assemble by simultaneously pushing the rails toward the center from both sides.


2. Assemble measuring plate A.

3. Assemble Handle A. (We recommend using adhesive. When using adhesive, be careful not to get it on the sliding area.)


4. Insert measuring plate B.

5. Assemble handle B. (Using adhesive is recommended.)

6. After the adhesive used in the above step has dried sufficiently, turn the device over and push it from both sides to make it look like the picture below.

7. Assemble the anti-separation block as shown in the photo. (Use adhesive.)

Congratulations, your assembly is complete.

Hope you Enjoy this model.
As always, I welcome your feedback.
Click to Check out FunOrNothing's interesting designs.
Boost Me (for free)
Your boost helps me spend more time creating better designs. And don’t forget to check my other models — you might discover something useful! 😊
Membership
The best way to support my work is to join the FON membership. You can be my Supporter, Seller, or Partner. If you join the membership, you can communicate more closely with me through Discord.
You can be a friend who encourages me by buying me a cup of coffee.

License
You shall not share, sub-license, sell, rent, host, transfer, or distribute in any way the digital or 3D printed versions of this object, nor any other derivative work of this object in its digital or physical format (including - but not limited to - remixes of this object, and hosting on other digital platforms). The objects may not be used without permission in any way whatsoever in which you charge money, or collect fees.
Comment & Rating (66)