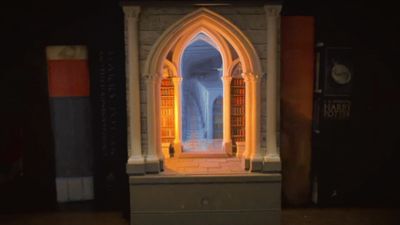
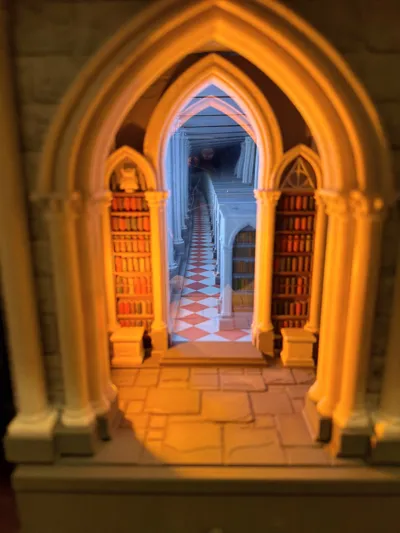
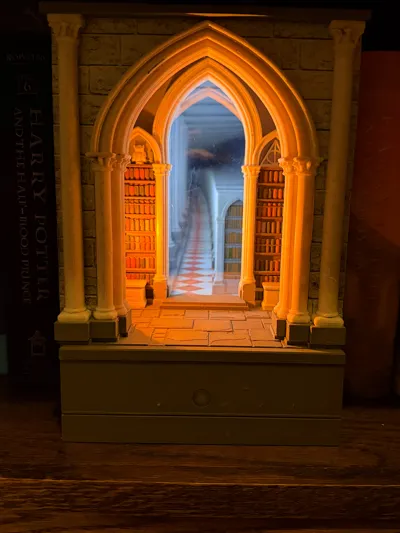
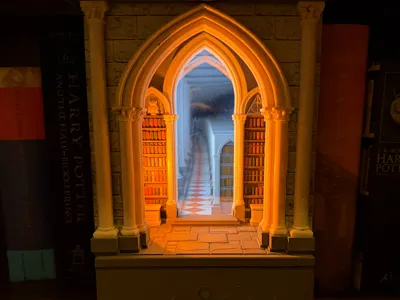
The Infinite Archive - Gothic Infinity Book Nook


Print Profile(2)

Bill of Materials


- One way mirrors x 1: 2mm thick, cut to size
- Two way mirrors x 1: .75mm thick (.04 inch advertised) or 3mm thick works, print appropriate side wall plate
- Fire flame led x 1: bare wires, needs a PH2.0 wire in addition
- Power bank or external USB power source x 1: either use a battery or shore power
- USB motion sensor switch x 1: optional
Description
📖 Description
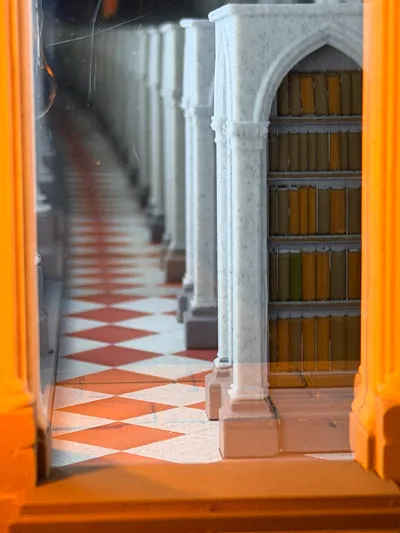
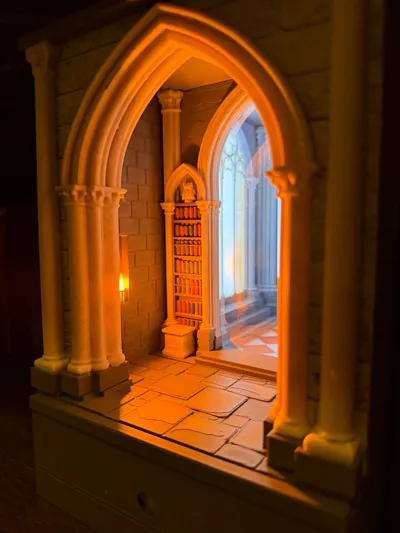
The Infinite Archive is a gothic-inspired book nook that creates the illusion of a vast, endless library using an infinity mirror effect. Stone arches, repeating corridors, and carefully layered depth draw the eye far beyond the physical limits of the shelf. A large gothic window acts as the primary light source, glowing through transparent PLA and backlit by a hidden lithophane LED panel, while a subtle flame wall effect positioned below the panel adds warmth and movement deeper in the scene. Concealed wiring paths, an integrated electronics drawer, and internal mirrors keep the exterior clean and architectural while supporting multiple lighting and power configurations.
📐 Overall Dimensions
- Width: 162 mm
- Height: 240 mm
- Depth: 230 mm
🏗️ Design Highlights
- Infinity mirror illusion for deep visual depth
- Gothic stone architecture with repeating arches
- Large gothic window backlit using transparent PLA
- Lithophane LED panel hidden behind the window
- Flame wall effect positioned below the lithophane panel
- Integrated rear drawer for power bank, motion sensor, and wiring
- Vented top lid for hot-air exhaust only
Optional motion sensing and flame lighting
🛠️ Build Instructions
This project supports two build paths. Decide which configuration you want before printing or purchasing electronics.
Step 1 — Choose Your Build Configuration
Option A: Motion Sensor Build
- Automatically turns on when someone approaches
- Requires a motion sensor and additional wiring
- Best used with continuous power (wall power or a power bank without auto-shutoff)
Option B: Manual / Always-On Build
- Uses a simple USB power switch
- Fewer components and simpler wiring
Drawer faces with and without a motion sensor hole are included.
Step 2 — Acquire Materials
In addition to printed parts and electronics, you will need:
- Cyanoacrylate (super glue)
- Used for recommended and optional structural bonds
📦 Non-Maker Supply Parts
Acrylic Mirrors (Required)
Back and side walls
https://www.amazon.com/dp/B09Q89PNRL
Two-Way Mirror (Required)
Installed just beyond the main hall archway
https://www.amazon.com/dp/B0DHGW55KG
USB Power Bank (Optional)
https://www.amazon.com/dp/B0FPYH58CJ
⚠️ This power bank auto-shuts off after ~1 minute and defeats motion sensing.
Use wall power or a different power bank for motion-sensor builds.
Flame Light (Optional)
https://www.amazon.com/dp/B0G6YRNMJ8
Motion Sensor (Optional)
https://www.amazon.com/dp/B07FLPSL48
🧩 Maker Supply Parts
USB-A to PH2.0 Cable
(Required only for motion-sensor builds)
https://us.store.bambulab.com/products/usb-a-power-cable-with-ph2-0-connector?id=42122946445448
Lithophane LED Backlight Board Kit
(2-piece kit; only one panel required)
https://us.store.bambulab.com/products/lithophane-led-backlight-board-kit?id=42816246907016
Includes:
- USB inline power switch
- USB-A to PH2.0 cable
Optional Extra PH2.0 Wire (to avoid cutting)
https://us.store.bambulab.com/products/100-mm-wire-pair-with-ph2-0?id=42123210031240
🪞 Acrylic Mirror Cutting & Fit
Cutting Methods
- Guillotine paper cutter
- Utility knife + straight edge (score and snap)
Back Mirror
- 150 mm × 180 mm
- thickness advertised 2 mm, measured ~1.5 mm
Side Mirror
- 116 mm × 180 mm
- Same thickness as back mirror
Front Two-Way Mirror
- 131 mm × 180 mm
- Advertised 0.04 in thick, measured ~0.75 mm
- Optionally you may use a 3mm thick two way mirror and print the appropriate side-wall plate in the print profile
The body supports mirrors up to 3 mm thick.
For thicker material, cut mirrors slightly narrower to fit the recessed pocket.
🖨️ Printing Order
Primary Structure
- Body
- Lid (vented)
- Drawer
- Drawer Face (with or without sensor hole)
Infinite Interior
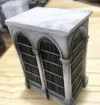
5. Infinite Bookshelf
6. Infinite Floor
7. Infinite Column
8. Infinite Window
Main Hall & Facade
9. Main Hall
10. Front Facade
11. Lobby Floor
12. Side Walls (one with fire slit) Choose the appropriate plate for the thickness of your two way mirror
🧪 Adhesive & Assembly Notes
Super glue is used selectively. Many parts press-fit or hold in place with clear tabe, but adhesive improves durability.
Recommended Glue Joints
- Drawer → Drawer Face
- Front Facade → Lobby Floor
Optional Glue Points
- Lobby Floor → Body
- Side Walls → Body
- Back Mirror → Body
- Side Mirrors → Body
- Infinite Floor → Interior
- Infinite Bookcase → Infinite Floor (seats in a shallow recess)
- Infinite Column → Interior
Do NOT Glue (unless you really want to)
- Lid
- The lid is intentionally removable for servicing electronics or wiring.
🎨 Filament & Color Guide (as used)
Structural / Stone
- Bambu Basic Black
- Panchroma Matte Fossil Grey (box & lid)
- Elegoo Marble Cement Grey (walls / light floors)
- Amolen PLA Marble Cement Grey (dark floors)
Marble
- Geeetech Marble Brown (exterior)
- Bambu White Marble (interior / infinity room)
Window (Required)
- Bambu Translucent PLA — Mellow Yellow
Accents
- Panchroma Starlight Mars (red floor)
Books
- Amolen Olive Green
- Amolen Red Wood
- Bambu Basic Brown
- Greys for variation
More colors = longer print time.
Users may reduce colors for faster prints.
🧠 Final Notes
- Transparent PLA is required for the gothic window
- Lid venting is for hot-air exhaust only
- Electronics remain hidden but accessible
- Multiple lighting and power configurations are supported
Thanks to the great tools @ Makerlab
- Powered by MakerWorld-Chroma Canvas (https://makerworld.com/makerlab/chromaCanvas)
- Powered by MakerWorld-Image-to-3D (https://makerworld.com/makerlab/imageTo3d)
🔧 Assembly
Prepare your path
Wiring with sensor. The flame LED from Amazon comes with bare wires, I connected them to a PH2.0 wire I sacrificed from the backlight kit. You can also order one by itself to sacrifice. Use the drawer face with hole

Wiring without sensor
If you dont want the motion sensor, you can just use the switch that comes with the backlight kit. Use the drawer face with no hole

Place the power bank and sensor/wires in the drawer, pull the wire through the hole of the floor. Unfortunately this power bank will shut down after some time. The motion sensor works great with continuous power, there may be alternate batteries that do not intelligently shut off.

Step 2
Use one or twoM2.6mm screws and mount the led panel into provided slot. Note there are mounts for the power distribution board for potential future expansion
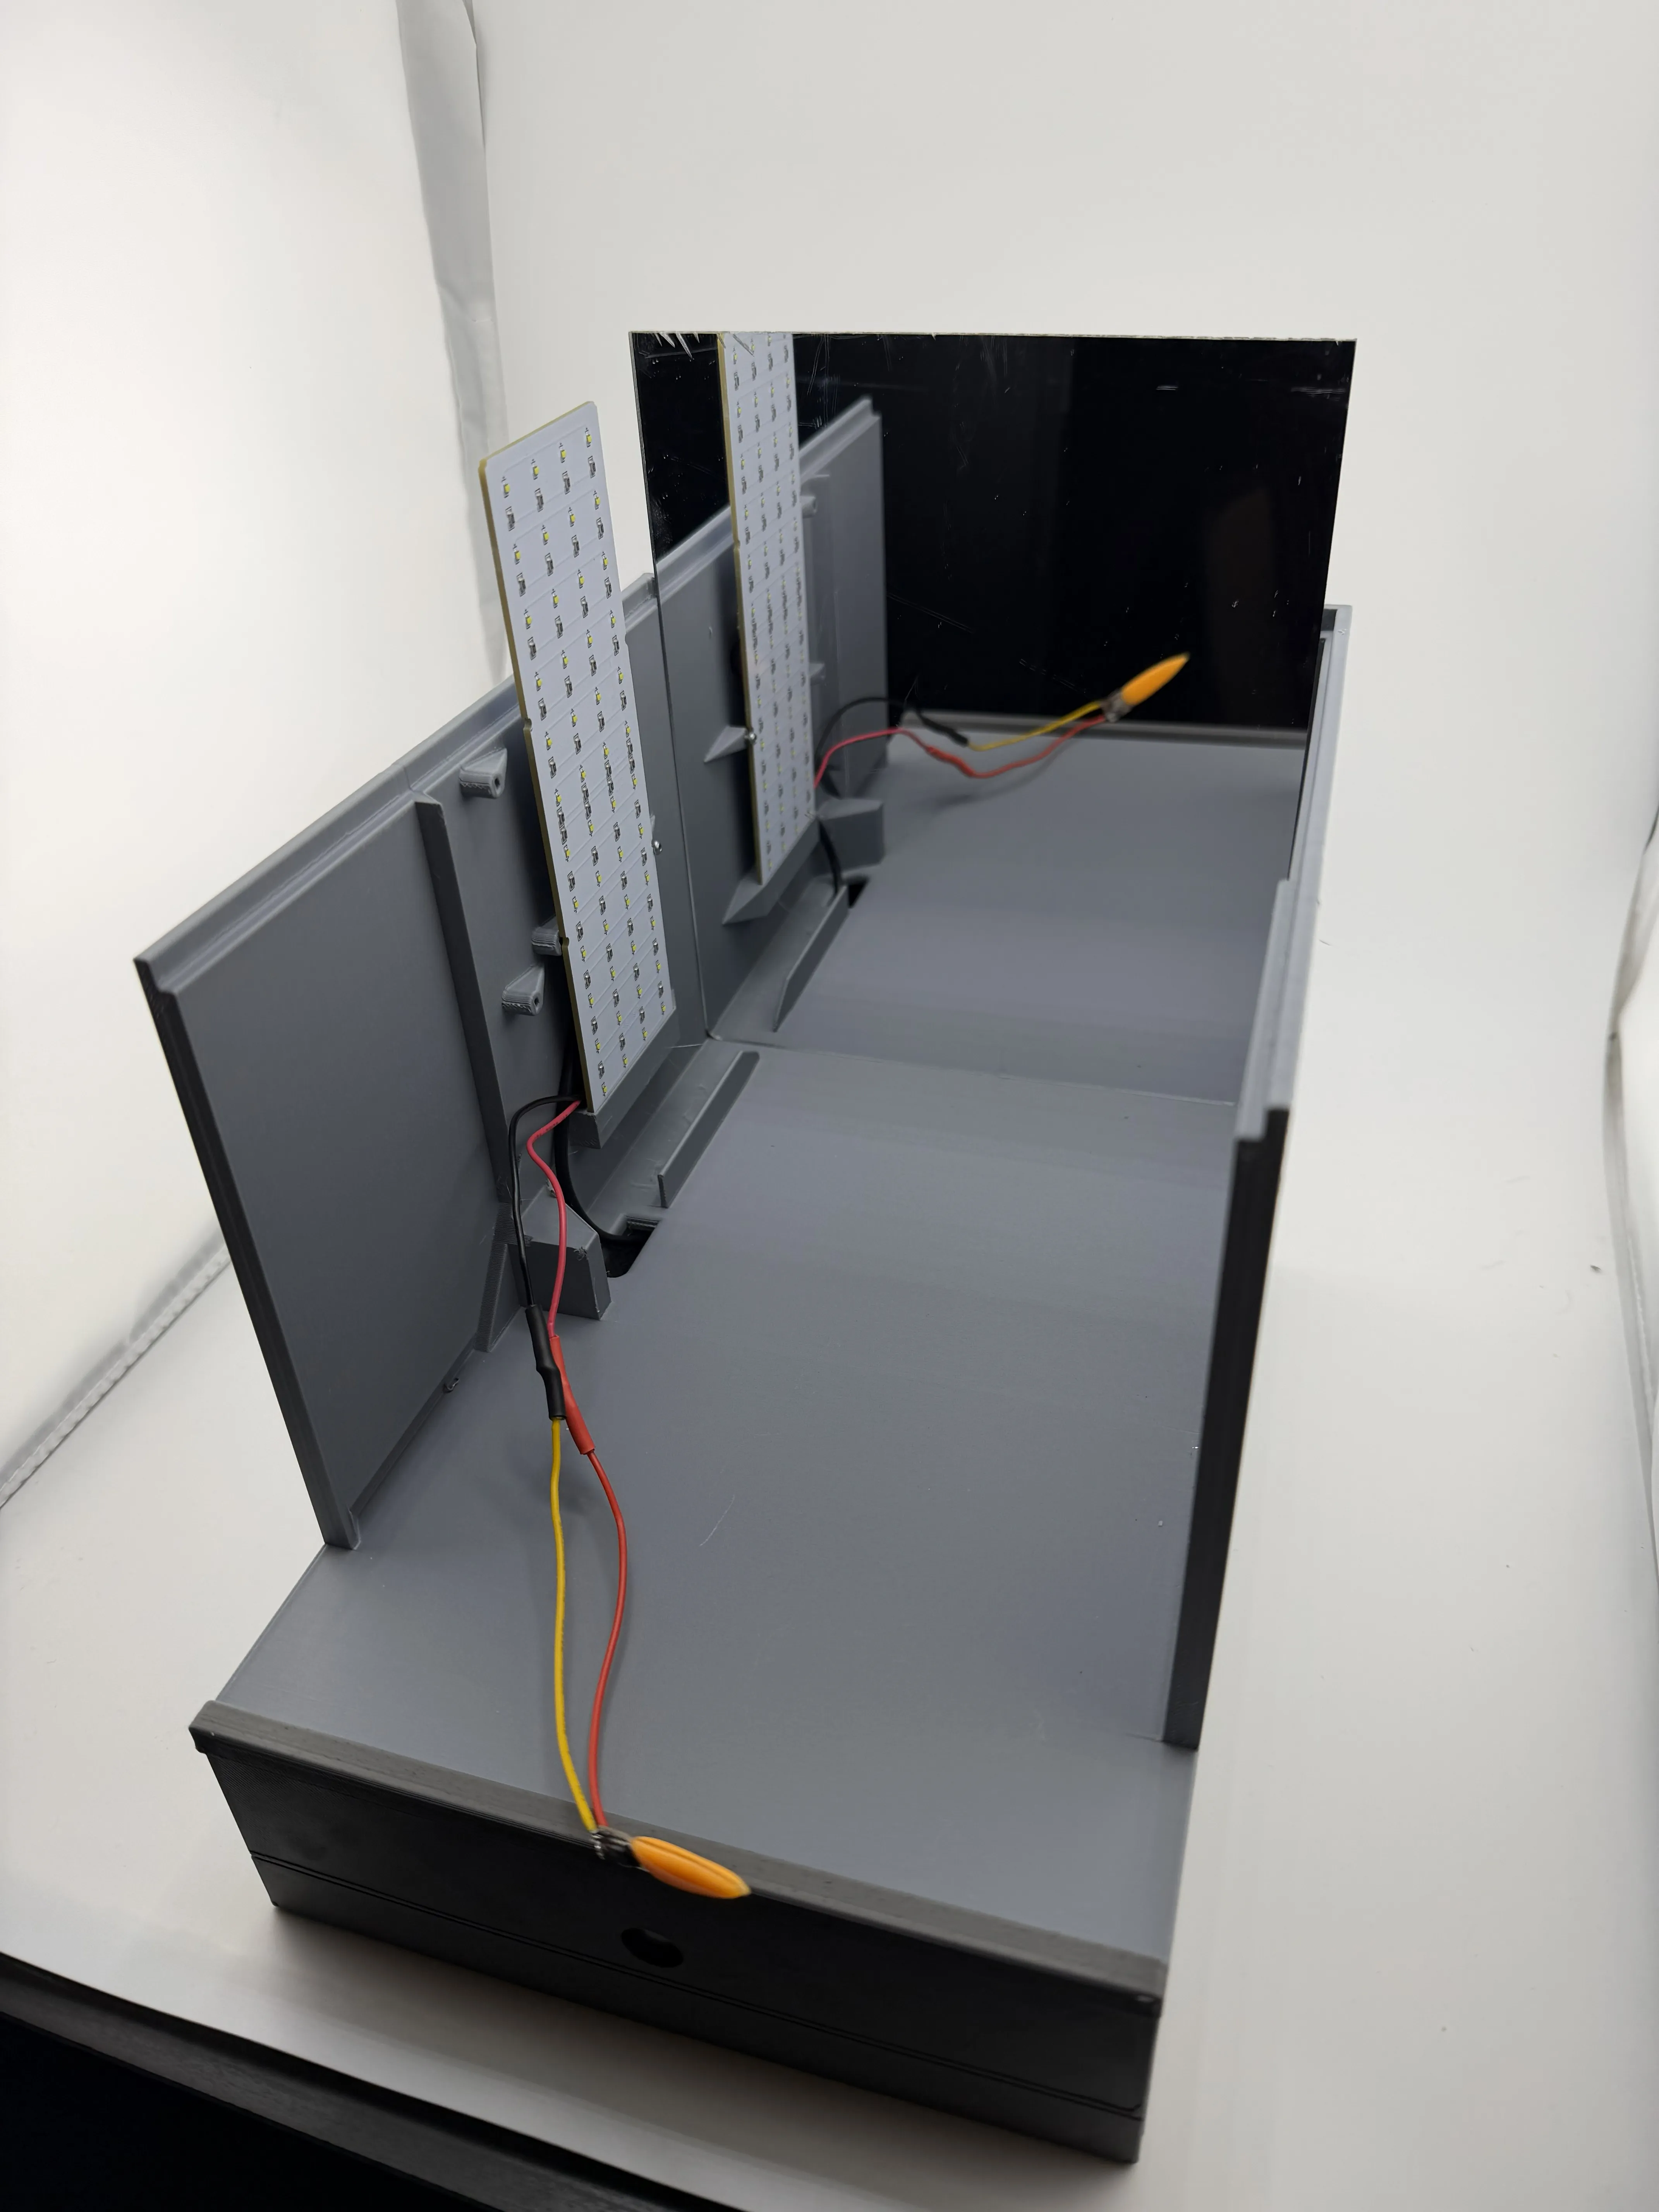
Step 3 placing mirrors
These mirrors are advertised as 2mm, but they measure to about 1.5mm there are slots in the walls to handle up to 3mm thick
tape is useful to keep things from moving, glue can work as well.

Step 4
window wall placement
tape is useful to keep things from moving, glue can work as well.
Step 5
infinite floor placement

Step 6
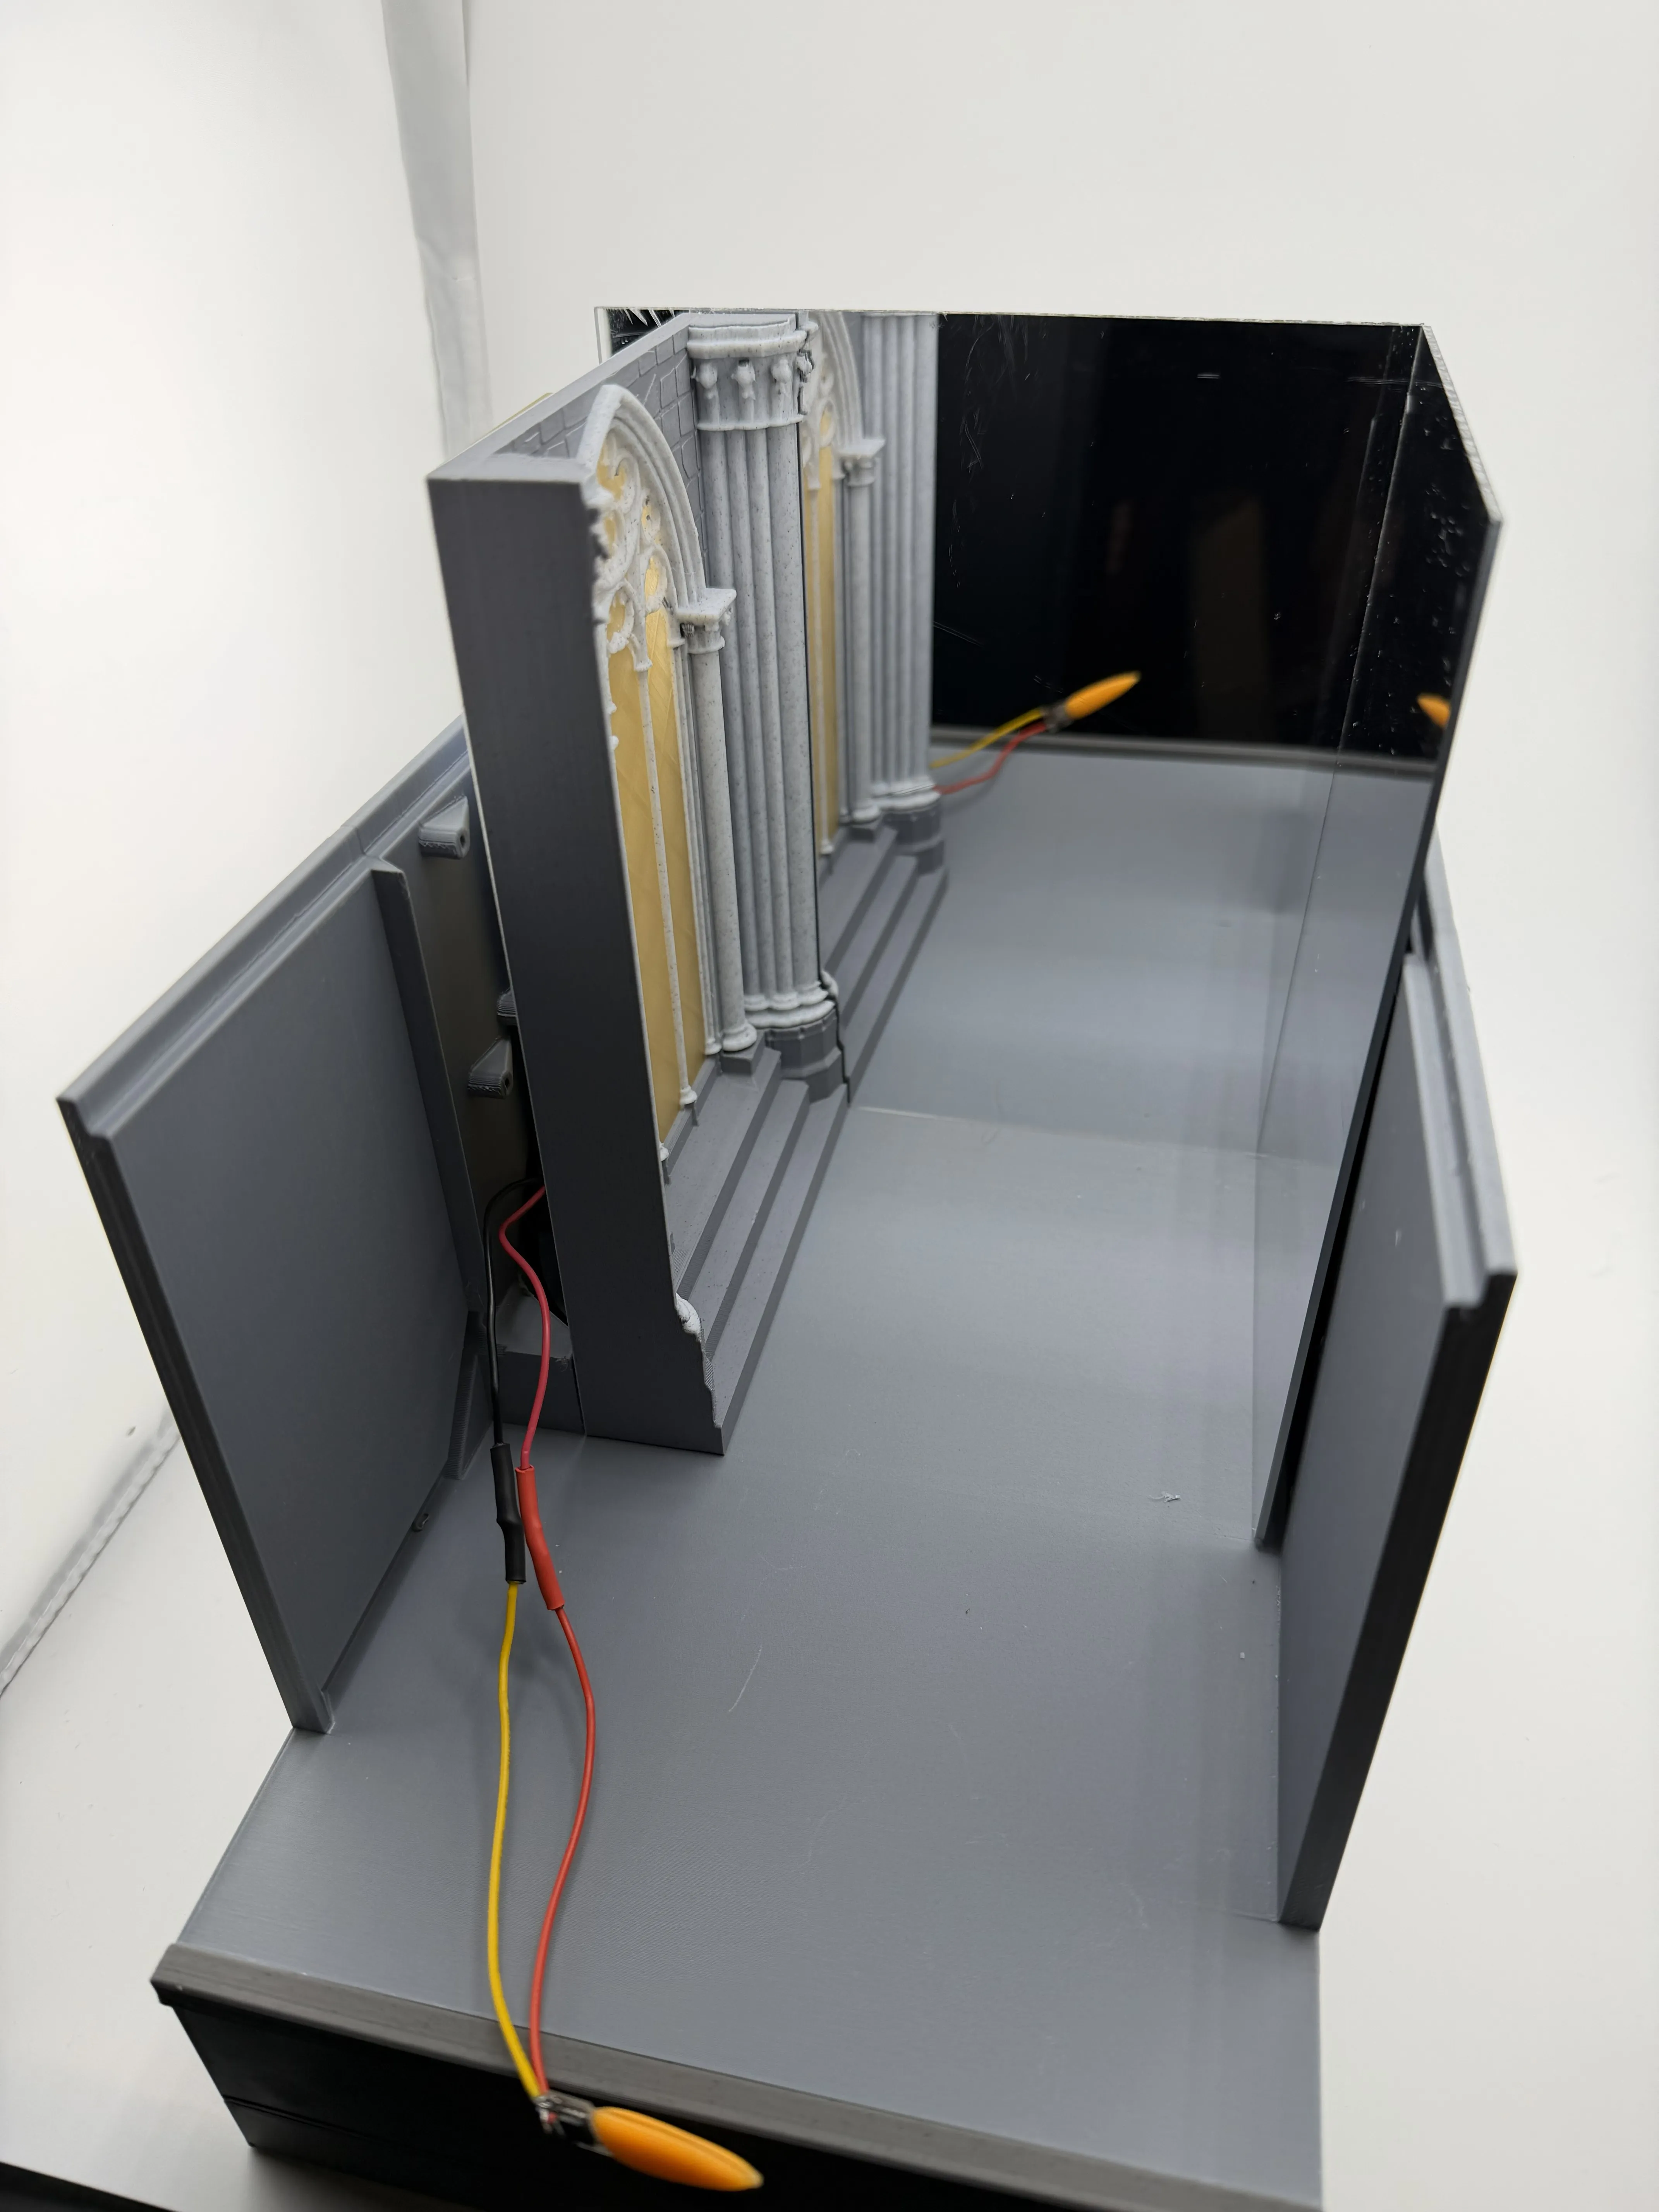
infinite column placement
tape is useful to keep things from moving, glue can work as well.

Step 7
watch your wires


Step 8
place the two way mirror here. The issue with this thickness (advertised as .04" , measures at about .75mm, is that it is very flexible. I am trying thicker material (3mm) but I will need to cut down the sidewalls and lobby floor to make that fit.

Step 9
dont forget to place the infinite book case

Step 10
main hall placement

Step 11
gently place the flame in the flame wall. watch those wires, you could tape them so they fit in the channels/chase.

Step 12
the fire wall fits into the hall arch bookcase (use the appropriate plate for the thickness of your two way mirror)

Step 13
place the other side wall.. it fits into the main hall as well

Step 14
Place the front facade. you can glue it down. I originally had it key'd, I lost the keys and painted the part. I will go back and add that for simplicity, but for now just use a little glue.

Put on the lid on the thing!
All done :)
License
You shall not share, sub-license, sell, rent, host, transfer, or distribute in any way the digital or 3D printed versions of this object, nor any other derivative work of this object in its digital or physical format (including - but not limited to - remixes of this object, and hosting on other digital platforms). The objects may not be used without permission in any way whatsoever in which you charge money, or collect fees.
Comment & Rating (4)