Search models, users, collections, and posts
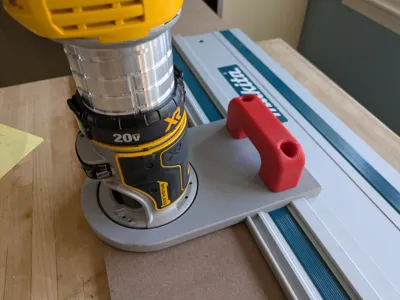
Dewalt Palm Router - Makita Track - Robust Model
IP Report


Print Profile(1)
0.2mm layer, 4 walls, 40% infill (triangles)
Designer
8.9 h
1 plate
Open in Bambu Studio
Boost
23
119
4
0
76
31
Released
Description
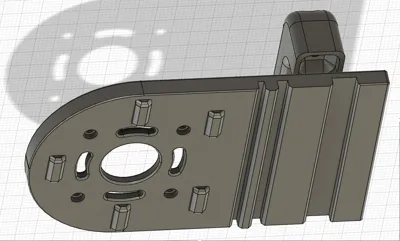
For safe and true routing, the jig needs a great fit to both track rail and router. This jig fits snugly on the Makita track rail extrusion. It is robust and stable on the track, attaches tightly to the Dewalt palm router, and adds a strong handle for secure two-handed routing. This fits the corded (DWP611) and cordless (DCW600) Dewalt 1.25hp palm router.
Feedback and photos welcome! Thanks.
This Model
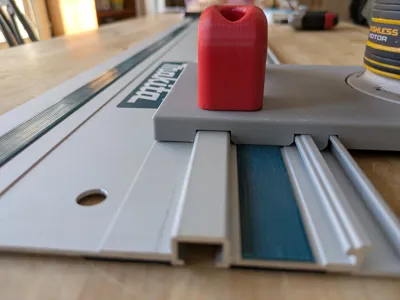
- Has a snug fit and broader contact with the Makita track rail. Some other models were loose and wiggly on the track. I tested and adjusted this track profile to get a snug fit that slides well (PETG and PLA). I also expanded the plate’s horizontal dimensions for firm contact with the track and made it thicker for strength.
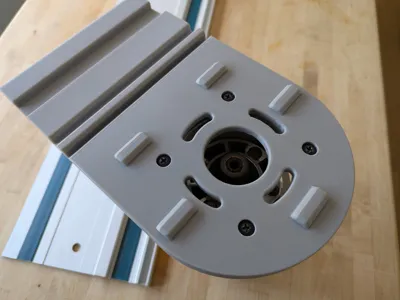
- Attaches firmly to the Dewalt palm router. It uses the original Dewalt track plate screws and adds a recess on top for the metal base.
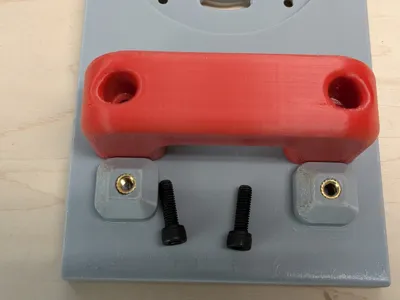
- Adds a strong handle. For safe and sure routing, two hands are better than one. This handle attaches with two:
- M6*8*10*8 (or M6*8*8*8) heat-set threaded inserts, in a form-fitting block on the plate (available here), and
- M6*20mm hex socket head cap bolts, inserted through the handle uprights.
- M6*8*10*8 (or M6*8*8*8) heat-set threaded inserts, in a form-fitting block on the plate (available here), and
Printing and Cleanup
To ensure a smooth plate bottom, strong handle, and good fit between them:
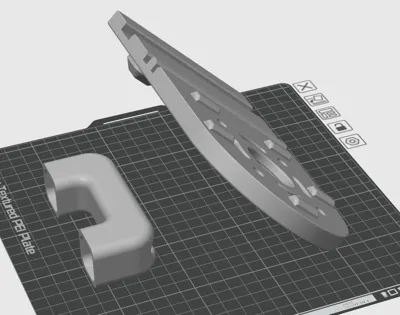
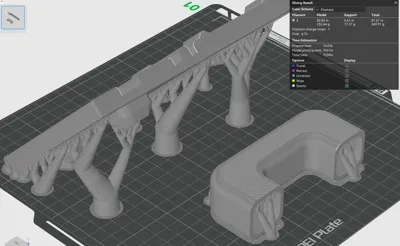
- Print the plate upside-down and at a 45% angle. The bottom needs to print support-free for an accurate fit and smooth sliding on the track rail. I painted on extra supports and added a brim to ensure stability during printing. See the slice screenshot.
- Print the handle laying flat, either on its side, as in the screenshot, or with the legs pointing up. Either will ensure strength by running the layer lines lengthwise. And either will require some cleanup.
- The plate’s handle blocks are just slightly smaller than the matching recesses in the handle. If the fit is too tight, trim or file the blocks a bit.
- Supports often stick too much, especially with PETG. I reduced, but did not eliminate, this problem by increasing the support/object first layer gap to 0.275mm, and increasing the brim/object gap to 0.6mm.
I printed the model in PETG and PLA, and both fit well and seemed plenty strong. I printed my final jig with 0.2mm layers, 4 walls, and 40% sparse infill (triangle pattern). Overbuilt, probably.
License
This user content is licensed under a
Creative Commons Attribution-Noncommercial-Share Alike
Comment & Rating (4)