Search models, users, collections, and posts
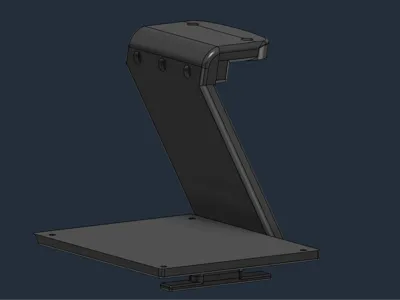
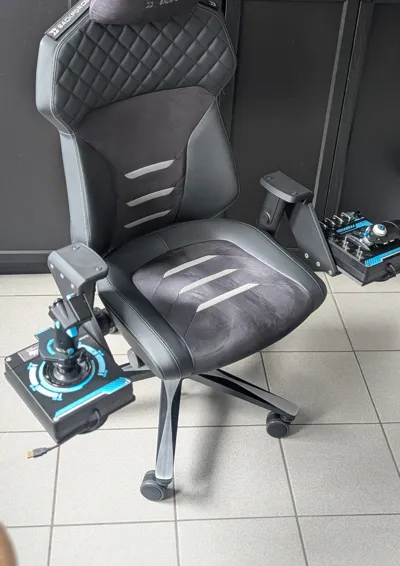
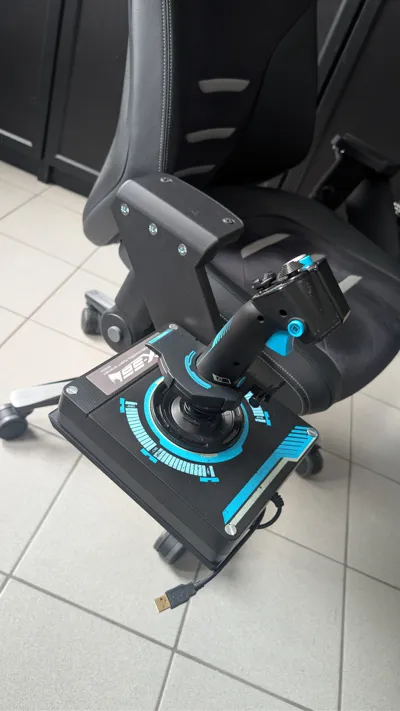
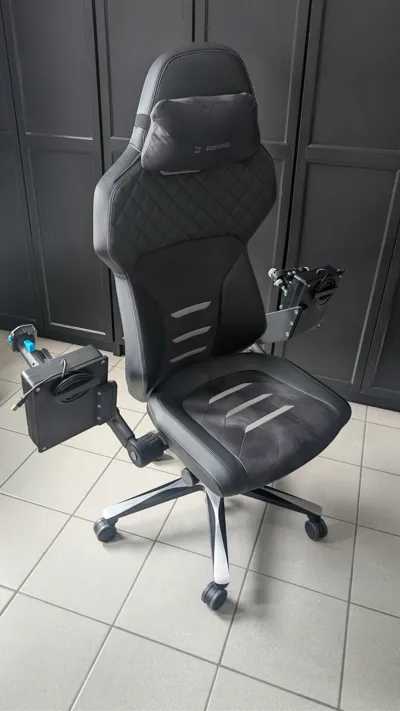
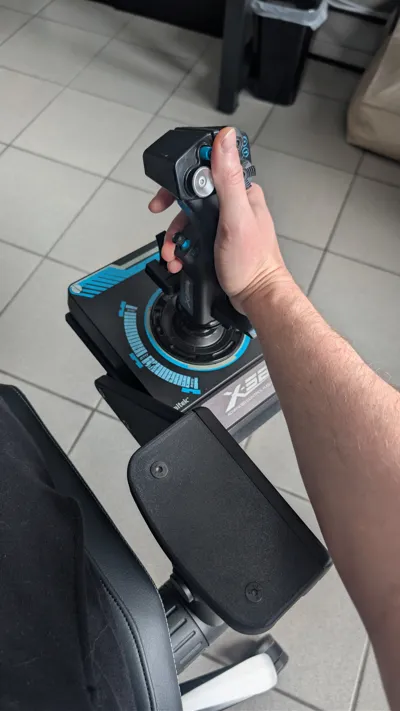
H.O.T.A.S. mount for Logitech X-56 - Backforce One
IP Report


Print Profile(1)
0.2mm layer, 5 walls, 15% infill
Designer
18.6 h
5 plates
Open in Bambu Studio
Boost
13
44
2
0
21
6
Released
Description
Logitech X-56 HOTAS Mount for Backforce One
This custom-engineered mounting system allows you to attach your Logitech X-56 HOTAS (both Flightstick and Throttle) directly to your Backforce One office chair. It is designed to replace the original armrest pads, transforming your chair into a professional flight cockpit while maintaining the chair's core ergonomics.
Features
- ✅ Seamless Integration: Specifically tailored for the Backforce One chair frame and Logitech X-56 base.
- ✅ Maintain Functionality: You can still flip the armrests back and use the original height adjustment without interference.
- ✅ Integrated Cable Management: Features a built-in cable wrap under the mounting plate to keep your setup tidy when not in use.
- ✅ Ergonomic Position: Placed at an ideal height for long flight sessions in Star Citizen, DCS, or Elite Dangerous.
Hardware Requirements
To assemble both the left and right mounts, you will need the following hardware. I recommend using nyloc (self-locking) nuts to ensure nothing loosens during intense maneuvers.
| Quantity | Bolt Size | Head Type |
|---|---|---|
| 6x | M8 x 30 mm | Socket Head (Flat/Low profile) |
| 6x | M8 x 40 mm | Socket Head (Flat/Low profile) |
| 8x | M6 x 60 mm | Countersunk (Flat head) |
| 4x | M6 x 20 mm | Countersunk (Flat head) |
Print Recommendations
- Material: While I successfully tested this in PLA, I highly recommend using a more durable and rigid material like PETG, ASA, or ABS for long-term stability.
- Walls: Use at least 4-5 wall loops to ensure the bolt holes and stress points are solid.
- Infill: 25% or higher (Gyroid or Honeycomb recommended).
- Support: Depending on your printer's bridging capabilities, some supports may be needed for the cable management hooks and the main mounting bracket.
Assembly Instructions
- Remove the original armrest pads from your Backforce One.
- Mount the 3D-printed brackets to the chair's armrest frame using the M8 bolts.
- Secure your Logitech X-56 Throttle and Stick to the plates using the M6 countersunk bolts.
- Use the integrated cable wrap under the plate to manage the USB cables when the HOTAS is not connected.
License
This user content is licensed under a
Creative Commons Attribution
Comment & Rating (2)