


Print Profile(1)

Description
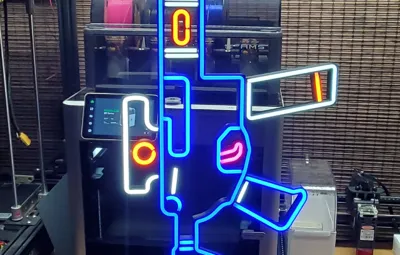
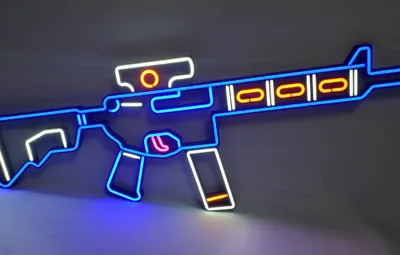
RIFT3D ORIGINALS
Creative builds. Functional designs. Whatever comes next.
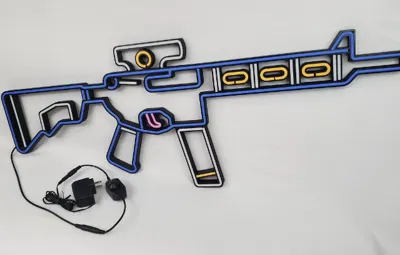
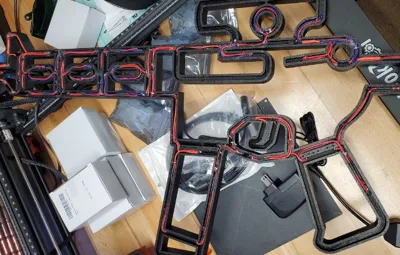
This light is made up of 7 main 3d printed parts and 7 printed back covers. To make it operate I installed 16' plus feet of LED neon silicone flexible rope, 45' feet of wiring, LED Dimmer on/off switch and a 100-240v Input max 0.3A, Output 12v 1.0A power supply with 5.5MM X 2.1MM male/female connectors.
This model print assembled is approximately 36 ½'' inches x 14'' inches x 1'' inch.
It took roughly 1kg of filament to print all of the parts. You will need some wiring experience to make this model. Like soldering, shrink tubing, wiring in series and parallel.
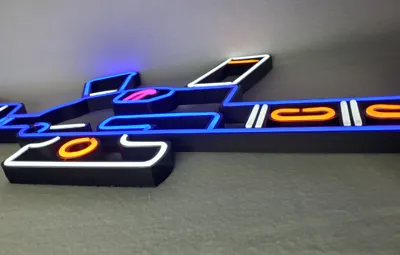
After you have completed this project, you can hang it on a wall and enjoy the light glow.
!!ATTENTION!!
(Note: The dimensions of these files are as follows.)
stock_frame X 239.28mm Y 167.99 mm
lower_frame X 240.00mm Y 155.39mm
forgrip_frame X 240.00mm Y 140.84mm
muzzle_frame X 206.92mm Y 107.38mm
Make sure each part will fit on your Build Plate
Do not Scale this model to fit. It will change the dimensions of the Neon and wiring channels.
Build of Materials
- Amazon.com: Lamomo LED Neon Lights, 16.4ft Yellow LED Strip Light, 12V 0.39In/Cut Silicone Waterproof Neon Rope Light, DIY Neon Sign for Bedroom Indoor Outdoor Decoration(Power Adapter not Included) : Tools & Home Improvement
- Amazon.com: Chanzon 3:1 Ratio 1/16" (1.6mm) Heat Shrink Tubing - Marine Grade Waterproof Adhesive Lined - 8Ft Roll (2.5M Total Length) Black Polyolefin Sleeving Wrap Shrinking 3 to 1 Ratio 1pcs : Industrial & Scientific
- Amazon.com: Viomis 30g Silicone Glue, Clear Silicone Super Glue Adhesive, Instant, Waterproof, Heat-Resistant, and Flexible Strong Glue for Silicone, Silicone Rubber, Liquid Silicone, CAR, TPU, TPR, TPE : Arts, Crafts & Sewing
- Maxmoral 1pc DC 12V 24V LED Strip Dimmer Switch with DC Female Male Adapter Single Color Mini LED Lamp Lighting Accessories Brightness Adjustable Controller Manual Knob Dimmer Switch Black - Amazon.com
- Amazon.com : SIM&NAT DC Female 5.5mmx2.1mm Power Jack Adapter Plug Pigtail Cable, 20inch DC Power Pigtail Female Jack Wire for CCTV Security Camera, DVR, HDVD, LED Strip Light, Low Voltage Application, Pack of 10 : Electronics
- Amazon.com: R-Tech12V 1A Power Supply, Power Adapters, Lighting Low Voltage Transformers 5 Pack, UL-Listed, Power Cord with 5.5x2.1mm Tips, AC 100-240V to DC 12V 1A for LED Strip Light, Camera, Router, etc. : Everything Else
- AOTORUA 100FT 22AWG Electrical Wire, 22/2 Gauge Oxygen Free Copper 12V/24V DC Red Black Zip Cord Wire Parallel Extension Wire, LED Strip Lights Hookup Wire for Led Strips Single Color 3528 5050: Amazon.com: Tools & Home Improvement
Directions
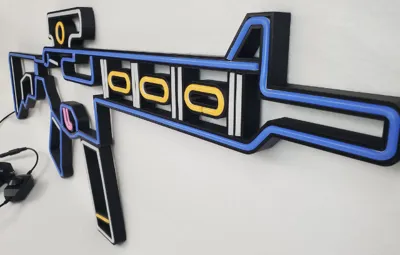
After your prints are complete glue the ends together in their respective positions. (Note: the 11mm channel is right side up for the Neon) After you glue each part, use your soldering iron and dab the seam. This will fuse the two parts together. Lightly melt the front seam and the back seams for a stronger frame.
Choose your first color for your lighting scheme. (SEE Note: Lamomo neon, in material list.) Cut the black line on the silicone led neon rope that best fits each channel leaving enough room for wiring. Double check fit for each piece before cutting. Note where all your cut pieces will go for installation.
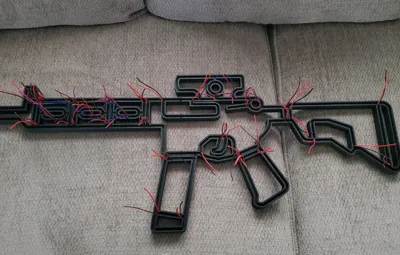
After you prep cut all your lighting. cut x135 4'' inch 22 AWG wires. strip each end 1/8'' inch. Then dip each end in wiring flux and use soldering iron to tin each wire end. Follow the directions that come with your new led neon rope lights for soldering each wire to their respective positive + / negative - terminal on the exposed led strip. BE CAREFUL not to let the positive and negative terminals get soldered together. (Note a short circuit and risk of damage, fire or personal injury can occur.) Be mindful and use caution.
Use the silicone glue sparingly to fold the cut silicon on the neon rope back to position at the soldered ends for installation. There will be approximately x166 solder points to finish this project. Use the holes provided in the frame model to push each set of wires thru as you insert each precut and prewired light section. After you install all lights. turn the frame over with the back upward wires facing you.
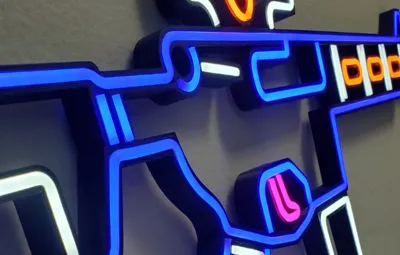
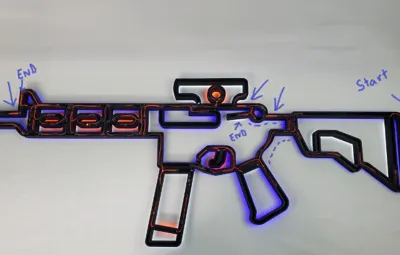
Separate all wires and test each section to make sure all are working! you are now ready to install the Sim & Nat DC female adapter into the hole provided in the butt of the stock frame. Pull roughly 2'' inches into the hole provided and lay in the 8mm back wire channel. Now you can mate each connection. Decide the direction for each connection you can see in my pics there are two places on the lower frame near the optic frame that you will connect x2 lights together for splitting the direction purposes. (SEE pics)
(Note: don't forget to add your shrink tubing before you solder your wires together.) Now cut x60 1'' inch pieces of shrink tubing. DOUBLE CHECK AND TEST YOUR CONNECTIONS!! Make sure all light sections are working!!
Now you can lay all wiring in the channels you will need to bend in suitable directions. start at one end and use hot glue to hold your wires in place as you lay them in the channeling. You can now use your normal super glue and close the back with the covers. Stl's named with (cover.) plug in the switch you have chosen from the list, plug the 12vDC adapter.
More original designs always in progress. Follow to see what drops next 👀
Boost Me (for free)
If this made you smile or print, consider a boost 🙌 It really helps more than you think.
Comment & Rating (2)