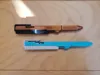
SLIDE ACTION PEN, PILOT G2, SMOOTH or CUSTOM TEXT


Print Profile(6)

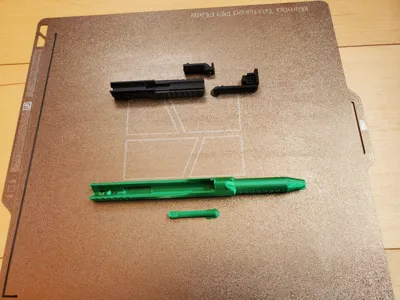
Bill of Materials

Description
03.14.26 : Added profiles with Safety button.
03.13.26 Major Updates! Thank you to all the commenters for you're valuable input!!!) (all parts have changed.) Edits:
- Press-fit pin is thinner, and the material surrounding the entry hole is thicker. Should be easier to insert.
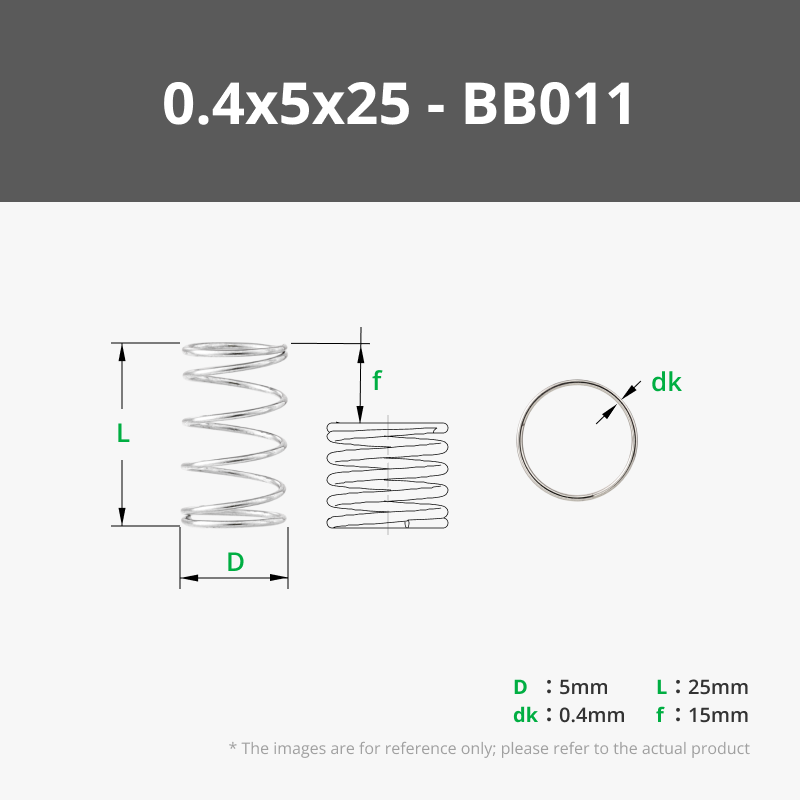
- You can now use many different pen cores, and springs from Bambu (BB011, 0.4x5x25mm, $1.42).
- Lower slide now has a rear rail guide for tighter fit and smoother retraction.
- Dozens of small tweaks here and there.
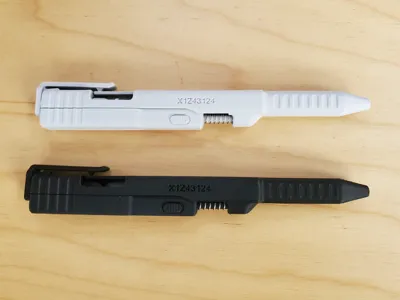
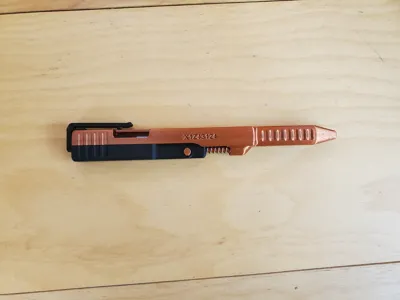
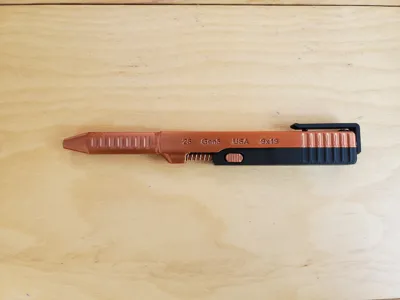
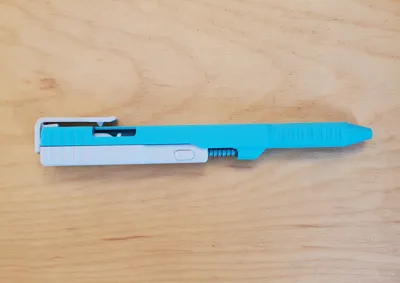
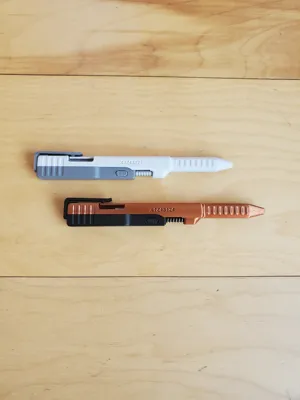
This is the same Slide Action Pen that is being sold everywhere online, although this one does NOT have the G-logo on the side. Tens of thousands have already been Printed. Engage the pen by sliding the top piece back. Release the pen with by pushing on the upper clip.
Text Can be changed within the Bambu Slicer Software. Double click on the text.

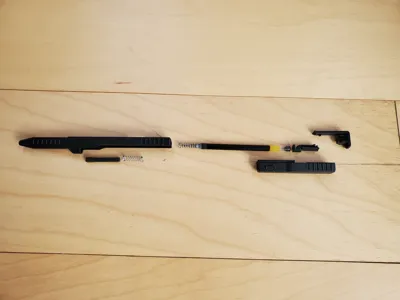
Parts needed: (Each Pens requires one ink-core and two springs.)
- one ink-core and spring from any of these pens:
- Pilot G2
- Mr. Pen
- Pentel RTX Ener Gel.
- The Sharpie S-Gel is longer, so you will need to cut about .08-inch [2mm] off the back of the ink-core.
one more spring from another Pilot G2 pen, or you can order springs from from Bambu (BB011, 0.4x5x25mm, $1.42, listed in the BOM)

Print Settings: (super easy print, and are preset in the profiles.)
- Super important that these long slender parts print flat, and that they don't come off the plate while printing. I used Bambu liquid glue on my older plates, otherwise the Lower-Slide would peel from the plate and not slide well.
- 0.16 Layer height, 2 walls, 8% gyroid infill.
- Normal (manual) support, Style Snug. (There is just a little bit for the pen tip.)
- Filaments tested Successfully: PLA basic Matte CF, ABS/GF, Petg HF, PLA CF, ASA CF.
-------------------------------------------------------------------------------------------------------------------------------------
- For those who want to download stl files. The outside tip of the pen is the only place you need support. Circled in RED Below. Absolutely Do Not put support material inside the main cylinders.

- Here is a picture of the tip of a pen that came off the plate while still printing. The hole closed up a little bit, so the tip of the ink-core would stick when engaged. I fixed it with the tip of another pen, by inserting and wigging it around. (It was PETg material, so figures)

Assembly: (Not easy to disassemble, so be sure it works before pressing on the clip.)
1. After Printing remove the support material from the places circled in red below. Then visually inspect rails and slides of the Housing and Drive Pin. Look for overhanging material at the beginning of the rails. You can use a scraper to remove anything that may cause the parts to stick while sliding.

Slides and Drive pin:

2. Then remove the designed in support. It should break off.


3. This is a very important step!!! Slide the two main parts together to be sure they slide easily. Slide them back and forth vigorously to loosen them. (especially important for PLA Matte and CF.)

4. Before pressing in the pin into the Upper-Housing, be sure the Arrow on the pin is pointing outward, as shown. (Note: If you plan on printing the pen with the safety feature, it is very important that this pin is pressed in all the way, or it will prevent the safety button from moving.)

- Assemble the springs, extender, spacer as shown in the slides.
5. Insert the pin, and use something to help you push it in. Like a desk, see pic below.


6. Before adding the drive pin (as mentioned above, remove support material), push down on the spring tab to be sure it moves up and down freely, see pic below. Add the drive pin to the slot on the lower housing in the orientation shown in the slide below. (In my haste, I have put this in upside-down a few times, so do check.)


7. Slide the upper and lower housing together. (Not easy to disassemble, so be sure it works before pressing on the clip.) Press fit on the clip. You’re done.

Disassembly:
Disengage the pen by pushing on the clip.
Use a small screwdriver to lift the snap-lever up and push out the clip from the bottom side of it. This is a tough step to do, please be patience and careful removing it.

Partially slide out the bottom slider back until it stops. Then, while pulling on the bottom slider, insert a pin into the small round hole on the top slider to release and separate the main components. (I use the tip of a mechanical pencil for a pin.)

This is the end.
----------------------Link to Other Pen Designs------------------------
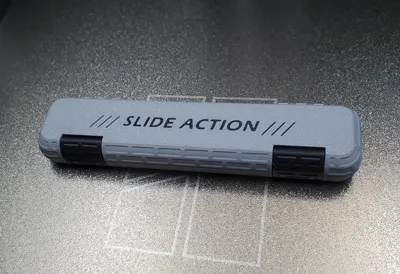
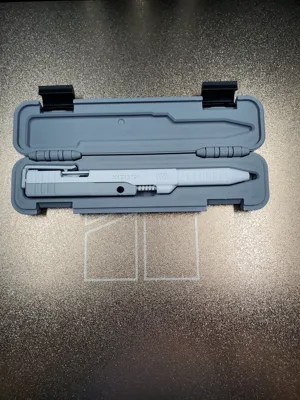
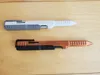
Link to fitted case.


Boost Me (for free)
If you like the design, send a Boost or give a THUMBS UP! Thank you!
Membership
If you are interested in selling this item, here is a link to the commercial licensing. Thank you!
License
You shall not share, sub-license, sell, rent, host, transfer, or distribute in any way the digital or 3D printed versions of this object, nor any other derivative work of this object in its digital or physical format (including - but not limited to - remixes of this object, and hosting on other digital platforms). The objects may not be used without permission in any way whatsoever in which you charge money, or collect fees.
Comment & Rating (408)