Table Top Curling


Print Profile(1)
Description
Based on the great model by DorAndy.
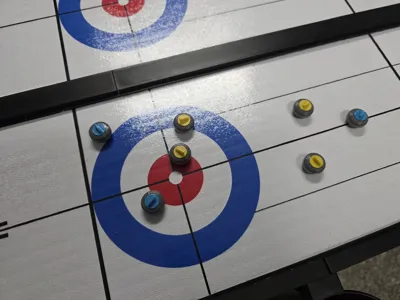
Change the infill to 15%. For some reason, my file kept being goofy, and it stayed stuck at 90% infill. Higher infill is ok, but a heavier rock seems to slide worse than a lighter infill.
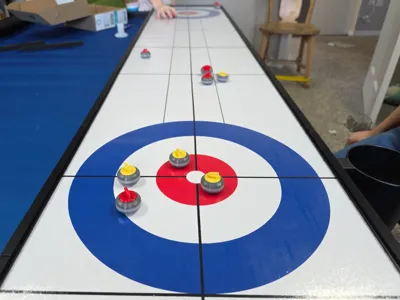
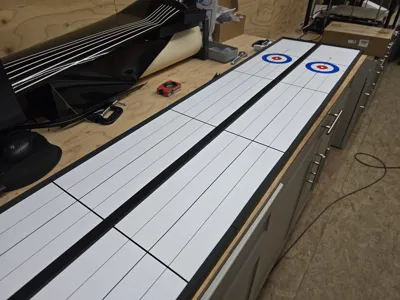
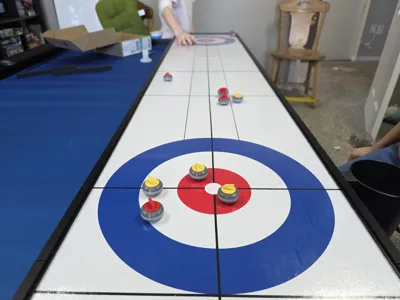
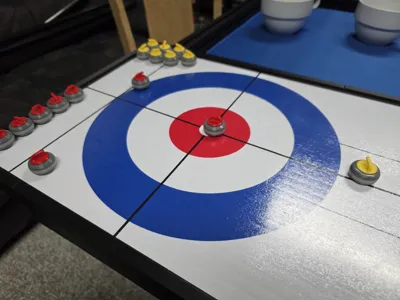
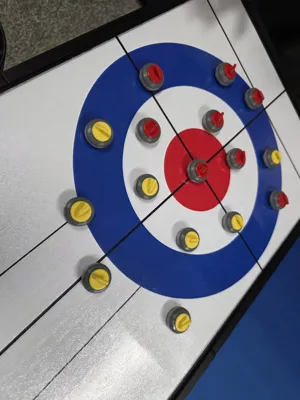
The initial goal for this project was to make a to-scale model of a curling rink that would fit on my tabletop. So I took a white sheet of coroplast that was 170 cm long, 36 cm wide and 1 cm thick. I then designed the project to have two rinks on one side, each scaled 1 ft = 1cm. On the other side, I designed the rings and curling stones to 1ft = 1 in, but shortened the rink to fit the board. I had to adjust the measurements a bit from there as my sheet of plastic wasnt cut perfectly. Also, I adjusted the rock sizes a bit to fit a 4.5 mm ball bearing for the 1cm scaled rink and a 12mm ball bearing for the 1 inch scaled rink. After testing, the 1cm-scale rocks were just a bit small, though still very playable. So I scaled them up a bit to fit a 7mm ball bearing. This allowed the stones to be a bit bigger for easier throwing, without feeling too oversized.
I also tweaked the model by DorAndy to remove the nubs on the bottom of the curling stones. Due to shrinking them down, it never printed quite right, and those edges would catch, and according to my tests, the flat bottoms seemed to work just fine. Another thing to note is that the side walls are slightly higher on one side for the bigger curling stones, while a bit shorter on a 1 cm scale size.
I then used my vinyl cutter to cut lines according to curling rink measurements found at https://worldcurling.org/about/curling/. Because the vinyl has a tiny bit of height, some of the curling rocks would catch on the edges, so I laid some 1.5 mm frosted plastic, typically used on top of tables. I cut it to size and then used small strips of pla to pin it down at the edges. I just glued it in place.
As a disclaimer, I am not great at modelling and pretty busy, so I probably can't make any adjustments, but hopefully this has most everything someone might need to make their own.

Comment & Rating (11)