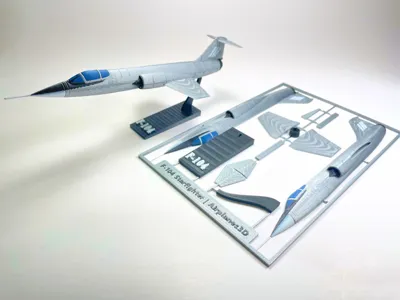
F-104 Starfighter Kit Card


Print Profile(1)
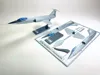


Description
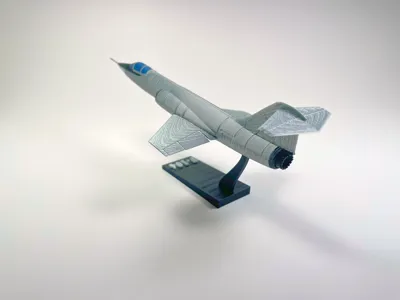
About the Aircraft
The F-104 was an American supersonic interceptor, designed in the 1950's as part of the “Century Series” Aircraft. It could reach a maximum speed of Mach 2, thanks to its single afterburning GE-J97 Turbojet, which was also used on other aircraft of the time such as B-58 Hustler and the F-4 Phantom. The F-104 was designed to be a small and lightweight fighter to be used as an interceptor. The maximum speed of the F-104 could have been even higher, but was limited in order to protect the aircraft's aluminum skin from excess heating due to air friction. The F-104 was retired by the USAF in 1969, but remained in service in many other countries such as Canada, Germany, Japan, and Norway. The last operational F-104's were finally retired in 2004 by the Italian Air Force.
Assembling the model
Before printing this, please ensure your build plate has sufficient adhesion. This model maximizes the build plate space of an A1 Mini, and can be scaled up further in Bambu studio if desired.
To assemble it:
- Cut out all the components from the card frame, ensuring to remove any abnormalities using sandpaper, scissors, or a knife. Ensure not to bend the thin Pitot tube on the nose of the fuselage sections.
- Take the 2 rectangular components and insert one into each half of the fuselage, then stick the fuselage halves together. This should be a tight fit, but if it really will not go in, feel free to use sandpaper to modify the components. Note: If you did bend the Pitot tubes, put a very small dab of cyanoacrylate (superglue) onto the tubes after putting the fuselage together. Press the halves together, and then wipe away excess glue. This should return it to original condition. If the fuselage halves are misaligned (i.e. one is farther forward than the other) put the stand component into the hole underneath and twist it until the halves line up.
- Insert the wings into their respective slots by putting the rear edge of the wing into the slot first. Again, this should be a tight fit. Note: You can also gently bend the control surfaces to move them, and simulate flaps. Ensure you do not bend them too much to avoid potential breakage.
- Insert the Horizontal Stabilizer onto the small brackets on the tail. Refer to the images for help if needed.
- Optionally, (Some prototypes did not include it) Insert the ventral fin underneath the rear of the fuselage.
- Insert the exhaust nozzle on the hole at the rear of the fuselage
- Assemble the stand and connect the stand to the aircraft via the square hole underneath the fuselage.
- Complete!
License
You shall not share, sub-license, sell, rent, host, transfer, or distribute in any way the digital or 3D printed versions of this object, nor any other derivative work of this object in its digital or physical format (including - but not limited to - remixes of this object, and hosting on other digital platforms). The objects may not be used without permission in any way whatsoever in which you charge money, or collect fees.
Comment & Rating (30)