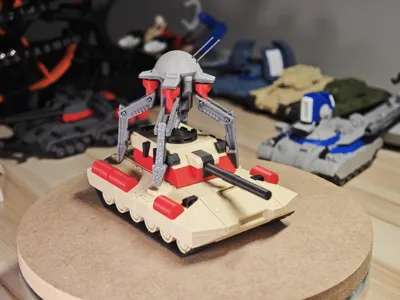
1:72 Red Alert 2 - Terror Drone / no AMS


Print Profile(3)


Description
Please click "View More" for installation guide~
Boost Me (for free)
Your support motivates my updates!
Design Insights:
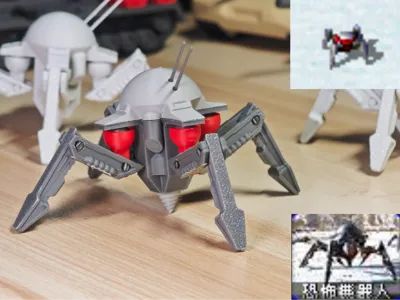
Unlike vehicles, small units (such as soldiers) in the Red Alert series do not use VXL voxel files. Instead, their dynamic effects are achieved by playing image frames, similar to GIF animations.
Due to its small size, the Terror Drone was also included in the frame animation sequence for small units.
Furthermore, while researching, I discovered something that completely overturned my memories.
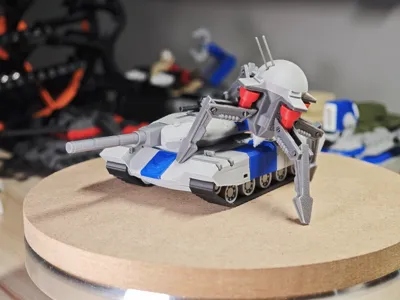
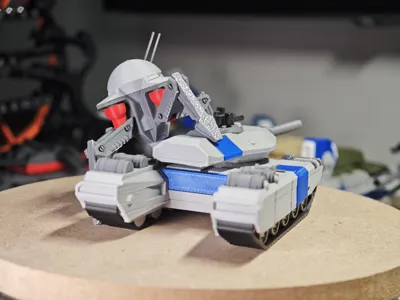
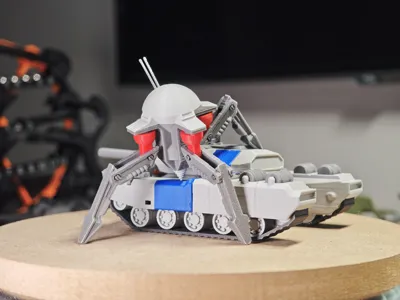
I had always thought that Terror Drones burrowed into enemy vehicles to cause damage. However, I found during modeling and in cutscenes that the original design for Terror Drones was to cling to the outside of tanks, like an octopus, and cause damage.
Perhaps due to the extreme difficulty of implementing the animation, the Terror Drone's attack animation was simply not made during modeling, leading us to believe it burrowed inside for twenty years!

Installation Guide:
1. To ensure strength, glue is needed for these four corners.

2. First, install these four ball joints, paying attention to the notch position and gap. (To ensure a secure fit, the gap here is designed to be very small. Please press vertically with force. It's okay if it's too tight; it will gradually loosen with subsequent handling.)

3. Take a piece of filament, cut it diagonally to a sharp point, and insert it into the joint hole. The hole gap should be just right; if you feel significant resistance, rotate the filament back and forth until it passes through.

4. After threading, trim both sides of the filament flush.

5. The appearance after installation, repeat 4 times.

Refer to the exploded view:


License
You shall not share, sub-license, sell, rent, host, transfer, or distribute in any way the digital or 3D printed versions of this object, nor any other derivative work of this object in its digital or physical format (including - but not limited to - remixes of this object, and hosting on other digital platforms). The objects may not be used without permission in any way whatsoever in which you charge money, or collect fees.
Comment & Rating (12)