Search models, users, collections, and posts
X1C Hotend QuickPlug
IP Report


Print Profile(1)
0.12mm layer, 3 walls, 30% infill
Designer
24 min
1 plate
Open in Bambu Studio
Boost
6
16
7
2
8
11
Released
Description
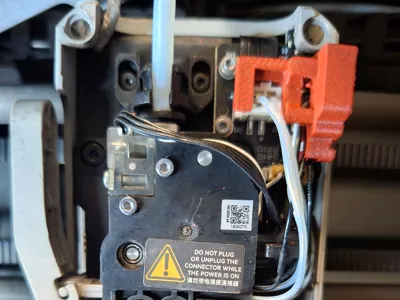
🔌 Quick-Connect Cable System | Hotend Swap-Mod
Tired of fighting with zip ties and tiny connectors every time you need to clean or service your hotend? This Quick-Connect Cable System streamlines your electrical management, grouping all essential wires (heater, thermistor, and fans) into a single, easy-access point.
💡 Why install this?
- Zero Stress: Disconnect the entire hotend electronics in one simple move.
- Cable Protection: Prevent wear and tear on the original connectors of your motherboard or breakout board.
- Clean Aesthetics: Eliminate the "bird's nest" of wires cluttered above your extruder block.
- Lightning-Fast Maintenance: Perfect for makers who frequently swap nozzles or need to remove the block for deep cleaning.
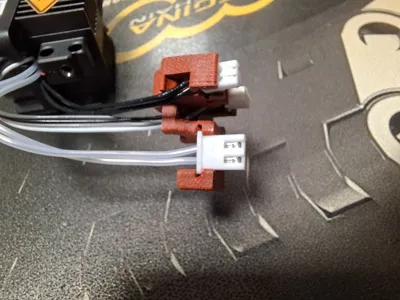
🚀 Assembly Instructions (Follow the Images)
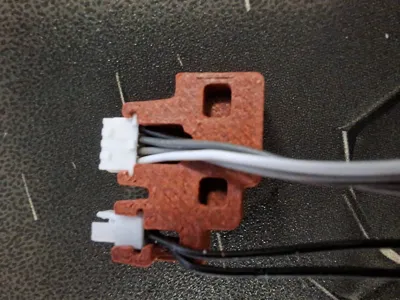
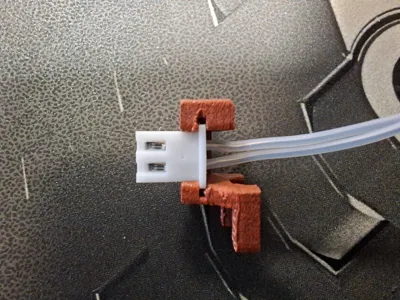
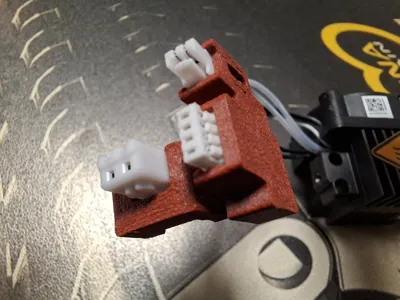
This system uses a lateral slide-in design to lock the connectors in place without the need for extra screws.
- Identify Components: Each slot is shaped to hold the flange of standard connectors (like JST types).
- Lateral Insertion: Do not force the connector from the top. Align the plastic ridge of the white connector with the guide in the printed part.
- Sliding: Slide the connector horizontally until it is perfectly centered in the seat.
- Wire Management: Ensure the wires exit freely through the back slots, avoiding any tension on the crimped pins.
🛠️ Print Recommendations
- Material: PETG, ASA, or ABS is highly recommended. PLA may deform due to residual heat from the motors or hotend during long print jobs.
- Infill: 25% or higher (Gyroid recommended).
- Tolerances: The slots are intentionally designed with tight tolerances to ensure the connectors remain firmly and securely in place. If the fit is too tight for your specific printer calibration, a quick pass with a small file inside the guide will help achieve the perfect fit.
Did you find this project useful? If you print it, please upload a photo of your setup! It’s the best way to support my work and help other makers in the community.
Would you like me to create a list of keywords/tags for your upload to make it easier to find?
License
This user content is licensed under a
Creative Commons Attribution-Noncommercial-Share Alike
Comment & Rating (7)