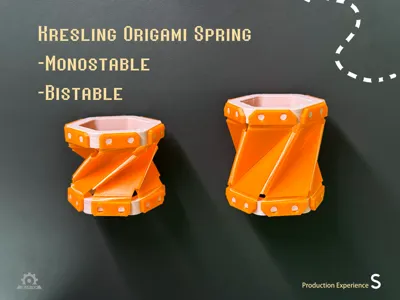
Kresling Origami Spring Monostable and Bistable G-BOX


Print Profile(2)


Description
Boost Me (for free)
Please comment more to support my creation!

Latest work, click to view!
~~~~~~~~~~~~Divider~~~~~~~~~~~~
Boost Me (for free)
The model is redesigned based on the Kresling origami spring structure, referencing original papers, several derivative papers, and a video by netizen Mathew Lim. Of course, these are not very significant. Through my experiments, the mathematical model in the papers seemed to only provide a rough guide, because thick plate folding is required and the elasticity of the spring itself does not come from the structure, so I ultimately created this model using a reverse engineering approach
Below are the core design ideas and methods; if you don't want to try making it, you can skip this section
First, the mathematical model is not very relevant for reference, because the key parameter is material stress, so the final product can only be obtained through experimentation
The Kresling origami spring structure easily enters a bistable region. So-called monostability means that the spring structure dissipates all deformation stress before entering the second stable state, at which point the spring automatically returns to the first stable state
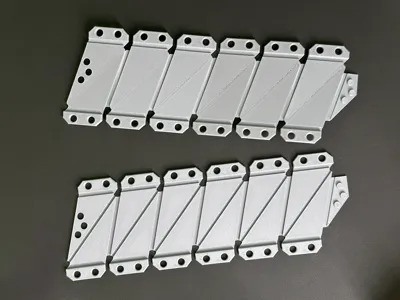
Modeling ideas: First, draw the 3D spring structure, obtain the detailed parameters of two triangles from a single surface of the structure lines, flatten the triangles to get planar structure lines, and then create 6 continuous surfaces using the planar structure lines to complete the model. Drawing the 3D spring structure is also simple: Create a new hexagon, copy one upwards, with a height slightly greater than the width of the hexagon; Rotate the upper hexagon by 35 degrees (above 60 degrees makes it easier to achieve a monostable structure); Connect two points on a single side and a diagonal line; at this point, two triangles are obtained. Take one of the triangles, place it on a plane, and duplicate it multiple times to form a fully unfolded surface; at this point, the overall framework for making the spring has been obtained
Since the spring easily enters a bistable structure, when creating a monostable spring, simply limit the spring's range of motion through hinge width to achieve a monostable structure. Friends who like it can try to make it, unfortunately, there are no pictures
Instructions
- The model comes in two versions, monostable and bistable
- The model will be under stress during assembly, so installation is not easy
- The model assembly steps are simple, but require "great force to achieve miracles," so you will need a pair of duckbill pliers
- First, glue the ends of the model together. Then use pliers to press the panels onto the rivets; you will also need a towel to prevent the pliers from scratching the model
- Before twisting the spring for the first time, please press the peak and valley fold positions to prevent excessive stress concentration and hinge tearing
- The printed side of the model is the front, and the reverse side is the printed texture side; please install with the front facing outward
- An installation video will be released later, please stay tuned
Additional notes on tolerances
The round holes and cylinders of the model are both 3.92 mm. No tolerance is given for structural strength. Under normal circumstances, you can simply press them on with pliers. This is equivalent to an interference fit, because there will be overflow from the routing, the actual size will certainly exceed this value, such as at the seams.
I am not entirely satisfied with this structure, but I have made 4 versions of this structure with 4 different connection methods, and this is the simplest and most effective one. It can definitely be installed! Just requires tools.
If you use tools and still cannot install it, it is likely a filament setting issue caused by excessive flow. Please enable "automatic circular bore compensation"; simply turn it on, no other settings are needed


commercial authorization https://www.patreon.com/c/WiSeGearDad
Buy me a cup of coffee, please.https://coff.ee/gbox
———————更多作品———————

License
You shall not share, sub-license, sell, rent, host, transfer, or distribute in any way the digital or 3D printed versions of this object, nor any other derivative work of this object in its digital or physical format (including - but not limited to - remixes of this object, and hosting on other digital platforms). The objects may not be used without permission in any way whatsoever in which you charge money, or collect fees.
Comment & Rating (8)