Search models, users, collections, and posts

Sputnichoke. A Modern Hanging Lamp.

IP Report

Print Profile(1)

All
P1S
P1P
X1 Carbon
X1
X1E
X2D
A2L

0.2mm layer, 2 walls, 15% infill
Designer
20.2 h
14 plates
5.0(1)

Open in Bambu Studio
Boost
100
373
15
6
99
28
Released 

Bill of Materials

List other parts
  • HESSION 15.6ft Plug in Pendant Light, 2-Pack Light Sockets Extension Cord x 1: https://www.amazon.com/dp/B0BBQLHVJ4?ref=fed_asin_title&th=1
  • A19 LED Light Bulbs, 40 Watt Equivalent x 1:

Description

Update 2/23/2026 - Version 2 uploaded with minor modifications to make assembly a little easier.  

  • Added some notches on the bottom ring to help lock the ribs in place
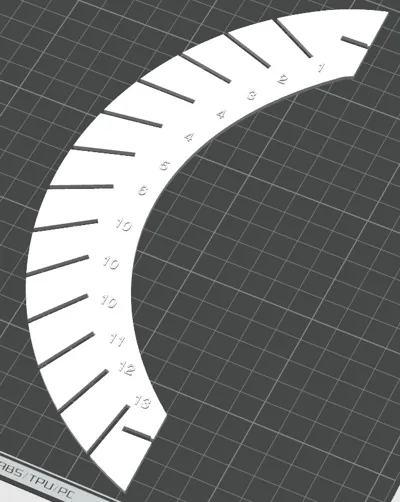
  • Modified how the leaves were labeled to make it more obvious that each leaf spans 2 ribs
  • Increased the size of the “top hat” a bit to accommodate an optional top retaining ring for the socket


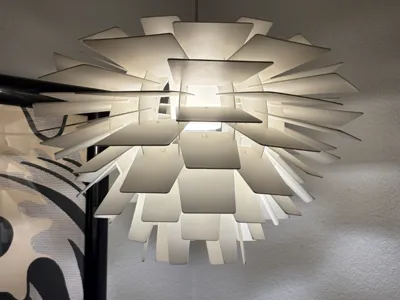
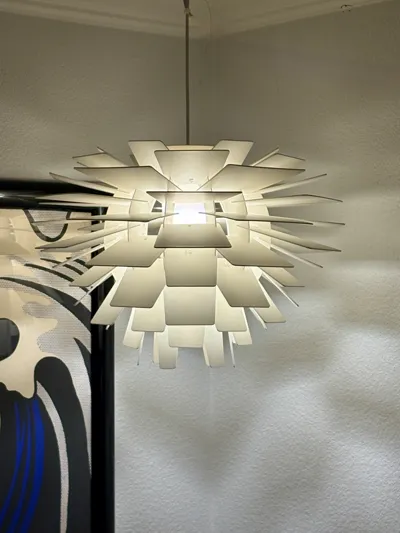
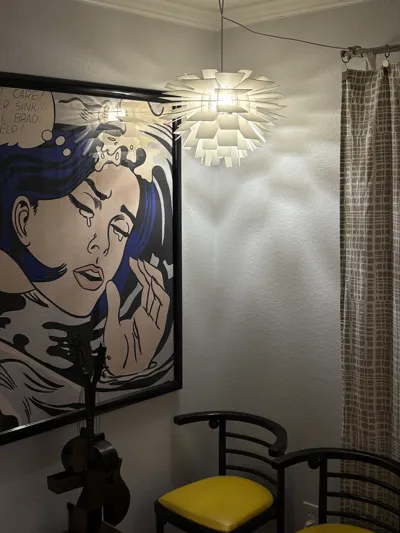
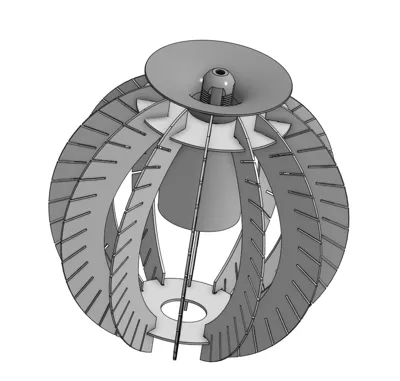
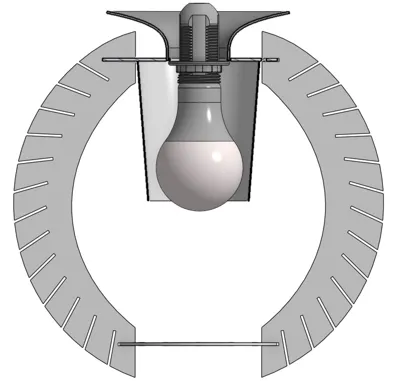
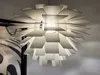
A hanging lamp inspired by Danish modern design and the Louis Poulsen Artichoke Lamp (sometimes called the Pinecone Lamp).  I wanted a design that was easy to print and assemble while still having that distinct mid-century feel.  The final design is a little bit organic like the Artichoke lamp, but a little more mechanical - maybe like Sputnik.  Thus the name “Sputnichoke”.


This model is designed to be used exclusively with an LED bulb - do not use an incandescent bulb.  I used an A19/E26 5W (40 watt equivalent) LED bulb, a 9W 60watt equivalent should work as well.  The cord and socket I used is included in the parts list.  


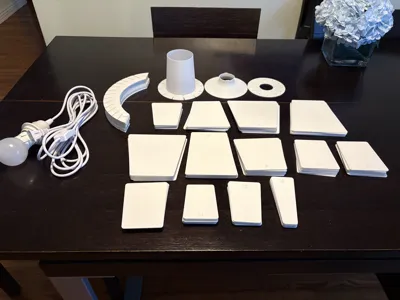
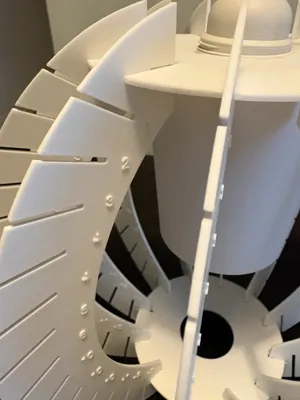
All parts can be printed in PLA without supports - with the exception of one part that needs supports. Optionally, I recommend printing the “diffuser” in PETG since it sits closest to the light bulb.  High-temp PLA might also work. 


All printed parts are included in the main profile with the number of plates you will need indicated in the title - e.x. 1x, 2x, 6x, etc.  You will need to print the following:
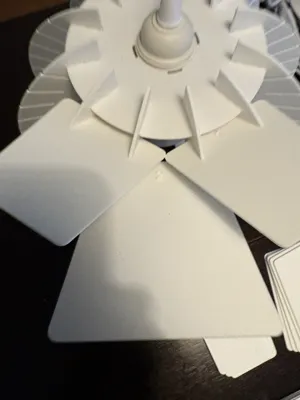
  • 12 ribs
  • 1 diffuser (PETG recommended)
  • 1 bottom plate
  • 1 top hat (decorative piece on top)
  • 78 leaves
    •      - 1x plate 1
    •      - 2x plate 2
    •      - 3x plate 3
    •      - 6x plate 4
    •      - 3x plate 5
    •      - 2x plate 6
    •      - 6x plate 7
    •      - 1x plate 8
    •      - 1x plate 9
    •      - 1x plate 10


Assembly:


Ive attached simple assembly instructions in the Documentation area.  The entire lamp can be assembled without glue or fasteners.  All parts simply notch together.  After printing, the entire project can be assembled in about an hour. 


Documentation (1)

Assembly Guide (1)
Sputnichoke Assembly Instructions.pdf

Comment & Rating (15)

(0/1000)

The best chandelier design, thank you for sharing it with us.
(Edited)
The designer has replied
0
Reply
Wow! Nice print. What materials did you use?
0
Reply
Replying to @mroven :
I use filament Multfila PLA silk black and bronze. But what you did is a work of art, it looks very similar. I saw an original and it was spectacular, because the original is a fortune.
0
Reply
Replying to @Miguel20 :
Thank you. I appreciate it.
0
Reply
very nice hanging lamp. but a bit challenging to change the bulb
The designer has replied
0
Reply
Nice print! Yes, the bulb is hard to change, I agree. I figured since it is LED, it should last for 25 years. So maybe every 25 years having to remove a row of pedals didnt seem too bad. :) I appreciate your feedback! Thanks.
0
Reply
Print Profile
0.2mm layer, 2 walls, 15% infill
This print 3d is a work of art.
(Edited)
The profile uploader has replied
0
Reply
Thank you! Much appreciated.
0
Reply
Replying to @mroven :
My print not completed, when stay finish, I send photos
(Edited)
profile
1
Reply
looks mega good! Can you estimate how much PLA is used?
The designer has replied
Show original
0
Reply
Yep, I estimate that it takes about 1842.68 grams of filament. About 50g of that is PETG if you choose to print the diffuser in PETG. You can always load the profiles into a slicer to get a better calculation of the filament used. Thanks for reaching out!
0
Reply
The print adheres completely to the plate, it's so hard to remove 🙁🙁🙁, and there are marks on the plate after removal ಥ_ಥ How do you guys solve this?
The designer has replied
Show original
0
Reply
Hi. Check your bed leveling and temps. The print profiles I provided are for PLA and a smooth plate. Ive never had problems with PLA adhering too much. For me, everything pops off easily. Let me know if you still have problems.
0
Reply
Awesome design!!
The designer has replied
0
Reply
Hey thanks! Glad you like it. :). Let me know if you have any questions.
0
Reply
No more