Fantasy Royal Magic Scepter - Fairy Floral Light


Print Profile(1)
Description
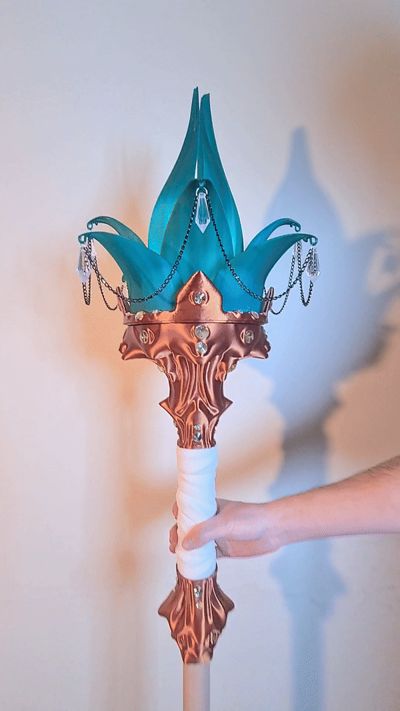
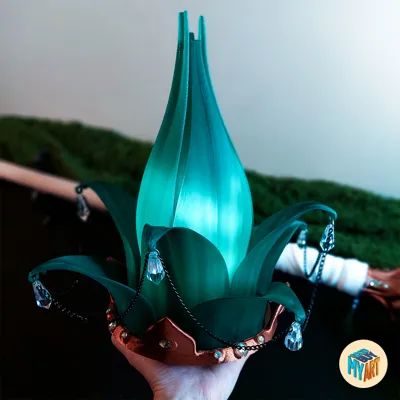
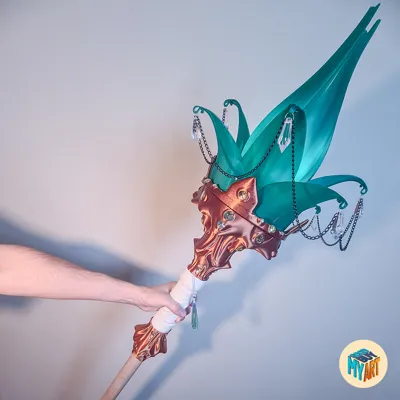
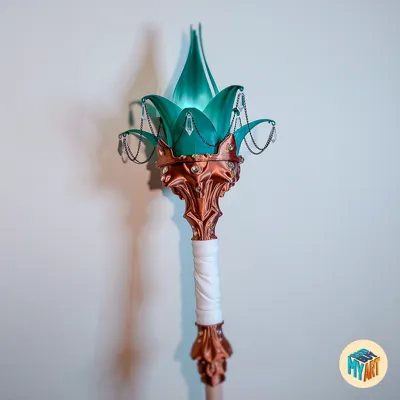
This scepter was fully conceived, designed, and modeled by me, from the initial idea all the way to the final printed parts.
My goal was to create a fairy-inspired, magical, colorful, and elegant object, while still keeping a slightly aggressive and royal feeling.
It features refined ornaments, noble motifs, and embedded “precious stones,” all combined into a magical scepter that looks like it came straight out of a fantasy story.
Through this project, I believe I successfully combined 3 out of the 5 MakerWorld contest themes:
- Epic Fantasy
- Royal & Ceremonial
- Magic
Honestly, it was quite difficult for me to limit myself to just one theme.
Along the way, I had many ideas, and without even realizing it, they naturally started to blend together — which ultimately shaped the final design of this scepter.
Printing Information
The model was designed to be easy to print, even though the final result looks complex and highly detailed.
- Split into 10 plates
- Each part prints in under 8 hours
- Total print time: approximately 38 hours
- Total filament usage: ~2350 g
- No AMS required
- Extremely few supports needed
For my personal version, I used only 3 PLA filaments:
- Bronze
- Transparent green
- White
Of course, I highly encourage everyone to create their own color combination — this scepter can look completely different depending on the colors used.
Required Materials
For assembly, you will need:
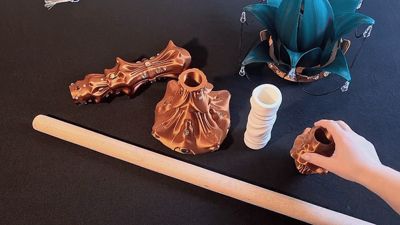
- Wooden handle / wooden pole
Height is not critical (mine is 120 cm — it will simply result in a taller scepter)
Very important: diameter of 3.6 cm
If the diameter differs, I recommend doing a few test fits first for a perfect result
- 8 chains, 20 cm each
Total length: approximately 1.6 meters
I personally used black chain to match my color palette
- 8 jump rings
Approximate diameter: 1 cm
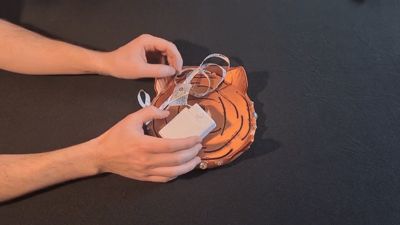
- 1 meter LED strip, battery powered
- 10 screws – 0.3 × 2.5 cm
Not all of them are mandatory
- Fast-drying glue for final assembly


OPTIONAL
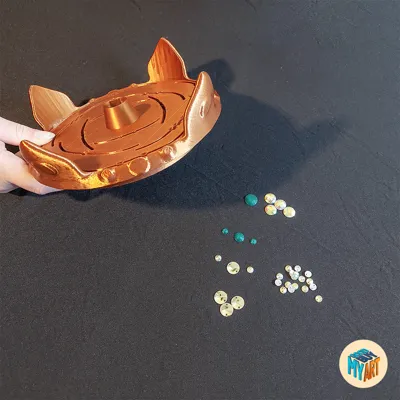
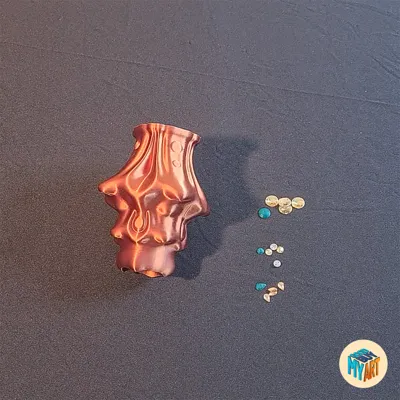
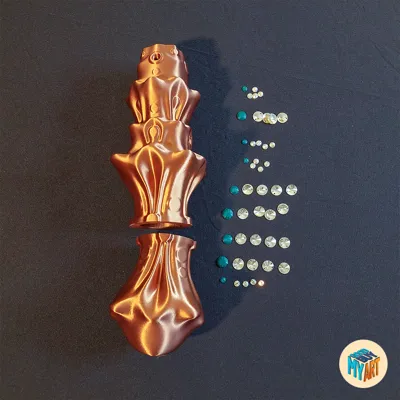
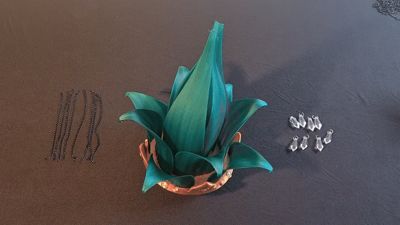
Decorative gemstones are already included in the project as printable parts, but I personally used a set of decorative stones bought from TEDi, which were almost identical in size.
IMPORTNANT NOTE:
The gemstones are placed on the print bed in the same order they appear on the scepter, from top to bottom.
Printing Recommendations
Make sure the build plate is very well cleaned, especially for the large petals
I created a few small fictional supports to help with adhesion, but I still recommend:
cleaning the plate thoroughly
optionally using a dedicated bed adhesive
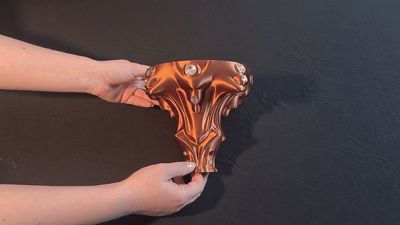
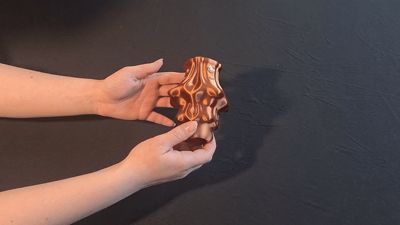
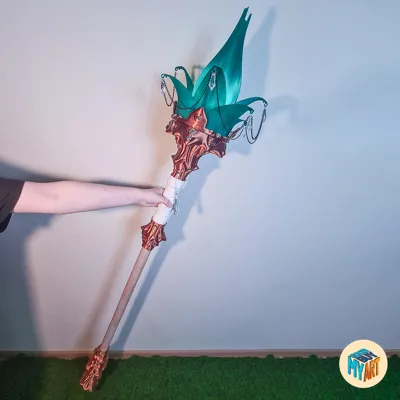
Assembly Guide
Assembly is very intuitive.
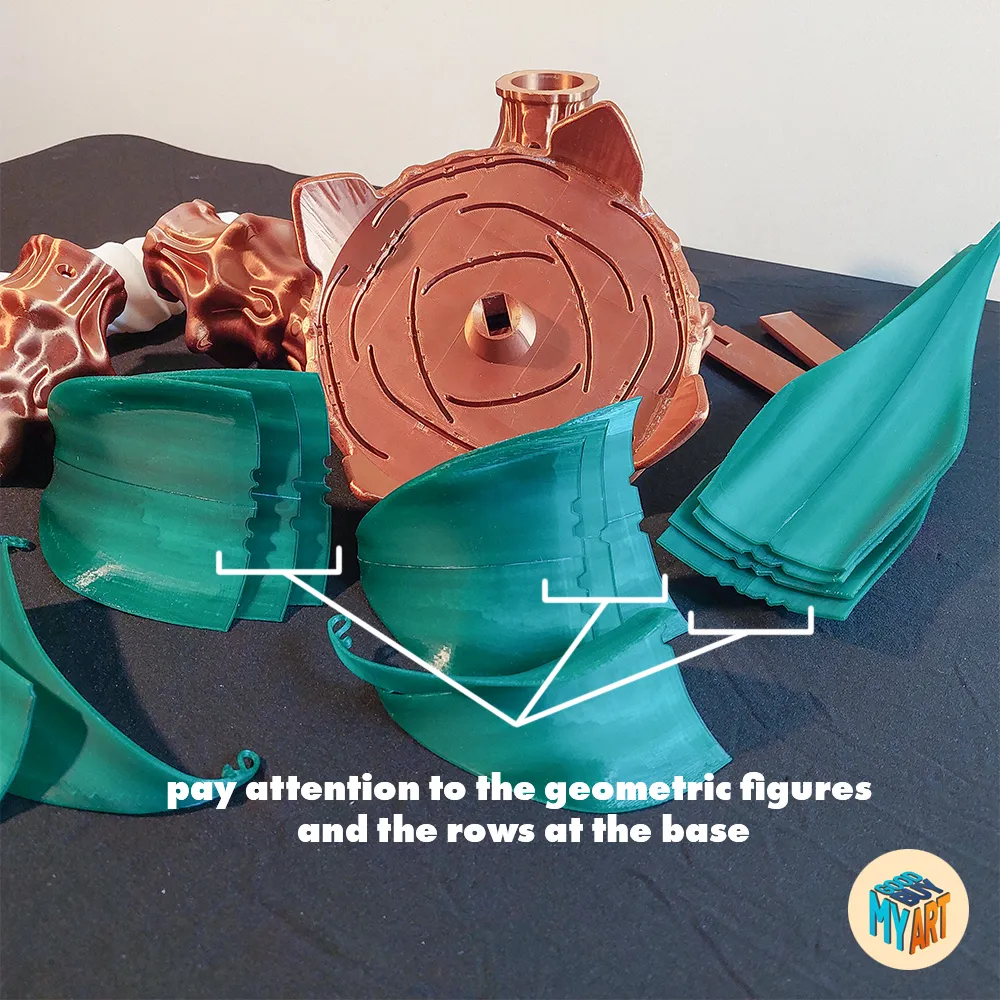
For the petals, please pay close attention to the geometric shapes located on:
the scepter base
the base of each petal
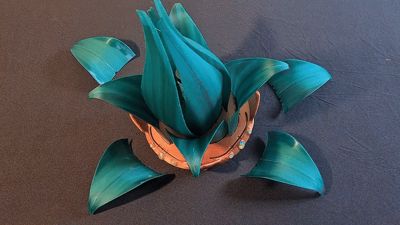
Petal order:
Row 1 – large petals (closest to the LED)
Row 2 – medium petals
Row 3 – small petals
The lower base includes a square socket designed for the threaded connection, making it easy to identify and assemble.
I hope I managed to include all the necessary details.
I wish you a lot of fun printing this project, and I truly can’t wait to see your own unique color variations.
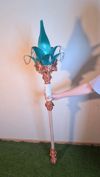
I am always available for questions, and I also included reference photos to help guide the build process as clearly as possible.
✨ Happy printing! ✨
License
You shall not share, sub-license, sell, rent, host, transfer, or distribute in any way the digital or 3D printed versions of this object, nor any other derivative work of this object in its digital or physical format (including - but not limited to - remixes of this object, and hosting on other digital platforms). The objects may not be used without permission in any way whatsoever in which you charge money, or collect fees.
Comment & Rating (5)