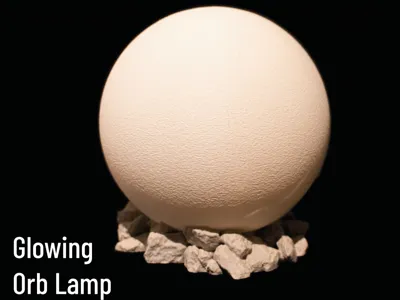
Glowing Orb Lamp


Print Profile(5)
Bill of Materials


Description
Introduction
This model is a simple spin-off of my Solar System Lithophane Lamp Series. Instead of a planetary lithophane, this lamp is a simple sphere with uniform thickness. Fusion 360 Files are provided and the license is chosen such that you can upload remixes and own models without any obligations other than attribution. You may use this model or derivatives thereof however you like, including commercially.
Requirements
The lamp has a size of ~ 205mm x 205mm x 195mm. It should print fine on most printers except for small printers such as the Prusa mini or Bambu A1 Mini. You will need around 200g of Filament (preferably PLA or PLA+) per lamp.
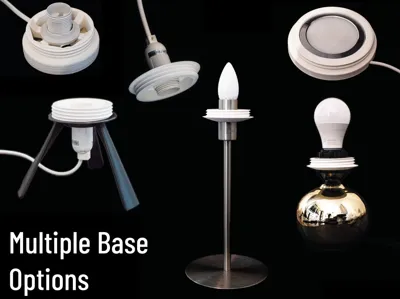
The lamp is mounted to a base with a M75x4 metric thread. The idea for the thread and also the thread dimensions are taken over from the Lithophane Moon Lamp with wide Screw Base by The Quicksilver. This means that his moon lamp as well as his mounting options are compatible with my lamps and bases. I am providing multiple different base options that all use the same thread.
Print the lamp shade and match it with any lamp base of your liking. All compatible lamp bases are listed below. You may either need a standard lamp base with a E14 or E27 thread or threaded E14 or E27 sockets. Some Bases also require M3 heat set inserts and M3 BHCS screws. There is additionally the option to use a a Bambu LED Kit as base.
Print Settings
There are only a few settings you should tweak in the slicer to print the lamps.
- Print in PLA or PLA+
- Recommended layer height: 0.15mm
- Adaptive Layer height recommended for the top
- Set wall count to 5-6 to obtain a solid lamp
- Activate Brim (Outer Brim Only) and set the Brim width to 5-10 mm
- Fuzzy Skin looks great on these lamps.
- No Support required! The lamps print perfectly fine without support. All lamp bases come with in-built snap off supports (where required).
This is not a SpeedBoatRace print! Use conservative print speed settings to avoid artefacts! It's totally fine if your print takes one or two days to finish.
Filament
Filament matters. A lot! Depending on your filament choice, your lamp may have more or less contrast or a warmer or cooler color temperature. You can also change the outcome by choosing light sources with different wattage or color temperature. The picture below illustrates this:

All of the four Panels above were printed with different white PLA/PLA+ filaments but illuminated with the same 1W LED bulb.
Before starting a multi-day print, I recommend printing the Solar System Lithophane Calibration Panel to test how your print will turn out. The Orb has a uniform thickness of 1.2mm. You are also by no means limited to white lights and filaments.
Lamp Bases
Printing the Orb is only a part of creating your own lamp. You'll also need a Lamp Base to illuminate your Lamp Shade. I am providing several different Lamp Bases, all with a matching M75x4 thread. All of the Bases below will work for all of the Planets and Moons. The Bambu Base is inspired by Bambu Lab's lamp base for their LED Lamp Kit. Depending on which base you choose, you will need different hardware for assembly. You will find a detailed BOM and assembly instructions below.
Links to shops are only suggestions on where you can find parts. I am not connected to any of the linked vendors and don't endorse them. Links are also supposed to show you how the required parts are called and look like.

Some lamp bases use snap-off support. The supports look like small ring segments, tabs or cylinders that should be removable with very little force and should leave you with a good surface. They are only tested with PLA/PLA+ filament. Using other filaments may make support removal more difficult.
Rock Base | |
 |  |
This lamp base is based on the High Quality Rocks Asset by P_4_N_D_A. No electrical skills or wiring mains voltage required. You can get the LED Kit on the BambuLab Shop. BOM:
Printed Parts:
Assembly:
| |
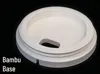
Bambu Base | |
 |  |
This is the recommended Base option since it is the easiest and safest to assemble. No electrical skills or wiring mains voltage required. You can get the LED Kit on the BambuLab Shop.
BOM:
Printed Parts:
Assembly:
| |
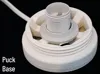
Puck Base | |
 |  |
This Base uses E14 or E27 lightbulbs, making it easy to maintain and switch out lamps. Additionally, you can use differently colored lightbulbs and even color changing lightbulbs. Some electrical knowledge (crimping ferrules, connecting lamp sockets) required. BOM:
Printed Parts:
Assembly:
| |
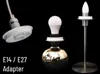
E14 / E27 Adapter | |
 |  |
This is a set of simple, yet effective adapters, allowing you to mount the lamps to any lamp base that uses E14 or E27 sockets. The possibilities are endless. BOM:
Printed Parts:
Assembly:
| |
Other models
If you are interested in Lithophane lamps, consider checking out my other models. Click the links below for the respective models or check my profile.


Acknowledgements
A big shoutout and thanks to:
- moonournation: to my knowledge, the Lithophane Moon Lamp OP, the original creator who came up with the idea.
- The QuickSilver: to my knowledge, the first person to add a thread to the moon lamp (I used the same diameter).
- P_4_N_D_A: creator of the high quality rock asset I used to create the rock base
Changelog
- 25.01.2026 - initial upload
Comment & Rating (7)