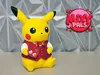
Valentines & Fancy Pikachu - No AMS


Print Profile(2)
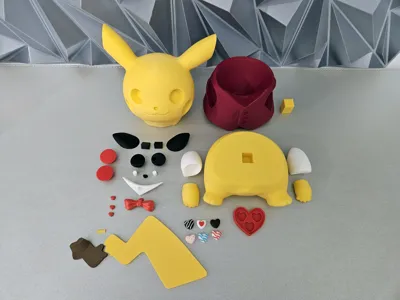
Bill of Materials


Description
Please Note: If you would like to sell printed versions of this model, you will need to subscribe to Playco3D’s Patreon for now in order to receive commercial rights. www.patreon.com/playco3d
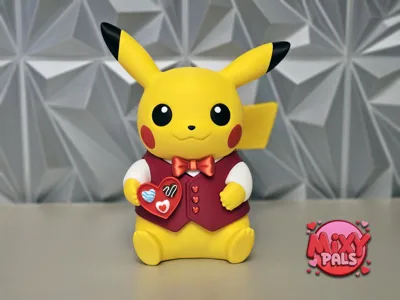
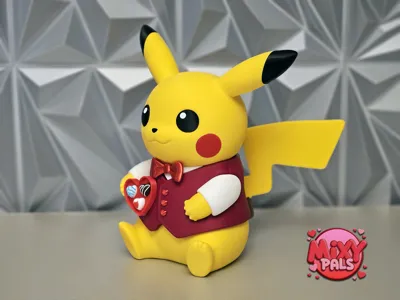
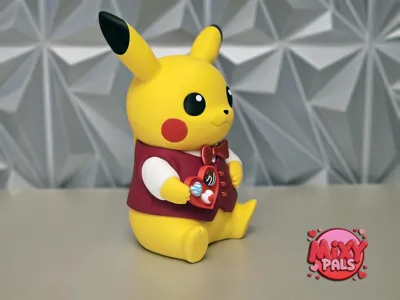
Celebrate the season of love with this Valentine’s dressed Pikachu 3D model. Designed for easy printing and assembly, this charming build makes a fun and festive display piece for any collection.
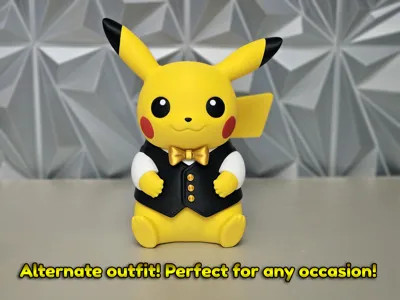
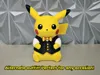
Fancy Outfit Pikachu (alternate version):
This alternate fancy outfit Pikachu adds a stylish twist to the classic character. Easy to print and assemble, it’s a great bonus display option that brings extra personality to your shelf.
Dimensions:
At 100% scale, Pikachu stands approximately 7.87 inches (200 mm) tall.
Scaling up should work without any issues. If you scale down, remember that the tolerances will get smaller and some parts may be harder to assemble.
Colors Used:
- Bambu Basic: Black, White, Cocoa Brown, Red, *Maroon Red
- Bambu Matte: Lemon Yellow
- Bambu Silk+: Red
- *For the pictures I used Hatchbox Matte: Cherry Red. But the Bambu Maroon is a close match
Print Profiles:
•The heart buttons and plain chocolate hearts are also included with an angled cut option. This allows you to print them at a larger size while achieving better detail and smoother layer lines.
Assembly Tips:
• When attaching the chocolate heart box, apply a small amount of glue to the cut area on the right hand and the matching cut area on the vest. Align the box at a slight angle and press lightly until secure.
Assembly Steps:
• Attach the legs to the vest using the pin. Note: the top of the yellow legs is cut lower and will not make contact with the vest. Apply glue to the pin or to the top area of the legs that touches the inside of the vest.
• Attach the buttons to the shirt and press firmly until they snap into place.
• Attach the left and right arms and hands.
• Build the head:
• Attach the left and right black ear parts.
• Attach the eyes, making sure the angled cut faces downward.
• Attach the nose.
• Attach the red cheeks, with the angled cut facing downward.
• Attach the inner shirt with the bowtie, then attach the head.
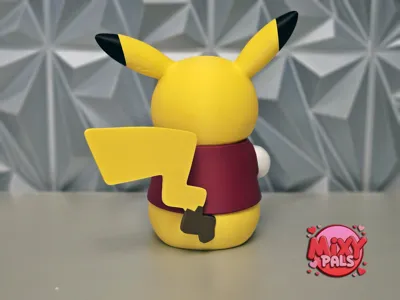
• Build the tail using the pin and attach it to the back.
• Choose which chocolate hearts to print and add them to the box.
• Secure the heart box to Pikachu’s hand and vest, following the directions above.
That’s everything, Pikachu is ready to brighten up your collection. Thank you so much for printing this model and for supporting MixyPals and Playco3D. I’d love to see your finished print, so be sure to share your photos. More fun designs are on the way!
License
You shall not share, sub-license, sell, rent, host, transfer, or distribute in any way the digital or 3D printed versions of this object, nor any other derivative work of this object in its digital or physical format (including - but not limited to - remixes of this object, and hosting on other digital platforms). The objects may not be used without permission in any way whatsoever in which you charge money, or collect fees.
Comment & Rating (58)