Functional Rear Ventilation - Trx UDR - 8421


Print Profile(1)
Bill of Materials

.jpg)
.jpg)

Description
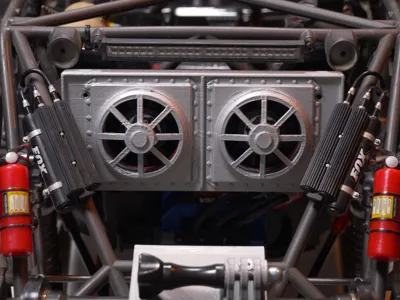
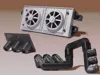
Operational cooling system for Traxxas UDR (8421).
👇read carefully
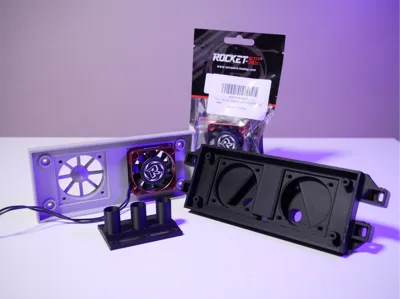
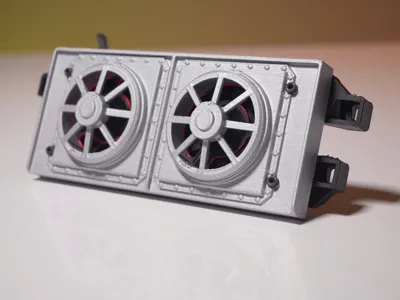
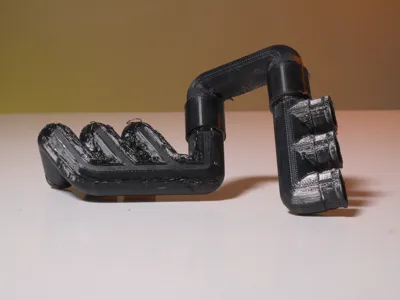
With the functional cooling system, add a touch of realism to your Traxxas UDR. Fully functional with two 40x40 mm fans, this system will allow you to cool down part of your engine and central transmission.
*Why have decorative parts when you can have functional ones !?
👇 Important points, tips, tricks, and materials 👇
The model below was printed in PLA Tough+ and TPU 95A HF
- PLA Tough+ offers better flex resistance and is also less breakable than Classic PLA.
- TPU 95A HF was used to make the intake hose.
- Each print plate has been renamed for better understanding and good categorization.
⚠️The print profile is based on an A1 mini and a PEI Textured Plate. Remember to redefine your printer and build plate.
⚠️If you use a Smooth PEI plate with TPU it is essential to use glue to avoid damaging your build plate and to remove prints more easily.You will need to equip yourself with
- Cutter or cutting tools.- Drill and a 2.5mm metal drill bit.
- Punch and scribe or marker.
- kraftprotz PLA, ABS, PETG, TPU glue.
- Bambu Lab liquid glue (for TPU).
x6: M3 x 8mm.
x8: Cable ties.
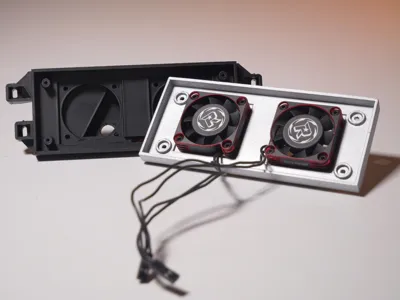
x2: RC 40x40mm fan.
x1: Futaba type Y extension cable.


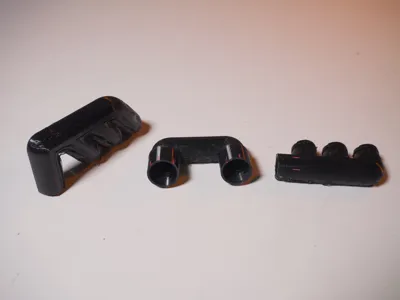
Plate - 1
x1: Output grille / protection.
Plate - 2
x1: Radiator / Fan support.
Plate - 3
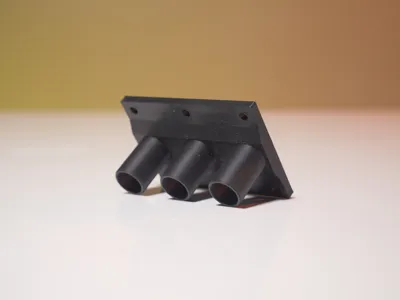
x1: Engine chimney.
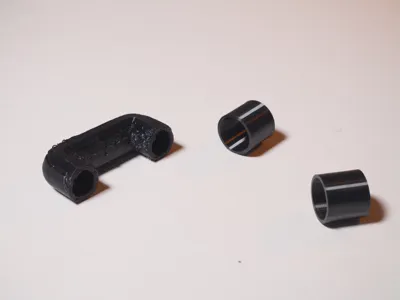
Plate - 4x1: Air hose (A).
Plate - 5
x1: Air hose (B).
x1: Air hose (C).
x2: Sleeve.
⚠️Bambu Lab liquid glue (for TPU) and a Smooth PEI plate.
Boost Me (for free)
A small boost to support a small independent creator! This model was entirely modeled by me in Fusion 360, and if you feel like it, show your support and don't hesitate to give your best boost, it gives strength and motivation
Full assembly manual: Available in PDF format in French - German - Spanish* - English.
*with a small translation oversight
THE MANUAL IN BRIEF 👇
Chapter 1 : Chimney attachment.
- Remove the X protection fixed with 4 screws and the pilots and part 8421.- Place the chimney as in photo 3 and use a point, fine marker or punch to mark the location of the holes then use a 2.5mm drill bit to make the 6 holes.
- Use a 10mm drill bit or a router bit to make a rough opening and finish the edges of the opening with a cutter.
- Secure the chimney with six M3x8mm screws


Chapter 2 : Fan assembly for intake.
⚠️ For an exhaust assembly, skip chapter 2 and go directly to chapter 3.
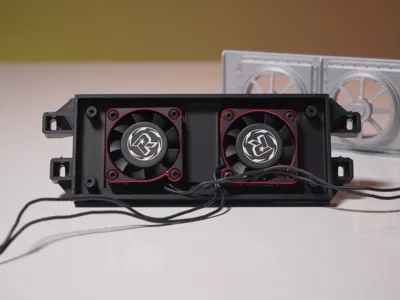
- Once the fans are attached to the radiator, pass the cables through the small slot provided for this purpose
- Once aligned, apply slight pressure while tilting it to bring the chimneys into the cabin.
- Attach the radiator to the cage using the original screws 2577 - 3x10 BCS (photo 3).
⚠️ Please pass the cables under the tubular cage.


- Place your protective plate by sliding it diagonally, not from the top or bottom (photo 1).
- Position it horizontally and slide it onto the fans and radiator (photo 2).
- Finally, reinsert the 4 original screws - 3215 - that connected the radiator to the protective plate


Chapter 3 : Fan assembly for exhaust.
⚠️ For an intake assembly, skip chapter 3 and go directly to chapter 2.
- Once the fans are attached to the protective plate, pass the cables through the small slot provided for this purpose and close everything with the 4 screws - 3215.


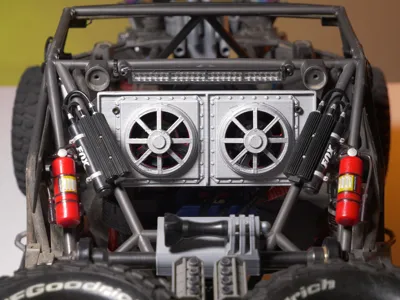
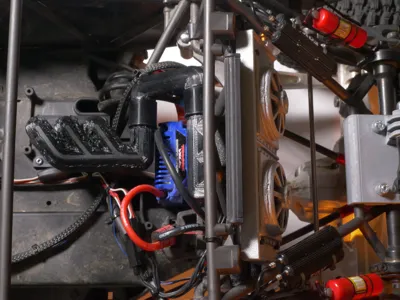
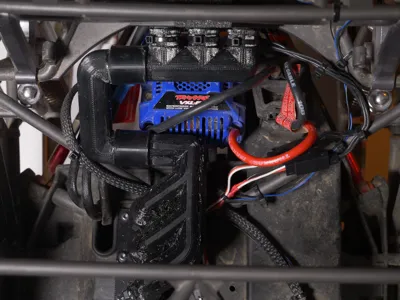
- Remove the two dummy shock reservoirs 8423 before installing the complete radiator (photo 1).
- Place your radiator by sliding it diagonally, not from the top (photo 2) and position it horizontally with the chimneys under the tubular frame (photo 3).
- Now, slide the top of the radiator onto the tubular frame (photos 3 and 4) while keeping the chimneys to rotate on the lower tubular frame (photo 5).
- Once aligned, apply pressure while tilting it upwards (photos 5 and 6) to bring the chimneys into the cabin.


Chapter 4 : Intake hose assembly.
- Generously glue the U-shaped hose (B) without getting it everywhere, then slide the sleeves onto it.
- Once the connecting sleeves are in place, make the external and internal joints.


- Prepare your three intake hose parts and do a dry fit.- Take a paint-type marker (Posca) or adhesive tape to make marks before permanently attaching them.
- Generously glue the inside of the U-shaped hose sleeves without getting it everywhere, then slide parts (C) and (A) of the radiator and engine hose into them. Use the previously traced marks for a guaranteed assembly.
- Lock the 6 air ducts with cable ties.


Chapter 5 : Cutting and assembly of the pilots (optional).
- If you want to keep the cockpit. Cut the center of the pilot's position (photo 1) and the rear right (photo 2), this is to allow the intake hose to pass.
- Once the pilots are well installed and secured, please place a small foam shim with adhesive to compensate for the missing screw and prevent them from rattling in their seat.


⚠️let the build plate cool down before removing the 3D parts⚠️
Short Presentation
Documentation (4)
License
You shall not share, sub-license, sell, rent, host, transfer, or distribute in any way the digital or 3D printed versions of this object, nor any other derivative work of this object in its digital or physical format (including - but not limited to - remixes of this object, and hosting on other digital platforms). The objects may not be used without permission in any way whatsoever in which you charge money, or collect fees.
Comment & Rating (17)