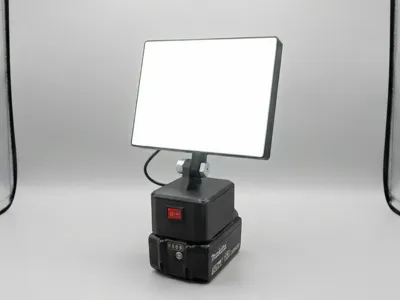
18V Construction lamp for a turquoise-tool brand


Print Profile(1)
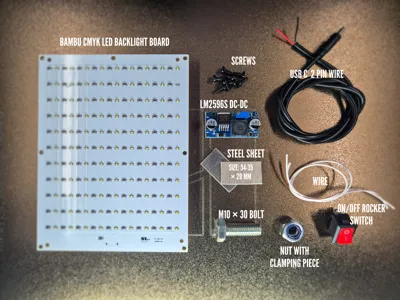
Bill of Materials


- LM2596S step-down module x 1:
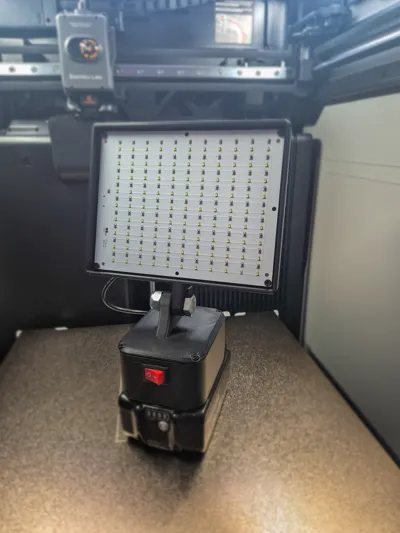
- Rocker switch x 1:
- Wires for internal connections x 2:
- 2-pin USB-C cable x 1:
- Metal plates used as electrical contacts x 2:
Description
Boost Me (for free)
This is just one lamp from the series. More designs and cleaner looks are coming-boost this and tell me in the comments what I should improve!
This DIY LED work light is designed for use with 18V batteries in the turquoise-tool brand form factor.
It is intended for workshop, hobby, and maker projects and is for private, non-commercial use only.
This design is not an original or licensed product.
There is no affiliation, partnership, or endorsement by any power tool manufacturer.
Compatibility
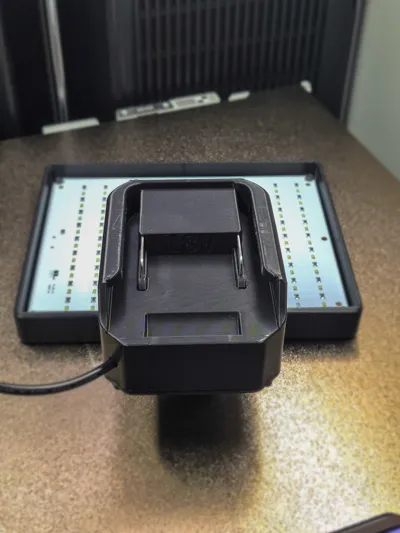
Mechanically and electrically designed for 18V batteries in the turquoise-tool brand form factor
Input voltage: 18 V DC
Output voltage: 5 V DC
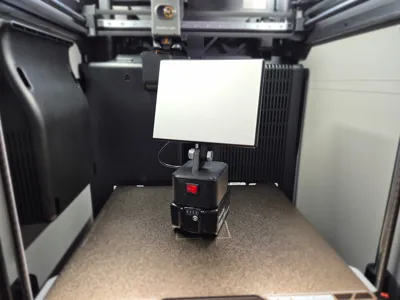
Compatible with all Bambu Lab 3D printers, including the A1 Mini
Required Parts
5 V LED light (Bambu CMYK LED Backlight Board)
LM2596S step-down module (DC-DC converter)
Rocker switch (ON/OFF)
Wires for internal connections
2-pin USB-C cable (power only, no data)
BT3×8 SHCS self-tapping screws
M10 × 30 Bolt
M10 nut with clamping piece
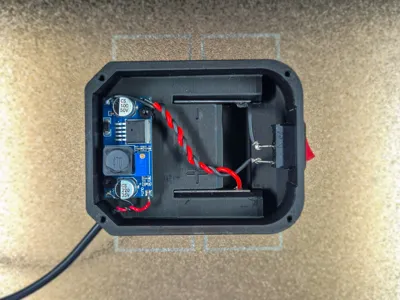
2 metal plates used as electrical contacts
Thickness: 1 mm
Size: 34-35 × 20 mm
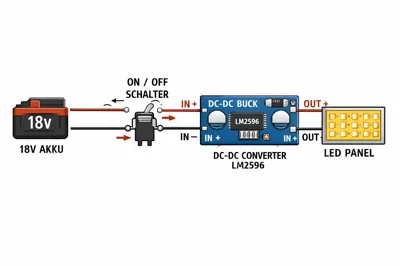
Electrical Layout (Summary)
18V battery → rocker switch → LM2596S (IN+/IN−) → 5 V output → USB-C → LED
The metal plates act as power contacts between the battery and the electronics.

Setting the LM2596S to 5 V (using a multimeter)
1. Connect the 18V battery to IN+ and IN− of the LM2596S
2. Do NOT connect the LED yet
3. Set the multimeter to DC voltage (range ≥ 20 V)
4. Measure OUT+ and OUT−
5. Adjust the potentiometer with a small screwdriver:
clockwise → voltage increases
counter-clockwise → voltage decreases
6. Set the output to exactly 5.0 V (4.95–5.05 V acceptable)
7. Recheck the voltage
8. Connect the LED only after the voltage is confirmed

Printing & First-Use Notes
During the first ~100 usage cycles, the lamp may feel slightly stiff.
This is intentional and improves durability and long-term robustness.
Recommended printing materials:
PETG or
ABS
Important Notes
Incorrect voltage may damage the LED
No built-in protection against short circuits or moisture
Double-check all electrical connections
Use entirely at your own risk
Legal Notice / Disclaimer
All brand references are used for descriptive compatibility purposes only.
This model is not an official product, not tested, and not certified.
The creator assumes no liability for damage, injury, or consequential loss.
Do not use or display any brand logos.
Enjoy building your own lamp 😉
License
You shall not share, sub-license, sell, rent, host, transfer, or distribute in any way the digital or 3D printed versions of this object, nor any other derivative work of this object in its digital or physical format (including - but not limited to - remixes of this object, and hosting on other digital platforms). The objects may not be used without permission in any way whatsoever in which you charge money, or collect fees.
Comment & Rating (0)