P2S Screen Ribbon Cable Protector


Print Profile(1)
Bill of Materials

Description
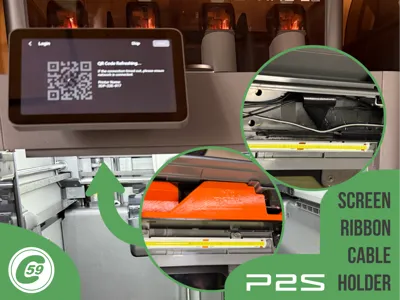
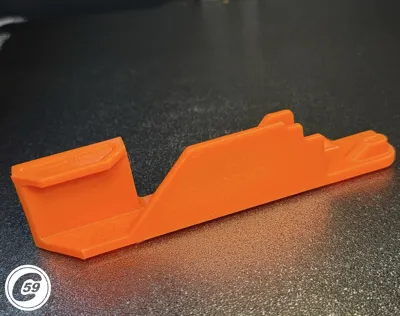
P2S Screen Ribbon Cable Protector (XP2SRP)
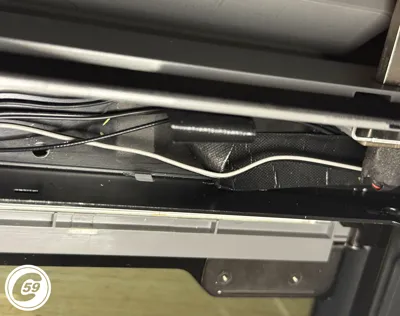
The P2S Screen Ribbon Cable Protector replaces the factory saran-wrap–style plastic film with a purpose-built, engineered solution for managing the screen ribbon cable when using a toolhead guide.
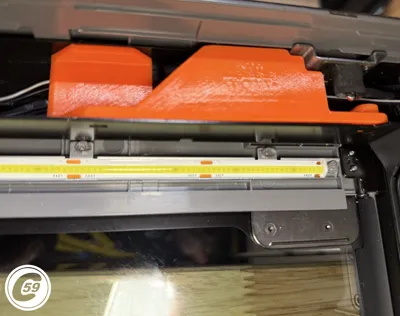
Remove the factory “band-aid” and install a designed support that inserts directly into the frame rail, keeping the ribbon cable and surrounding wires neatly secured behind the touch panel.
This protector prevents popular toolhead guides (such as Naked and 3.0) from catching or tearing the factory plastic film, while providing a clean, professional finish.
Features
- Keeps the screen ribbon and other wires organized behind the touch panel
- Prevents toolhead guides (Naked, 3.0, etc.) from catching the factory plastic film
- Prints without supports
- Precision design with 2 pins, 2 tabs, 1 clip, and 1 screw to ensure a secure fit
- Replaces the flimsy factory plastic with a more engineered, durable solution
Quick Action Shorts Including ribbon protector, XPTG 3.1 and Smart-Link sauces: Click here
At C59, we believe small details make a big difference.
Compatibility
Compatible with Bambu Lab P2S Only
Installation Instructions
- Lower the bed, then turn off and unplug the machine.
- For easier access, remove the door handle and place the printer face-down on a desk, resting on the door side.
- Secure or tape the door closed to prevent it from opening and shattering on the work surface while flipping the printer.
- This is also a good opportunity to check belt tension (see video).
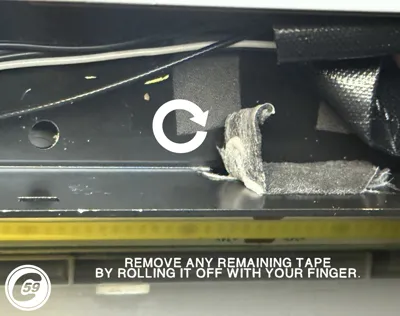
- With the printer in position, carefully peel off the factory plastic film.
- Take care not to pull or damage the ribbon cable.
- Some cables may be stuck to the adhesive, and you may be left with tape residue on the frame.
- Remove remaining tape by rolling it off with your finger.
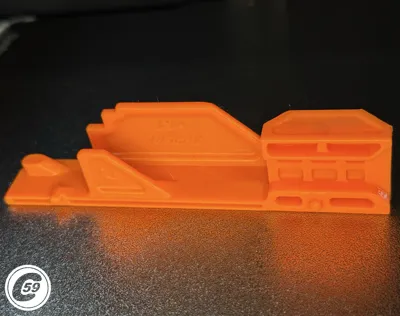
- Prepare the Ribbon Cable Protector with the required BT3×8 screw, as listed in the BOM.
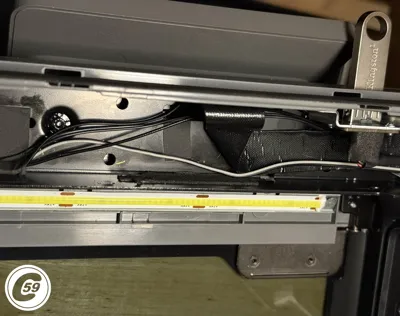
- Insert the protector by engaging one side first, then the other.
- Pay close attention to the ribbon cable and other wires while inserting.
- Do not pinch any wires, take your time during this step.
- Engage the components in the following order:
- First, the tab near the screw
- Second, the clip into the plastic top panel
- Finally, the center tab (this is the most difficult one)
- Once everything is clipped in place, the screw should align naturally.
- Tighten it until snug, do not overtighten.
Check wire clearance, flip the printer back upright, and run a bed calibration.
Enjoy stress-free printing, no more snagged saran wrap or broken toolhead guides.
v1.0 Specifications
Material: PETG
Printer Settings:
- Profile: Standard
- Layer Height: 0.20 mm
- Mode: CERTIFIED LUDICROUS
- Infill: 15% Gyroid
- Walls: 4
- Bottom Layers: 3
- Top Layers: 5
Printing Details:
- Supports: Not required
- Print Time: 1h14m
- Filament Usage: 0.57 oz
- Estimated Cost: ~$0.40 (based on a $26 PETG spool)
Boost Me (for free)
🚀 Boost Your Project! 🚀 If you love what I'm working on, hit the Boost button! Your support helps me continue to create, improve, and share even more exciting designs. Thank you for being part of this journey!
Enjoy your printing journey, and remember—keep your fingers away from the poop chute, she's angry!
"I’ll be sure to keep you updated with any future developments. If you come across any issues or need assistance, don’t hesitate to reach out—I’m here to help!"
You shall not share, sub-license, sell, rent, host, transfer, or distribute in any way the digital or 3D printed versions of this object, nor any other derivative work of this object in its digital or physical format (including - but not limited to - remixes of this object, and hosting on other digital platforms). The objects may not be used without permission in any way whatsoever in which you charge money, or collect fees.
Current ver.1.1_02/06/2026
© 2026 C59 Design Lab. All rights reserved.
License
You shall not share, sub-license, sell, rent, host, transfer, or distribute in any way the digital or 3D printed versions of this object, nor any other derivative work of this object in its digital or physical format (including - but not limited to - remixes of this object, and hosting on other digital platforms). The objects may not be used without permission in any way whatsoever in which you charge money, or collect fees.
Comment & Rating (40)