Search models, users, collections, and posts

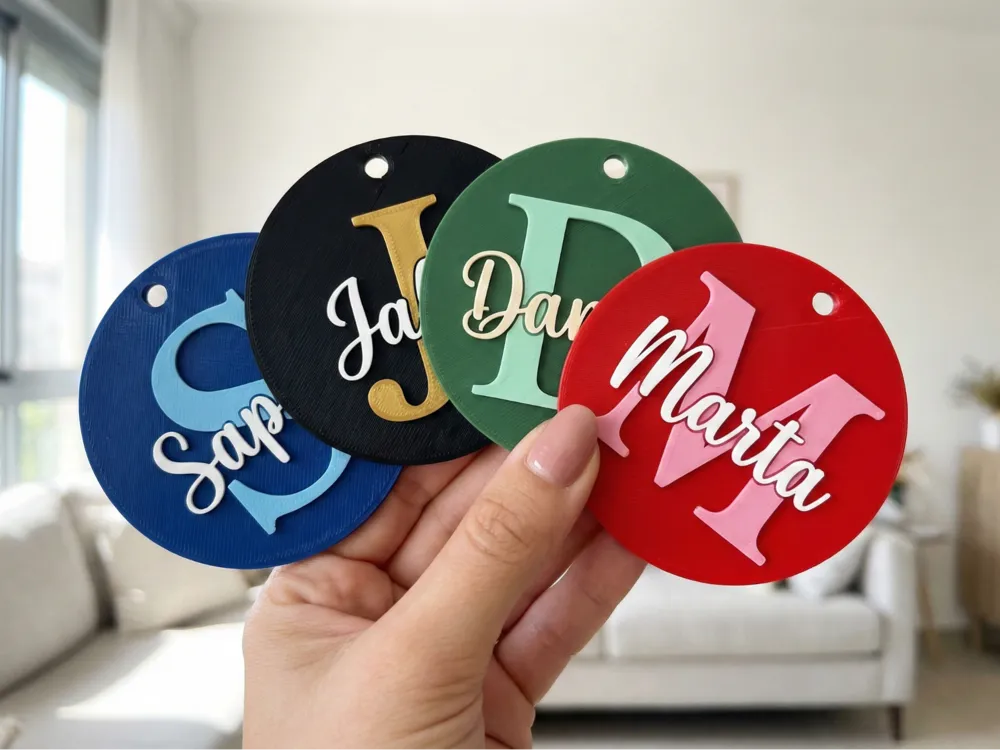
This model is created by Parametric Model Maker
Make Your Model
Print Profile(1)

0.2mm layer, 2 walls, 15% infill
Designer
27 min
1 plate
Open in Bambu Studio
Boost
1936
6248
48
39
4.2 k
1.7 k
Released
Description
Membership
Join
Create professional, multi-color name tags!
You can print it as a single multi-color piece (AMS) or as separate parts to assemble later.
✨ Key Features
- 2 Print Modes:
- Preview (Stacked): See exactly how the final tag looks in 3D and print the same way.
- Print (Side-by-Side): Exports the Base and Letters as separate objects for easy coloring.
- Assembly Ready: Optional tolerance settings allow you to print the letters separately and glue them in (perfect for non-AMS printers!).
- Language Support: Full support for English (LTR) and Hebrew (RTL) text flow.
- Pro Fonts: Includes script, handwritten, and block fonts (Great Vibes, Solitreo, Fredoka, etc.).
⚙️ How to Customize
- Click the "Customize" button.
- Select Layout Mode
- Enter Text: Type your Name and choose a Background Initial (A-Z).
- Adjust Position: Use the sliders to perfectly center your text or create a unique offset look.
- Download: Save the STL or 3MF file.
🖨️ Slicing Instructions (Bambu Studio / Orca)
For the best Multi-Color result:
- In the Customizer, set Layout Mode to "Print (Side-by-Side)".
- Import the file into your slicer.
- Right-click the model → Split → To Objects.
- You will now see the Base and Letters as separate items in the object list.
- Use the "Fill" tool or Object list to assign colors (e.g., Blue for Base, White for Text).
- Select all objects (Ctrl+A), Right-click → Assemble.
- The slicer will snap them back together perfectly.
- Slice and Print!
🧩 Assembly Mode (For Single Extruder Printers)
If you don't have an AMS, you can print the parts separately!
- Set Assembly Tolerance to 0.20mm.
- Export and print the Base in one color and the Letters in another.
- The parts will have a slight gap, allowing you to easily glue the letters into the pocket.
Boost Me (for free)
License
If you want to use this model commercially, please join my membership.
Join Now

This user content is licensed under a Standard Digital File License.
You shall not share, sub-license, sell, rent, host, transfer, or distribute in any way the digital or 3D printed versions of this object, nor any other derivative work of this object in its digital or physical format (including - but not limited to - remixes of this object, and hosting on other digital platforms). The objects may not be used without permission in any way whatsoever in which you charge money, or collect fees.


Comment & Rating (48)