LightBringer Card Scanner


Print Profile(1)
Bill of Materials

Description
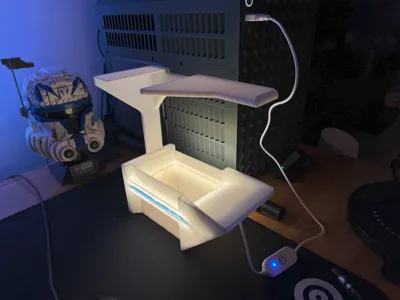
I've recently gotten into MtG and wanted a card scanner that would be cheap, fast, and simple. I came across the Card Slinger, and while it is nice, it has given me plenty of problems when scanning in low light (my living room doesnt get direct sunlight). The Card Slinger also uses 400g of filament, which is quite a lot.
To alleviate these issues I've created my own version! Here are some highlights:
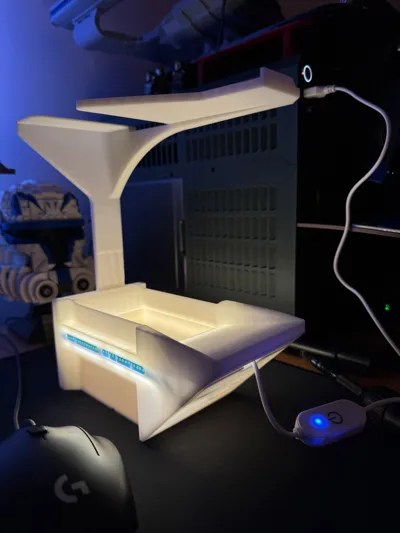
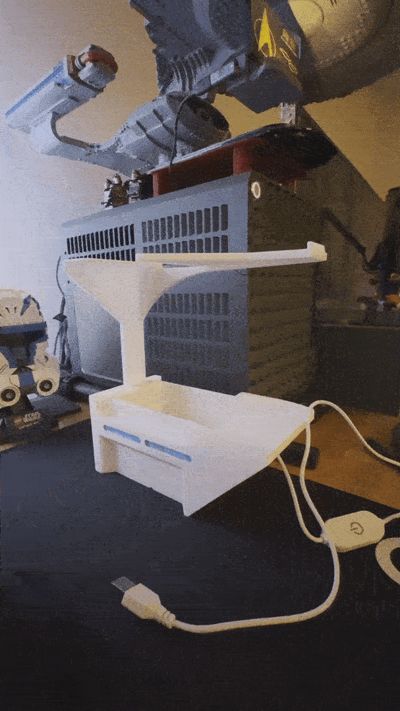
- A 15" strip of white LED's has been integrated into the housing. This lights the scanning area and has adequate diffusion to reduce any glare on the cards.
- Any LED strip will do, with the cheapest being whatever you can find on amazon (I use this one).
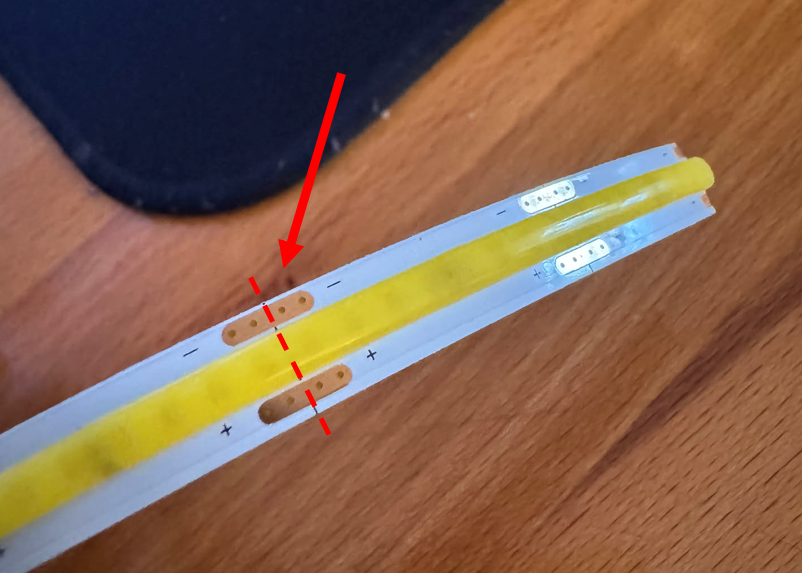
- You will likely need to cut the light strip to the correct length of 15".
Most LED strips can be cut short. If you need to do that look for the copper contacts and cut through the middle as shown:

- Lower filament usage!
- After a bit of chopping and changing, I've managed to get the filament usage down to about 281g!
- After a bit of chopping and changing, I've managed to get the filament usage down to about 281g!
- Sleeved and un-sleeved scanning.
- If your cards are un-sleeved use the insert!
- If your cards are sleeved (inner or outer+inner) do not use the insert!
Instructions:
- Print box.
- Install LED strip.
Slip the beginning of the strip into the marked box.

Using the slots on the side of the scanner, push the LED strip in and move it along the side of the box in one motion. The corners can require a decent amount of force!

Done!
- Plug into your outlet of choice.
For me that was a USB port.
- Turn on!
I'm also working on another variant of this box that integrates an ESP32 into it for some more fun colors and other control. Maybe a motorized version incoming???
Boost Me (for free)
Enjoy and feel free to drop a boost if you found this useful!
License
You may create derivative works based on this object, provided that all such derivative works are published exclusively on the MakerWorld platform and include proper attribution to the original creator. You may not share, upload, host, distribute, or publish this object—or any derivative work of this object—on any other digital platform, marketplace, or distribution channel. Commercial use of this object and any derivative works is strictly prohibited. This includes, but is not limited to, selling, renting, sublicensing, or using the object in any context in which you receive monetary compensation or other financial benefits.
Comment & Rating (7)