Carapace Queen and Token miniature - Aeon's End


Print Profile(1)

Description
My friend really likes Aeon's End and we play every weekend, so I started making miniatures of each boss for him.
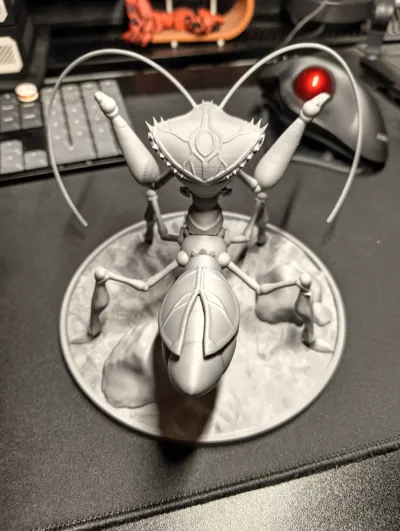
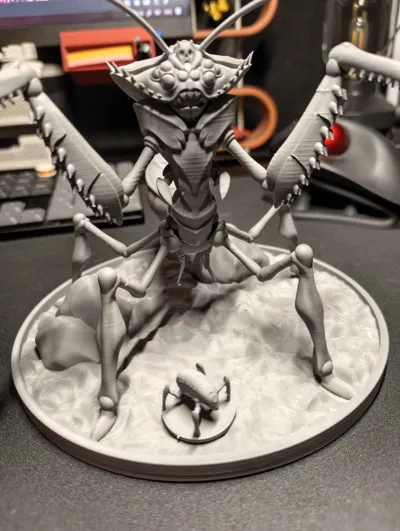
Starting with the Carapace Queen, this miniature is VERY TRICKY. Please do not attempt this mini if you don't have a good understanding of your own printer and it's tolerances! The settings that are included in the 3mf file are the ones that worked for MY printer, but this print is so delicate that it took me constant surveillance until the halfway point of the main body print and a good amount of support removal.
How did I make it work? What problems may I have?
You will see that every object has it's own support settings for the sake of not having 5 different 3mf files. This is a decision I made after a lot of trial and error and it's what worked for me. I'll be detailing the issues I personally had with this model and what to keep an eye out for. You're free to modify this model as you see fit and make any improvements necessary since this is the first miniature I make from scratch and I still have a lot to learn!
Let's start with the main body:
The body
Supports take ages to generate, it's not the program that crashed! The body needs surveillance until all legs have fully printed and it starts printing the torso itself. I had one of the feet slightly detach from my supertack somehow (maybe tighten the brim tolerance?) but I caught it just as it happened and literally just paused the print for a second and taped down the feet tight so it wouldn't wiggle anymore until the knee that kept it in place printed. After that I had no issues other than some vestigial supports breaking (but that's 0.2 supports for ya). For the antennae I used a soldering iron to make holes on it's head and then glued two pieces of cut filament for it.
You can also actually split the model in Bambu Studio itself and you'll see it's done by parts. That's how I intended to print it originally (you can even see the plugs and all) but I kept having issues with the print quality and tolerances so I decided to print it all at once instead. If you figure out how to print it correctly by parts please let others know!
(For those that notice, yes she's supposed to have a couple of downward spikes on her calves but they kept giving me issues nonstop when printing so I ditched them)
The little wiggly arms
These are super fast to print but were a pain to figure out how to support them. Grid support and slow printing speed did the trick for me. I glued it together afterwards but you can also use a soldering iron to kinda just melt it together again (will look better). If you're frustrated with the arms, feel free to ditch them altogether since they're barely visible anyways, just wanted to be as loyal to her ingame look as possible.
The tail and base
The tail and base are the easiest ones. No supports needed, just a decent brim for the tail and forget about it. You're free to adjust the seam position if you want to hide it better but it doesn't bother me personally. The base prints as is. I glued the tail and base with no issues afterwards.
The tokens
The tokens themselves might give you issues with the little legs at first (print just one first and adjust settings as necessary), but the main issue with these is taking the supports off. Don't try to use pliers! The pushing force upwards from the pliers is enough to snap the legs. What I did instead is use a soldering iron and “cut” (melt) the supports horizontally in the middle across carefully, then I could tug them off gently chunk by chunk with thin tweezers. The soldering iron is your best friend for this since it applies no force whatsoever, just be careful to not put pressure on the little legs and you'll be fine. Print spares! Luckily they're relatively quick to print.
That should be all! If you have any questions please let me know, and if you have any improvements to make on the printing of this model please upload a profile!
Comment & Rating (0)