Arms Dealer Duck


Print Profile(1)

Description
Boost Me (for free)
Originality is not easy, boost me! Thank you!
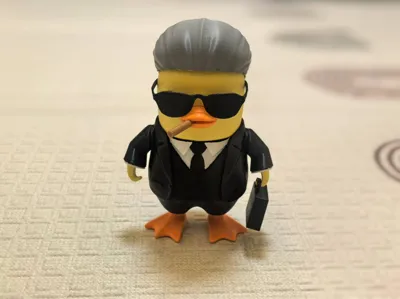
In Escape from Duckov, the Working Duck has taken on a side hustle and become an arms dealer, perfectly closing the loop of "Loot → Fight → Extract → Sell"!
In Escape from Duckov, the Working Duck has taken on a side hustle and become an arms dealer, perfectly closing the loop of "Loot → Fight → Extract → Sell"!
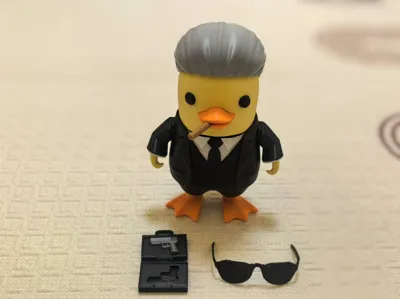
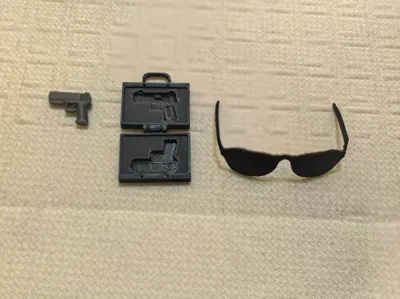
This creation is based on the Working Duck character, adding the element of an arms dealer. It also comes with interactive small accessories such as sunglasses, a handbag, and a pistol.
This creation is based on the Working Duck character, adding the element of an arms dealer. It also comes with interactive small accessories such as sunglasses, a handbag, and a pistol.
The model has been split into parts and optimized. Most components do not require supports (except for the hair, sunglasses, and pistol), and it is easy to print after multiple rounds of testing. If you do not have an AMS (Automatic Material System), the body and arms can be printed in black and then touched up with a white marker for small areas.
The model has been split into parts and optimized. Most components do not require supports (except for the hair, sunglasses, and pistol), and it is easy to print after multiple rounds of testing. If you do not have an AMS, the body and arms can be printed in black and then touched up with a white marker for small areas.
Your comments, printed photos, and ratings are the driving force behind my progress. Feel free to send me a private message with your valuable suggestions. Thank you!
Your comments, printed photos, and ratings are the driving force behind my progress. Feel free to send me a private message with your valuable suggestions. Thank you!
P.S. You can directly print the model if you download the 3MF file. If you download the STL file, you need to scale up the main body to 250% and the hand to 240% before printing.
P.S. You can directly print the model if you download the 3MF file; if you download the STL file, the main body needs to be scaled up to 250% (excluding the hand), and the hand to 240%.
If you use the STL file for printing, please note that the parameters need to be adjusted. The instructions are as follows (only applicable to self-printing with the attached STL model file):
If you print with the STL file, you need to adjust the parameters. The instructions are as follows (only applicable to self-printing with the attached STL model file).
No. No. | Part Name name | Scaling Factor Scaling Factor | XY Outer Contour Compensation XY outer | XY Inner Hole Compensation XY inter hole | Remarks else |
1 | Body body | 250% | - | - | Print black if no AMS print black if no ams |
2 | Arm arm | 250% | - | - | If no AMS, change filament at 1.28mm (8th layer) or print in black if no ams,1.28mm(8 floor) white turn to black |
3 | Arm Connector armtobody | 250% | -0.2mm | - | - |
4 | Hand hand | 240% | - | - | Enable brim brim |
5 | Head head | 250% | - | - | - |
6 | Eyes eyes | 250% | -0.1mm | - | - |
7 | Sunglasses glasses | 250% | - | - | Enable support support |
8 | Handbag bag | 100% | - | +0.2mm | - |
9 | Hair hair | 250% | - | - | Enable support support |
10 | Feet feet | 250% | -0.1mm | - | - |
11 | Mouth mouse | 250% | -0.1mm | - | - |
12 | Cigar cigar | 250% | - | - | Enable brim brim |
13 | Pistol pistol | 100% | - | - | Enable support support |
Installation Notes
Installation Notes:
1.Arm Installation NoteAfter attaching the arm to the body, position it so that the cuff sits slightly higher—this is the correct orientation (see diagram).
1. Arm Installation Note: After attaching the arm to the body, position it so that the cuff sits slightly higher for correct installation, as shown in the diagram.

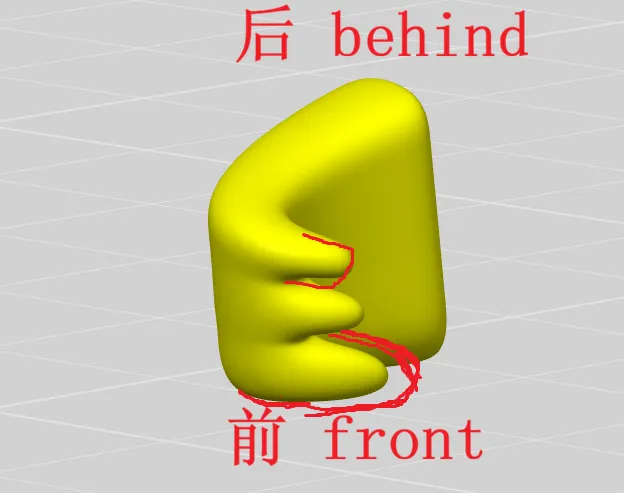
2. Hand Installation Notes.The fingers on the front side are larger, while those on the back side are smaller—make sure to distinguish the orientation. The hand fits snugly into the cuff opening; try inserting it at different angles for a proper fit.
2. Hand Installation Notes: The fingers on the front side are larger, while those on the back side are smaller; make sure to distinguish the orientation. The hand fits snugly into the cuff opening; try inserting it at different angles for a proper fit.

License
You shall not share, sub-license, sell, rent, host, transfer, or distribute in any way the digital or 3D printed versions of this object, nor any other derivative work of this object in its digital or physical format (including - but not limited to - remixes of this object, and hosting on other digital platforms). The objects may not be used without permission in any way whatsoever in which you charge money, or collect fees.
Comment & Rating (0)