


Print Profile(1)

Bill of Materials

Description
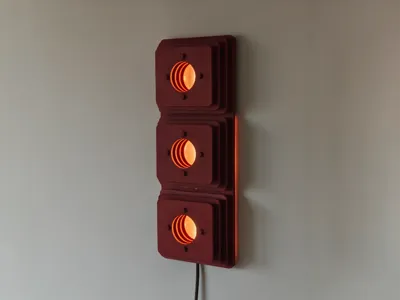
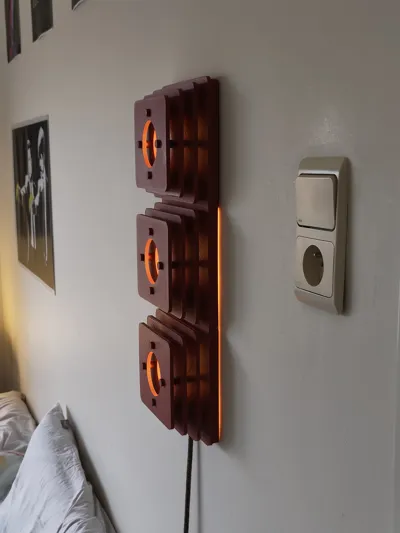
Strata – Layered Wall Lamp
Strata is a warm, atmospheric wall lamp built from layered panels that create depth, shadow, and a soft glowing core. The design consists of three identical stacked modules, each guiding light through a circular opening to create a cozy and sculptural lighting effect.
This lamp was designed by me and optimized for 3D printing, with simple assembly and minimal hardware.
Printing details
- The lamp shown in the photos is printed in matte red PLA
- Light diffusers are printed in white PLA
⚠️ Important: the diffusers must be printed in vase mode for the best light diffusion - Back panels:
- Print in white PLA if you want a subtle glow on the wall behind the lamp
- Print in matte red PLA if you want no light to shine through the back
Lighting
- I used a LED panel I had lying around
- You can also use a LED strip (warm white recommended for a cozy effect)
- The LED is mounted to the back panel using double-sided tape
Hardware required
- 16× M2 screws (preferably M2×8)
- Glue (CA glue or similar)
No other hardware is needed.
Assembly instructions
- Print all parts
- Assemble the layered modules (from small to big)
- Insert the rods through the 4 holes on each panel
- Place a spacer between each panel layer
- Glue the panels
- Glue the 3 back panels and 3 main panels together
- On the main panels, also glue the edge pieces in place
- If done correctly, the back panel should fit perfectly into the main panel
- Attach the layered modules
- Screw each layered part onto the main panel
- Use 4 screws per module
- Install the electronics
- Attach the LED panel or LED strip to the back panel (double-sided tape works well)
- Final assembly
- Insert the diffusers into the circular openings
- Place the backplate onto the main panel
- Secure it using 2 screws at the top and 2 at the bottom
- Enjoy
- Find a nice place to hang or place the lamp in your home and enjoy the warm glow ✨
License
You shall not share, sub-license, sell, rent, host, transfer, or distribute in any way the digital or 3D printed versions of this object, nor any other derivative work of this object in its digital or physical format (including - but not limited to - remixes of this object, and hosting on other digital platforms). The objects may not be used without permission in any way whatsoever in which you charge money, or collect fees.
Comment & Rating (2)