NC MX5 Miata Intake


Print Profile(1)
Bill of Materials


Description
Disclaimer
I have personally used this design in my car, printed in PA6-GF, for over 9 months. However, due to the variance in potential print/filament quality, real world conditions, and the risk of failure this design is published for prototyping purposes, use at your own risk.
Description
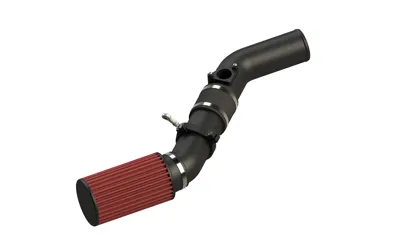
This is a low cost aftermarket intake for the NC miata that is easily serviced.
The stock NC miata intake is well designed to bring in cold air from outside the engine bay efficiently. However, due to the orientation of the radiator and the number of components mounted above it (intake, ECU, splash shield, coolant reservoir, and battery) the airflow out of the radiator is restricted. This intake is intended to free up airflow out of the radiator to improve cooling, especially used in conjunction with an ECU relocation. In addition, one of the issues with most aftermarket intakes is it requires the removal of the bumper cover to service. The initial installation still requires the bumper cover to be removed but once installed the filter can be removed with the bumper in place.
Filament
Print profile uses PA6-GF. High temperature filaments are required due to engine bay temperatures, ABS/ASA would be the minimum that I would consider viable.
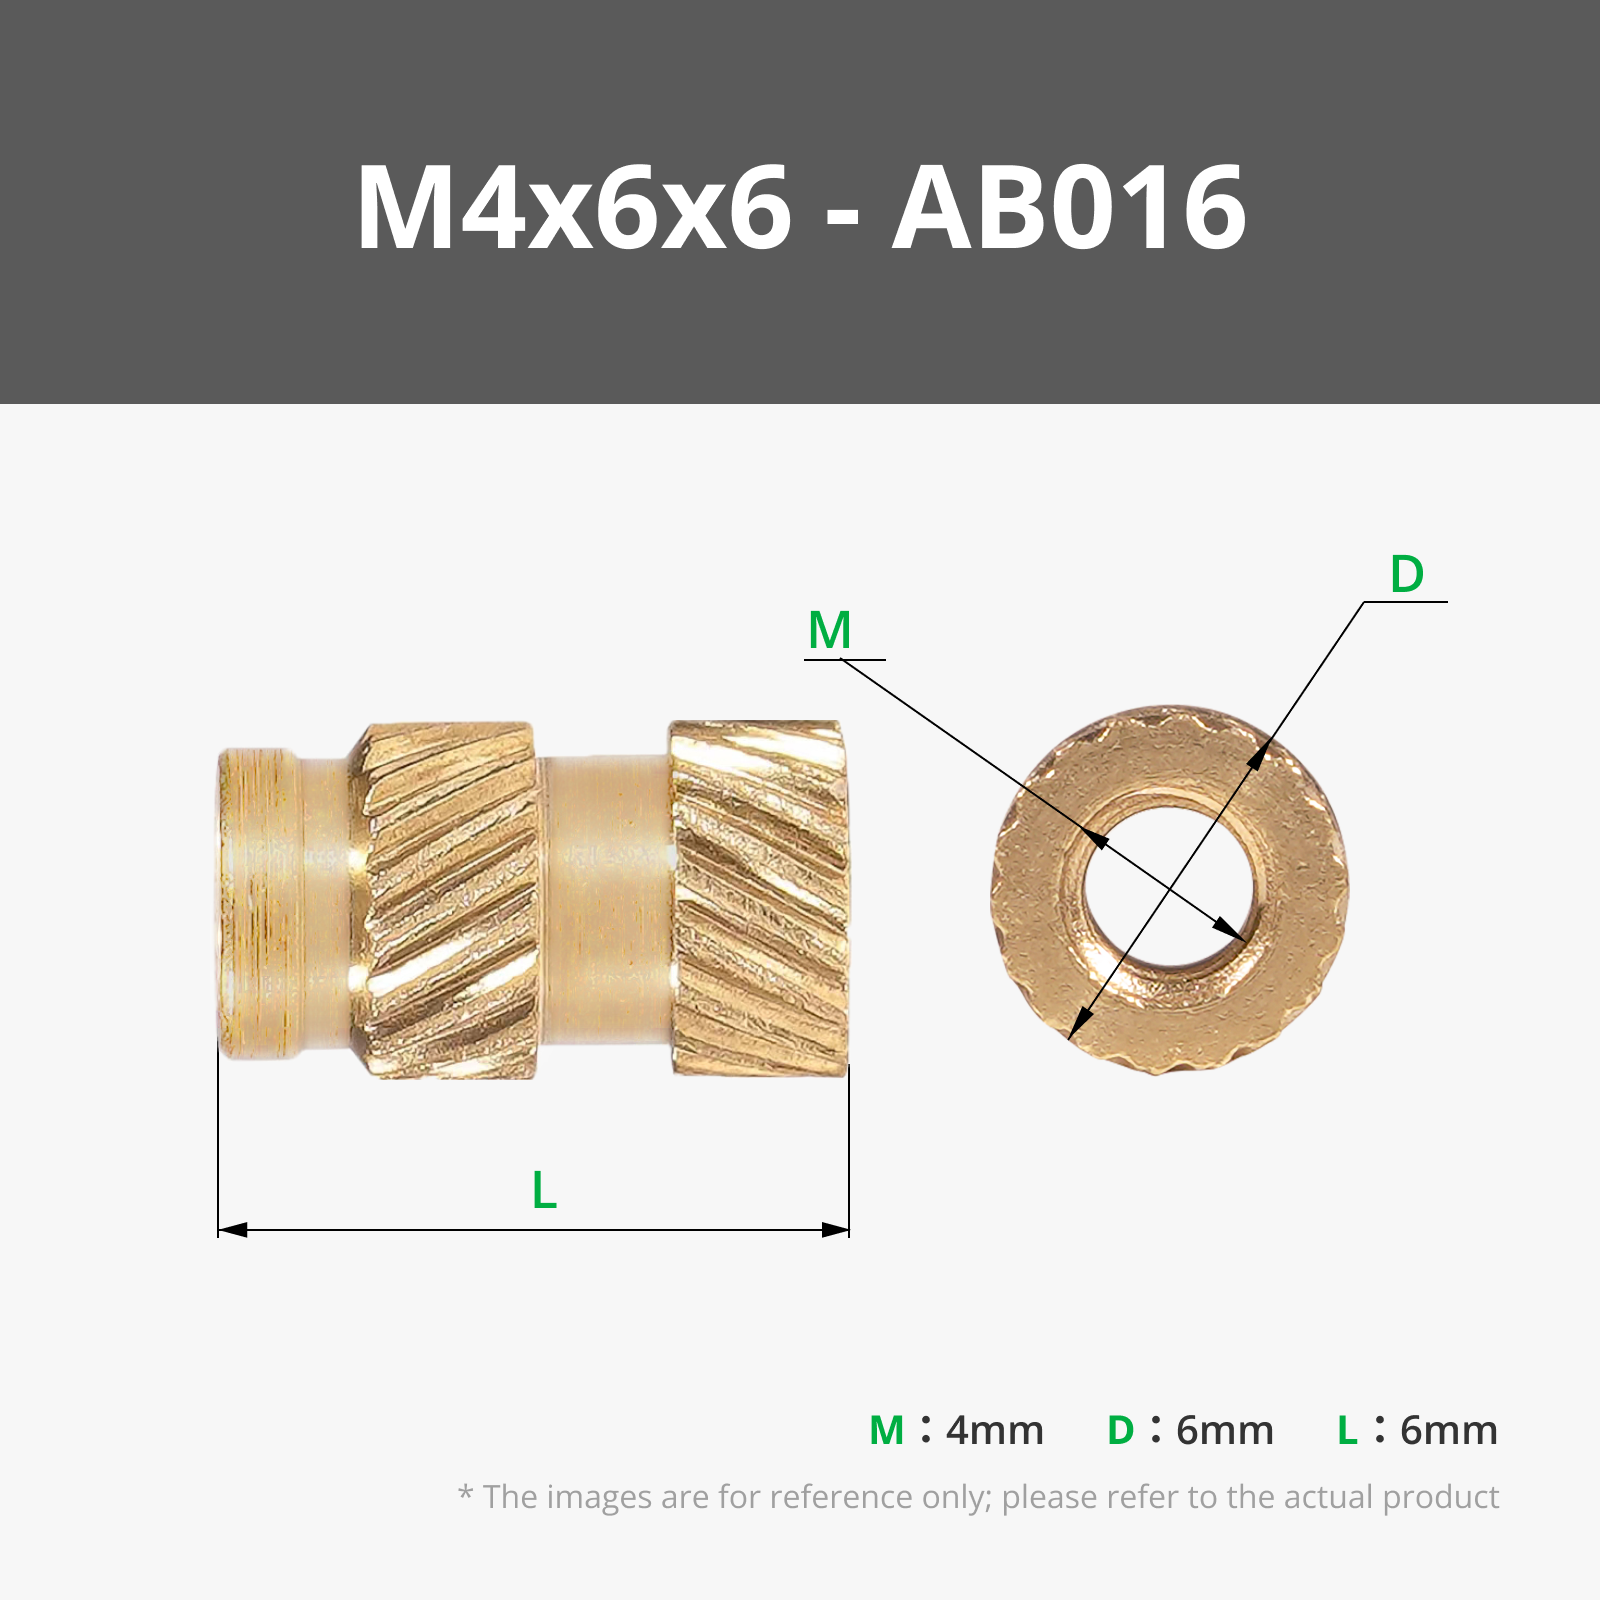
Bill of Materials

Installation
1. Remove bumper cover
2. Remove stock intake. The MAF sensor and elbow at throttle body will be reused.
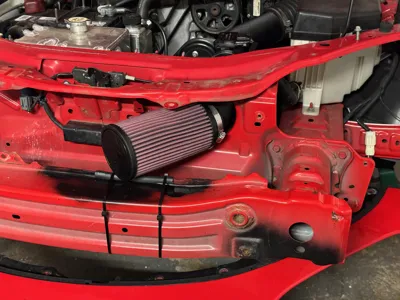
3. Remove the black splash shield between bore support and steel bumper (under stock snorkle)
4. Cut off one tab for the original splash shield - see photos. If left in place this could damage the filter. Secure a small piece of heater hose or plastic edge trim molding on this seam to protect the filter.
5. Install M4 heatserts into Intake Pipe 2. Smooth out any imperfections around MAF sensor bore and test fit sensor. Verify the o-ring is in good condition. O ring should be a tight fit in sensor bore to create a good seal.
6. Loosely assemble the filter onto Intake Pipe 1 and insert through the hole in the core support from the engine bay.
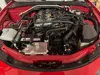
7. Attach silicone coupling to Intake Pipe 2 and connect this section to the original intake elbow at the throttle body.
8. Connect two intake sections with the coupling.
9. Loosely assemble intake clamp components and wrap around Intake Pipe 1. The rod end will install onto one of the existing studs in the core support used to attach the ECU heat shield. Re-use the existing M6 flange nut to secure rod end in place.
10. Adjust components until Intake Pipe 1 is centered in the hole and the filter does not touch any components. Then tighten all hose clamps, intake pipe clamp, and use jam nuts to secure the rod end and clamp in place. Remember, the pipes are plastic so do not overtighten.
11. Install MAF sensor into Intake Pipe 2 and tighten with M4 screws and reconnect to harness.
12. Reinstall front bumper cover.
Servicing
1. Loosen hose clamps at silicone coupling and stock intake elbow.
2. Remove M6 flange nut holding rod end in place.
3. Remove Intake Pipe 2 and silicone coupling.
4. Slide Intake Pipe 1, filter, and clamp assembly out of bumper.
5. Clean filter.
6. Reinstall.
Comment & Rating (7)