Search models, users, collections, and posts
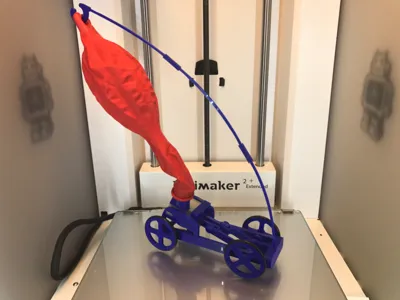
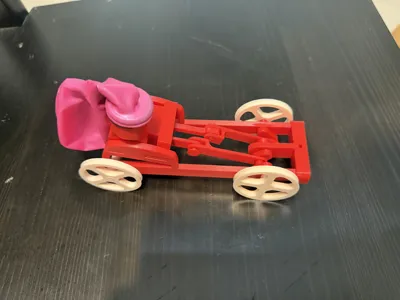
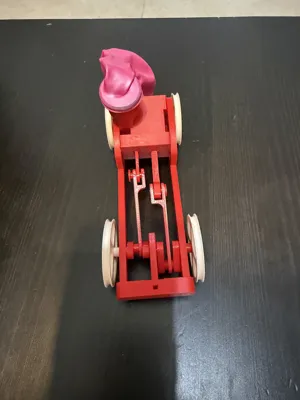
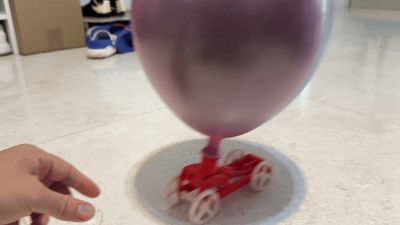
Single Cylinder Air Engine Balloon Powered Car
Remixed by
IP Report


GIF
Print Profile(1)

The main difference from the previous version is the addition of a third, non-printable plate for installation reference
Designer
5.7 h
3 plates
Open in Bambu Studio
Boost
36
75
9
1
85
49
Released
Description
Content has been automatically translated.
Based on ‘Single Cylinder Air Engine Balloon Powered Rolling Car’ by gzumwalt on Instructables.
The original share was not in 3mf format but many STL files, and an integrated version could not be found on Maker World. I integrated it into a 3mf version for easier printing. https://www.instructables.com/Single-Cylinder-Air-Engine-Balloon-Powered-Rolling/ This is the original link.
I think this project is excellent, its structure is the same as a steam train, but it uses air from a balloon instead of steam from a steam engine boiler. The printing time is very short, and no supports are needed. I spent one evening and one morning researching, assembling, and debugging it, after which I understood the principle of steam trains. However, printing and assembling the second one only took less than an hour. This project can serve as teaching material for explaining the principle of steam trains to children.
The original link has detailed installation instructions. I will not repeat them here, but only mention what I think needs attention.
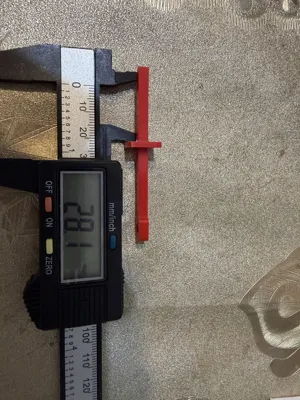
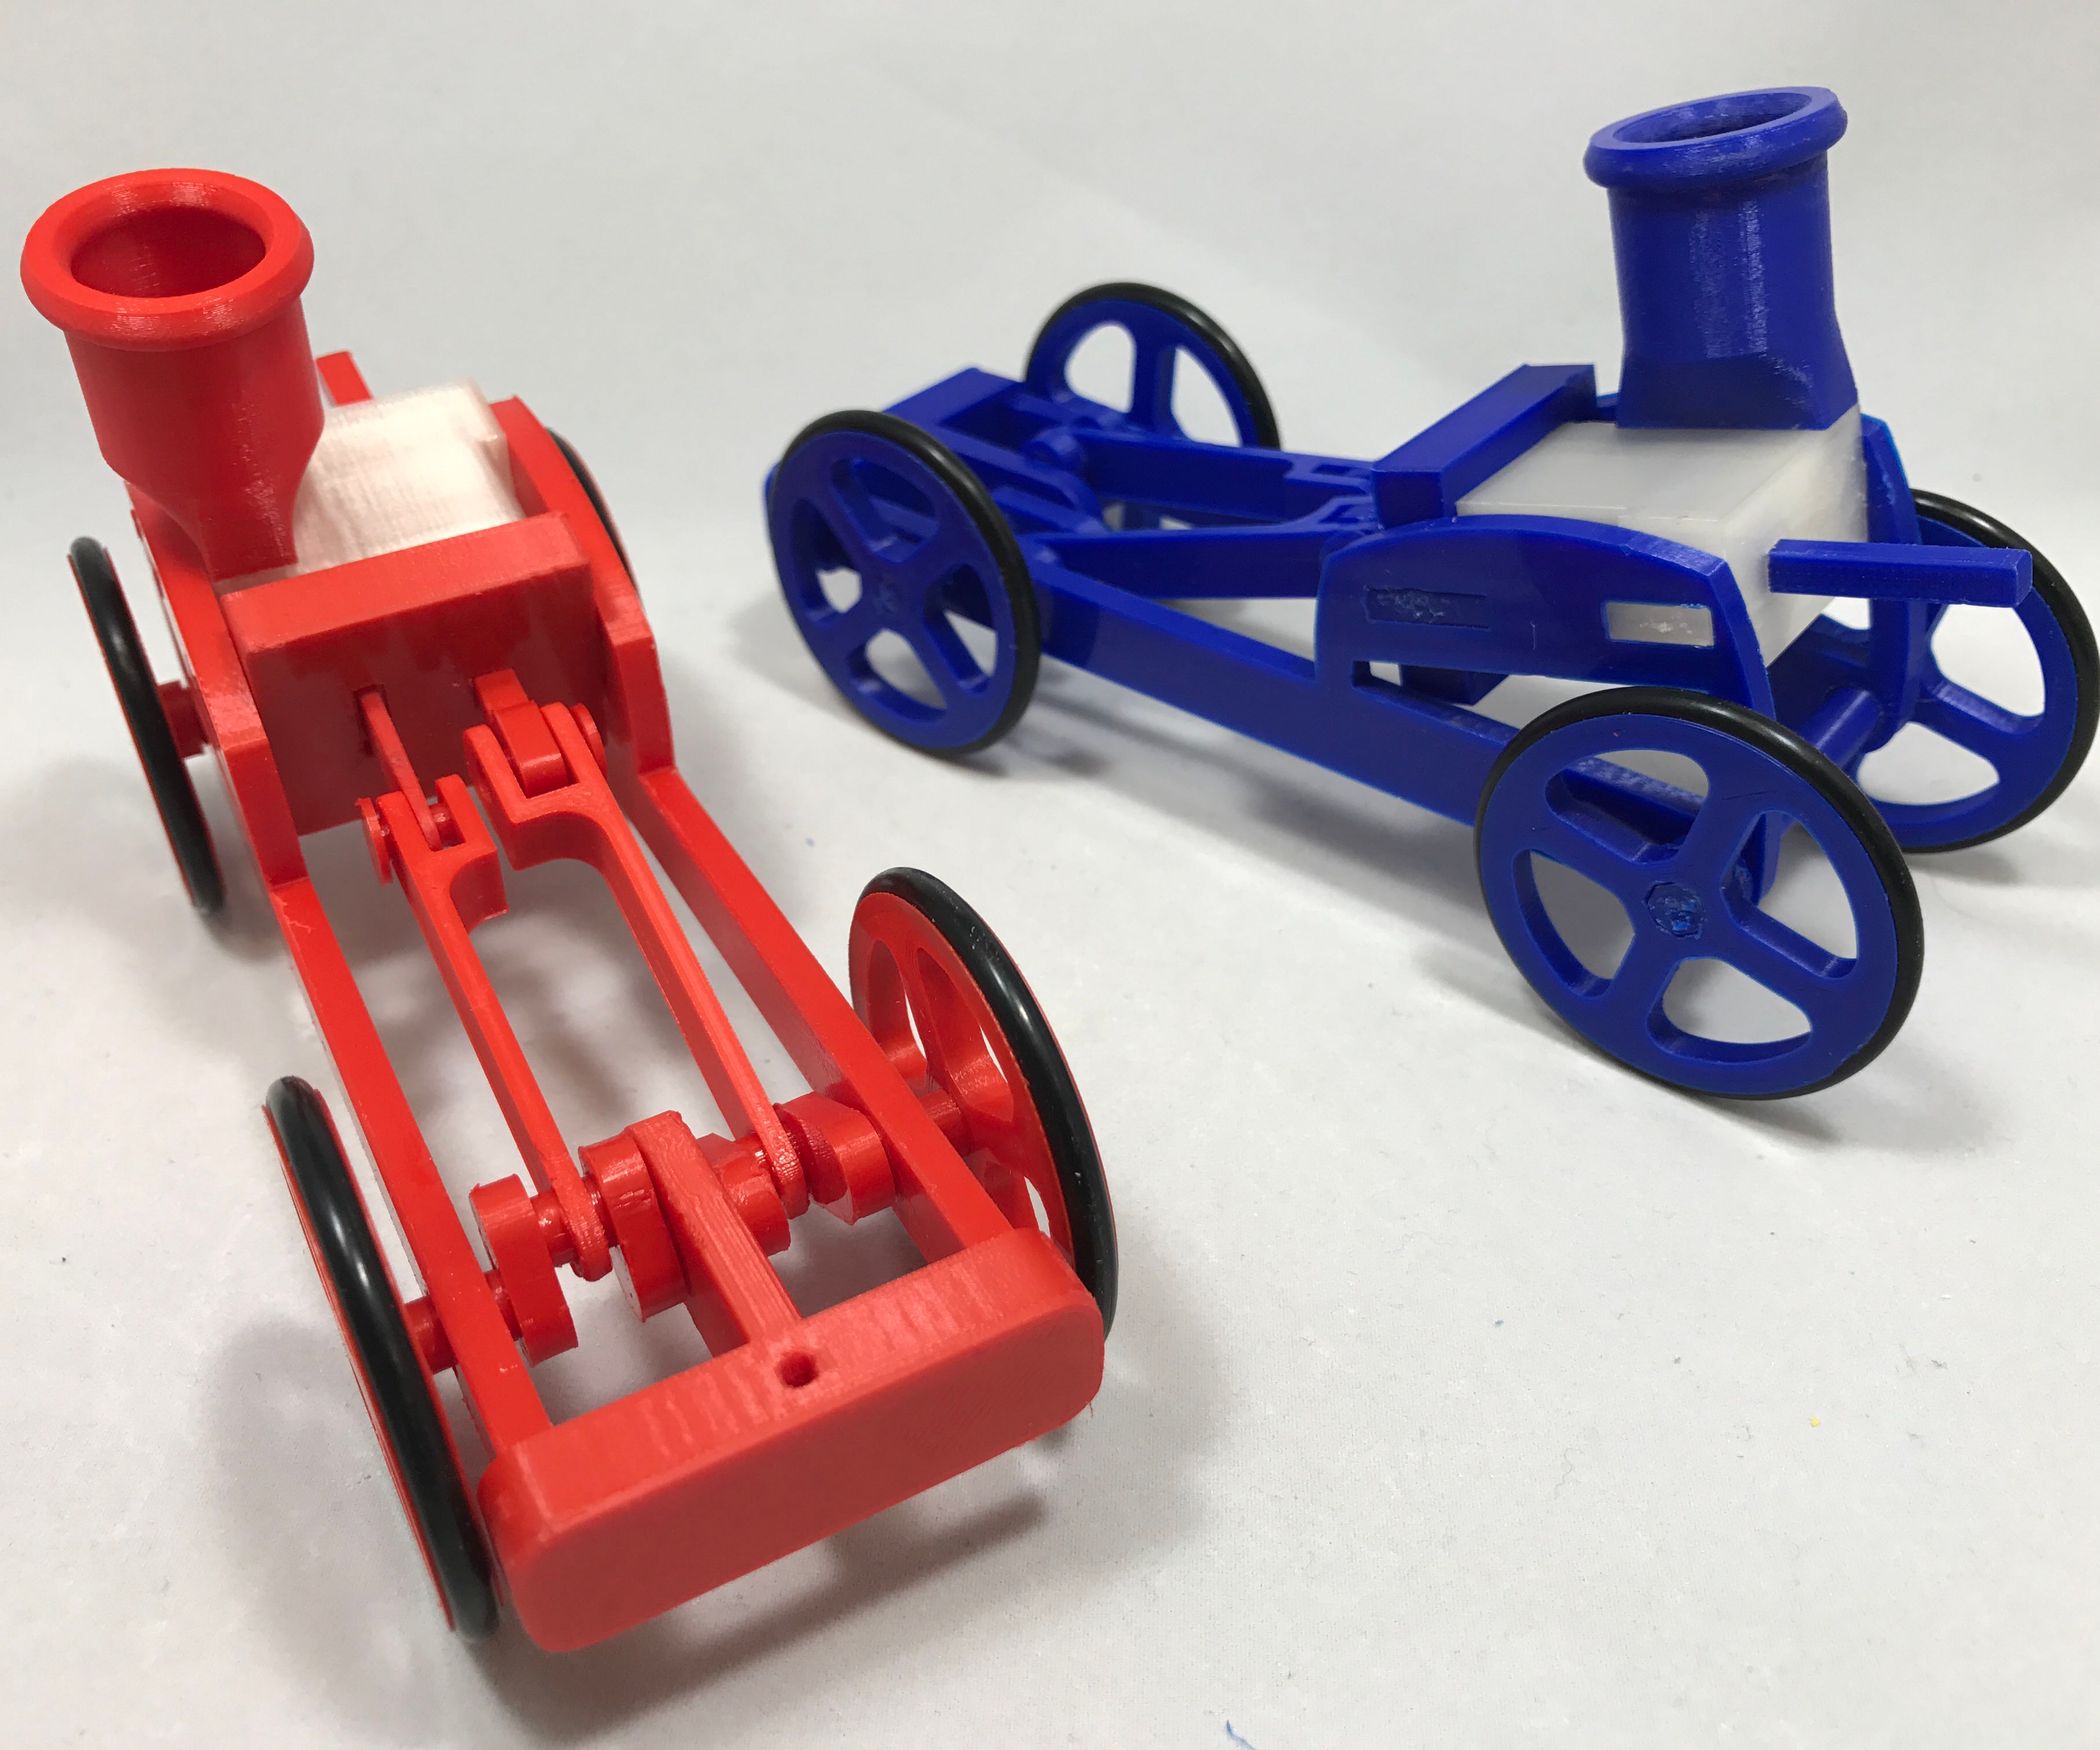
The first crucial point is the position of the cylinder piston. The original author only mentioned 28mm but did not specify whether it was the distance from the upper or lower surface of the piston to the end. You can refer to my photo with the caliper. The piston needs to be fixed with a drop of super glue, but the glue must only be applied after installing the cylinder head. Otherwise, it will become an unmountable waste part, just like in my photo, and you will have to print it again.
The second crucial point involves these 4 components: Journal Crankshaft 4mm 1.stl, Journal Crankshaft 4mm 2.stl, Journal Crankshaft 10mm 1.stl, Journal Crankshaft 10mm 2.stl, which together form the crankshaft. These four parts are similar in shape but differ in size; the installation order and position cannot be wrong, and the installation angle is also crucial. They are in the upper right corner of plate 1, arranged from left to right in the order I just wrote. If printing with Bambu Handy, it is best to mark them with a pencil when removing them. If unsure, open them in Bambu Studio to confirm. The installation angle is consistent with the overall model on plate 3 that I uploaded.
Also, the valve rod must not be installed backward. Just follow the original author's instructions.
Be sure to sand the piston rod and valve rod so they can move smoothly. It is best to apply PTFE grease to the piston, piston rod, and valve rod; it lubricates and also provides an airtight seal. It is best to apply PTFE lubricant to the crank section. If the friction is high, blowing hard might make it run, but it might not run or run too slowly after attaching a balloon. I solved the insufficient air pressure problem by using two balloons together. Later I found that one balloon also works. During debugging, the piston may get stuck at the two extreme positions and needs to overcome them with inertia. Therefore, install the two front wheels and then blow air for debugging; manually giving the wheels a very small initial rotational speed can prevent getting stuck at the extreme positions. After complete assembly, please give the car a very small initial speed by hand when running on the ground.
On plate 2, besides the wheels and an air nozzle, the rest are for securing balloons, and they are for special hookable balloons, which I think are unnecessary and can be skipped. Mine ran very well without the balloon securing components. There is also another air nozzle that might be for other accessories by the author, which I also feel is unnecessary to print. The air nozzle on plate 1 is very good; after attaching the balloon, you don't need to remove the balloon, just remove the nozzle, blow air, and then reattach the nozzle. So, you only need to print the wheels from plate 2.
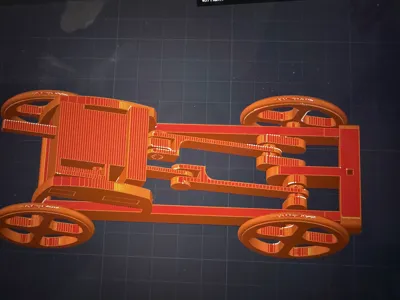
Plate 3 should also not be printed; it is an assembled structure for reference during installation.
The original author said that 4 219 O-rings are needed for the wheels as tires, but I didn't buy them, and it still ran normally
Documentation (1)
Assembly Guide (1)
Single Cylinder Air Engine Balloon Powered Rolling Chassis : 6 Steps (with Pictures) - Instructables.pdf
This remix is based on
License
This user content is licensed under a
Creative Commons Attribution-Noncommercial-Share Alike
Comment & Rating (9)